
Turn that blank wall space into a beautiful piece of customizable art and storage.
When looking for a piece of artwork to occupy wall space, a pegboard wall display is probably not the first thing that comes to mind. In fact, I think it's still commonly associated with garage tools.
But what if you were given the option of artwork that could be multipurpose? Hands down - artwork that can be functional in your space.
A pegboard wall is a great way to provide storage. But it also helps to display those cute knick knacks and decorations needing to be decluttered. And one of the best parts is that you can easily change the set up.
Gone are the days when pegboards were only utilized for tool organization. Now you can take that wooden board to the next level and turn it into a beautiful artistic display.
Not a fan of pegboard walls? Don't worry - here are a few more options for brightening up that wall space. Try out this peel and stick wallpaper, or any of these DIY wood wall treatments.
Why You Will Love a Pegboard Wall
- It's so easy to build!
- Customizable to your taste in style and decorating.
- The perfect solution to eliminating clutter on your tables and desks when you have little space.
- A great use of organization for any room from your garage wall to your home office.
- Turns that blank wall into a lovely modern take on a wall art display.
- You can easily add shelves and baskets for more dimension and storage.
- Easy art wall that you can change out and rotate.
- Easy access to items that used to be buried under a mountain of junk on your nightstand.
Large Blank Wall
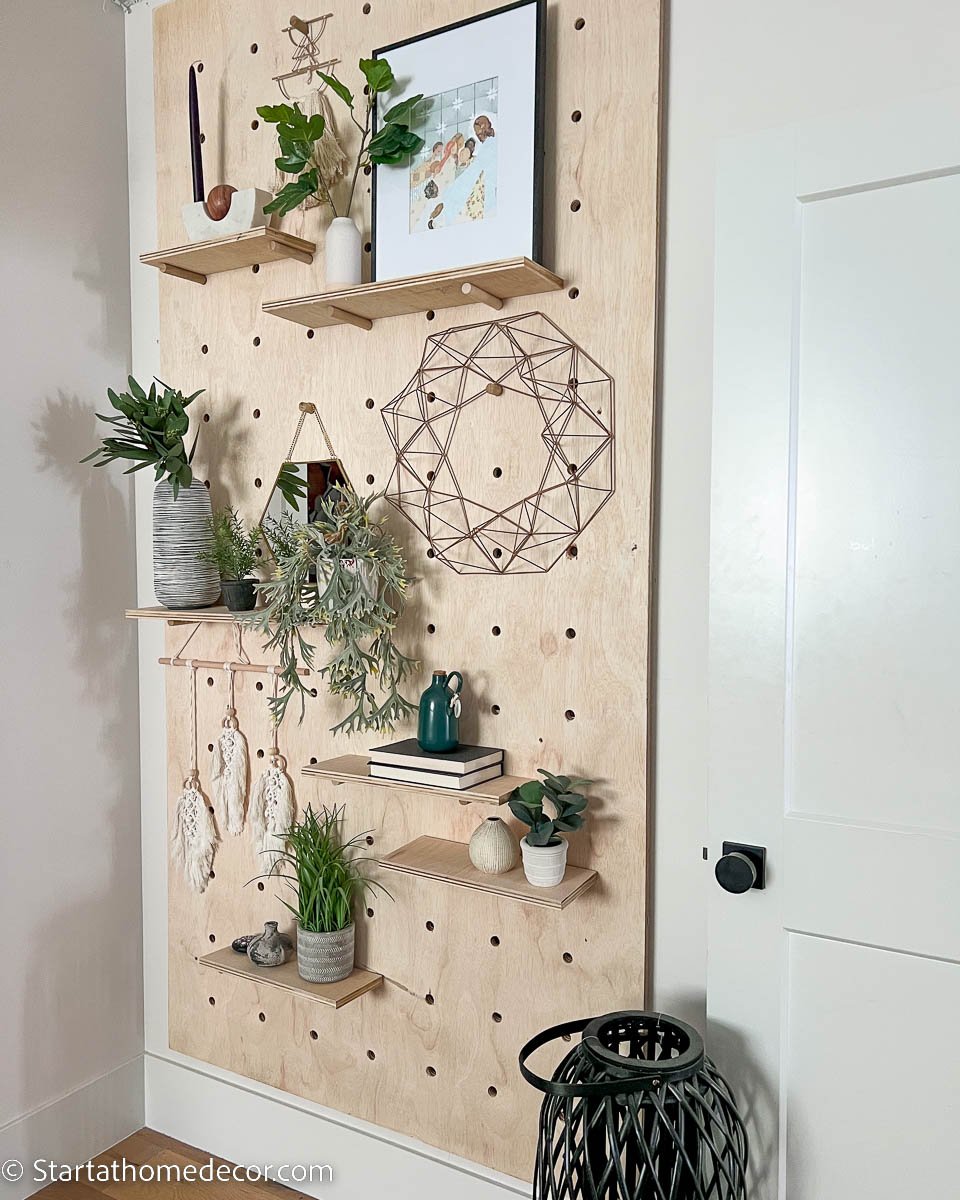
This wall was so boring, but with the doors it was hard to find a way to bring it to life. A big pegboard is the perfect solution. Ready to make your own? All details are below!

Supplies to Make a Pegboard Display
Here's a list of what you will need to make this pegboard organizer. Keep in mind that this is what I used for a large pegboard. If you want to create a small pegboard you will need to adjust your measurements.
- Drill
- ¾" drill bit
- 4' x 8' ¾" sheet of baltic birch plywood
- 1" x 4" x 3' pine (for a French cleat)
- tape measure
- pencil
- straight edge - level
- 2- 1" x 4" x 8' pine (You'll need 4 strips at 3 ft long each. Plywood strips can also be used in place of the pine strips.)
- 2 ½" long screws
- Chop saw
- Your favorite paint or stain (optional)
Supplies for Adding Shelving
- Plywood
- ¾" thick Dowels
You should be able to locate all of this at your local hardware store like Home Depot or Lowe's.
How to Build A Pegboard Wall

Step 1: Measure and drill your holes.
Measure out your drill holes spaced 4 inches apart across the length of your plywood. This will be your base for your wood pegboard. Using your drill and ¾" drill bit, make your holes evenly across the board.
Though my drill holes are 4 inches apart, you may choose to change this and do them closer together or farther apart. If so, make sure to adjust what size of dowel you use if you end up putting in shelves.

Step 2: Make a French cleat.
Make a French cleat using your 1" x 4" x 3' pine wood piece. Take your piece of wood and rip it into 2 pieces at a 45 degree angle.
The bottom piece will be screwed into the wall with the angle facing up. The top is screwed into the board with the angle facing down to interlock.
You'll want to make sure that the cleat piece screwed into the wall is attached to studs. And also secure your screws into the thick base of your cleat, not the angled part of the wood.

Pro Tip: So What's the Big Deal About a French Cleat?
A French cleat is two wood pieces that interlock and have been ripped at a 45 degree angle. It's a handy way of securing a large or heavy object to a wall with additional support. Think of a cabinet or a large mirror.
French cleats can also be made out of aluminum. The cleats are hidden behind whatever items you are hanging on the wall.
Step 3: Screw in your support strips.
Next, you'll want to cut down your 1 x 4 strips if needed. Make sure that you have 4 strips that are each 3 feet long (just smaller than the width of your pegboard). Plywood strips can also be used if you don't have access to smaller pieces of pine.
Use a stud finder to locate the studs behind your drywall. Measure where the holes of your peg board are and then drill in your strips so they are in between the holes. This step is important so you don't see the support boards through your holes from the front.
Now you should have all of your support beams and French cleat in place.

Step 4: Hang Up Your Pegboard
Grab a second set of willing, maybe unwilling, hands and hoist the pegboard. Then you will oh so carefully lift the peg board onto the French cleat. The French cleat will hold the board in place.

Step 5: Screw in the Pegboard to the Support Strips
Use the 2 ½" screw to attach the pegboard to the pine strips.

At this point, you can be done with your oh so beautiful easy DIY project. But if you are looking for a little more pizzazz, carry on!
Adding Optional Style to Your Pegboard Panels
Use Paint or Stain
If natural is your style preference then you can be finished. But if you want to add a little pop of color to your pegboard wall display, a little adventure can be a great thing.
Stain is an awesome choice if you want to keep wood looking more naturalistic. But I've also seen a white pegboard that can blend in really well to the wall color. It's up to you to decide your look.
Make Pegboard Shelves
Rip down a sheet of plywood to 5" strips. You can easily adjust the length to preference. This is what you will use for shelves. Prop any shelves on top of dowel rods.

Look at all the fun stuff you can do when you don't have enough room for all the little things.

How to Style Your Pegboard Wall Display
There are so many creative ways to style your pegboard. You can see mine below to see how we styled it for my teen daughter's room.

Most of the decor was found on Amazon, making shopping nice and easy. I did use a few items I had around my home as well.

Here are additional fun ways to get the creative juices flowing.
- Use vases with flowers, faux or real.
- Put up pictures or quotes.
- Attach wire baskets onto your dowels.
- Add hooks for hanging garland.
- Hang up some 3 dimensional metal art or try your hand at making your own modern Boho inspired wood art.
- Prop up some books.
- Faux plants like succulents.
- A block letter that starts with a first or last name.
What Can I Use a Pegboard Wall Display For?

Here are more DIY pegboard storage ideas that can come in handy when you need to get creative with storage space.
- Use it for an art display in your home or business.
- Organization for your laundry room.
- Spice racks or for dishes or kitchen tools on your kitchen wall.
- Use as a craft room organizer or for art supplies.
- Storing office supplies.
- Tool storage in your garage. A classic but still a good one.
- Organizing the cleaning supplies.
There are so many things you can use it for in any room of the house!
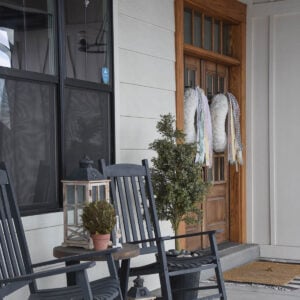
Looking for more DIY wood projects in addition to this pegboard wall display? Try your hand at this wood lantern that can be used in any room or even outside. And it can also be made pretty quick. Or this DIY reclaimed wood table tray. Maybe a candle centerpiece is more up your alley instead.
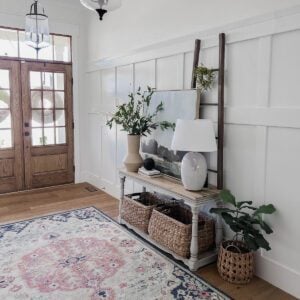
When the budget doesn't allow it, sometimes we have to get creative with our own DIY woodwork accents. I added wainscoting to our front entryway. Turns out it wasn't that hard and cheaper to do myself. You can even see what I did to our fireplace wall here.
If I can do it, you can too!
Brooke

Stephanie says
This is a super great idea. At the end of my hallway I have struggled with what to do. This is it!! Thank you !!
startadmin says
So glad you love it!