
Create the perfect accent wall with this trendy peel and stick wallpaper DIY.
Remember the days when wallpaper covered every spare surface of open wall in the house? We're talking entire rooms of floor to ceiling wallpaper. And yes, even the ceiling was plastered with that irremovable nightmare. There was even an era in the 60s and 70s when matching floral wallpaper to your curtains was trendy.
Traditional wallpaper used to be the bane of my existence. It was time consuming to put and up and impossible to remove!
Fast forward to recent years and wallpaper trends are on the rise. But definitely not the same traditional wallpaper that had you wanting to tear out EVERY SINGLE HAIR on your head. Nope. This new wallpaper is a gift sent from the gods!
As far as DIY projects go, peel and stick wallpaper definitely ranks at the top for being easy to use. Because it's made of vinyl, you will have a lot more flexibility in application. It's amazing how you can take one small space and completely change the look.

These tips and tricks to installing peel and stick wallpaper will help you get it right the first time and love the results. I've also used peel and stick in my daughter's bathroom and that small area turned out lovely. It's such an easy wallpaper to use!
The best part is it is also removable wallpaper. If you are renting is can easily be removed with minimal damage to the walls.
Before: the Boring and Blank Wall

This master closet was definitely lacking some pizazz. But there is nothing I love more than an inexpensive way to turn an entire wall into a beautiful pop of color.
After: A Splash of Wallpaper
Doesn't this accent look so good? I wanted to stick with neutral colors instead of a bold color scheme for this space. The black and white floral is an elegant selection for this interior design. It's amazing what a little bit of wallpaper can do to those white walls.

Supplies You Will Need
- Floral Wallpaper from Anewall - use high quality peel and stick wallpaper brands for best results
- Squeegee - or some other smoothing tool
- Tape Measure
- Razor Blade or X-acto knife
- Blue Tape - painter's tape is a good idea for this
How to Install Peel and Stick Wallpaper Right the First Time
Watch my full YouTube tutorial here
Step 1: Lay out your wallpaper
First step, find a large open space to lay out your wallpaper. Lay each sheet out side by side so that after putting up the first sheet, the rest are in order. This will help you to not install the wallpaper upside down.
When you start getting that wallpaper up, your seams will now match correctly.
Step 2: Install your first piece correctly
Installing that first peel the right way is important.

Do not place the edge of the wallpaper right at the ceiling border where it joins the wall. Instead, you will want to leave 1"of clearance space just below your ceiling. In case your ceilings are not 100% level, this gives more wiggle room for imperfections.
Also make sure you are using a utility knife or razor blade to cut your paper for clean lines.
Pro Tip: When cutting a big piece, it is easiest to measure first, mark the paper, then cut it on the ground. Do not cut off the excess paper in case you need to adjust if the wall is imperfect.
Step 3: Application process
On your first strip of wallpaper, you will only want to remove about 4” from the backing of the wallpaper at a time. Starting at the top edge, use your squeegee to secure the wallpaper to the wall and get all the air bubbles out.
A smooth wall will make a mountain of difference!
Continue working down the wall, making sure you have a smooth texture as you go. Pull it nice and tight into the corners. At the bottom you can cut off some of the excess and made a slit in the bottom corner. This helps to get the vinyl nice and secure.
Step 4: Onto the next sheet
Pro Tip: Vinyl wallpaper usually overlaps up to 1 ½” so make sure to read the instructions first!!
Before applying your second piece, the first thing you want to do is match up your repeat pattern in the center and use blue tape to hold it in place. Your seams will appear flawless and match up so much better.

Start at the top of the paper and pull off about 4 inches of the backing. Continue application process.
Step 5: Cutting around windows or door frame
Be careful cutting around windows and other tricky areas. You will want to be careful to match these seams as well as leave a couple inches extra of wiggle room for adjusting.
Make sure you have smooth surfaces as you squeegee all the air out of the vinyl. Vinyl wallpaper is amazing because you can pull it up and replace it again to make adjustments.
Step 6: Go back and trim
Once your wallpaper is all in place, go back and trim everything. An easy way to do this is by putting your blade in-between the surface and squeegee and running them down the line together. It will make a clean cut along those edges.

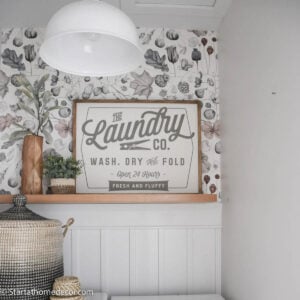
Installing wallpaper is easiest if you go slow and double check your marks to make sure seam placement is correct. You can also see my laundry room with wallpaper or how I did my daughter's dark floral wallpaper here.
The Final Countdown
This DIY project took me about 4 hours to install from start to finish. Extra shelving to work around made it go a little slower. A space with straight vertical lines would help this project go faster.
I hope this helps you install your peel and stick wallpaper right the first time. It's a fun option to change the whole look of a space without needing to paint.
See how I continued adding on to our master suite design here.

Leave a Reply