Save cost by building a custom DIY closet that is elegant and stylish.
When you are on a tight budget, it's really helpful to save money where you can by doing the work yourself. Building our own DIY built-in closet was a great way to cut back on a steep price tag. Follow this easy step-by-step tutorial to create a beautiful closet space for your master bedroom that is functional and stunning.
Building a custom DIY closet ended up being easier than I thought and a lot cheaper. The first thing was to have our new closet bid out to see how much it would cost. Those numbers were definitely not in the approved budget and I didn't want to change my preferences and go with wire shelves.
After sketching out a custom closet design, I figured I could create a DIY closet system for significantly less cost in labor and supplies. It turns out that closets are NOT that difficult to do. But, they do require time and precision, and of course a little bit of patience.
Take a look at how I accomplished my DIY plywood closets and how you can do it too!
Supplies Needed for DIY Master Closet
These are the supplies I used based on accurate measurements for our closet dimensions in our master bedroom. The amount of supplies you need will change based on your own custom closet build. Use the appropriate power tools for this DIY project.
- 4'x8' Baltic birch plywood (for my whole closet I used 15 sheets of plywood from Home Depot)
- ¾" MDF for spacing
- Trim for finishing edges
- Ryobi nail gun
- 1" Brad nails
- Wood glue
- Table saw
- Circular saw
- Level
- Tape Measure
- Closet rods
- Stud finder
Cut List
- Rip 4'x8' sheet of plywood down to 16" wide strips. I did 16" because I could get exactly 3 strips out of each board.
- One sheet I ripped down to 3 ½" thick for my shelf hook.
Make sure to measure everything twice, cut once! Plus, a level is a good idea in any type of project like this.
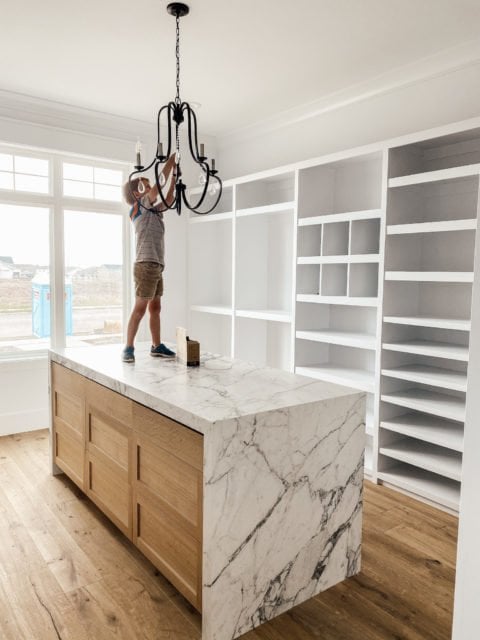
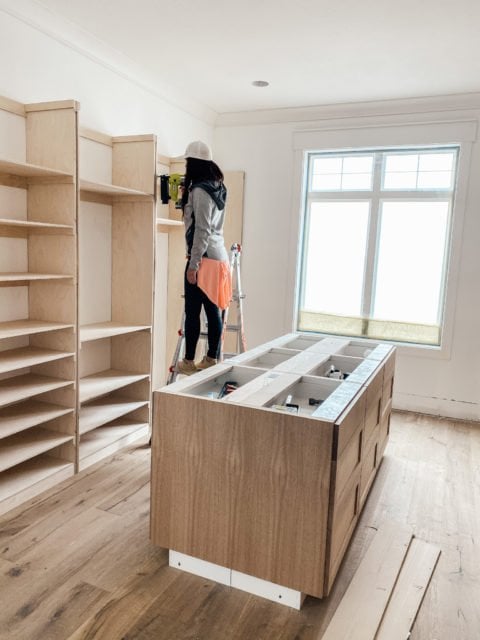
My master bedroom closet measures 12’ wide x 15 ½’ long. For our custom closet build I am going to build organizers down both sides of the room. Then we will add a floating island in the middle. Our cabinet company is making this for us because drawers can be tricky to build.
Because our walk-in closet does not have closet doors, it is essential to have optimal closet organization. My goal was to create enough storage space so everything can have a place.
FAQ for a DIY Custom Closet
How long does it take to build custom closet?
I built my entire walk-in closet in a weekend. I was surprised at how fast I completed it. The space is large and I had never built a closet before.
What was the hardest part of building your own closet?
The hardest part was figuring out the sizes I wanted for all of my shelves. I have included that below for you. Once I got all of the pieces of plywood ripped down the new closet went up pretty fast.
What was the total cost?
The total cost for the closet came in right around $2000. That is a huge savings from the $10,000 I was quoted. However, this may differ depending on inflated costs of wood or if you opt to include drawers or use a different material.
How to Build a Custom Closet
Where to Begin a Closet Build
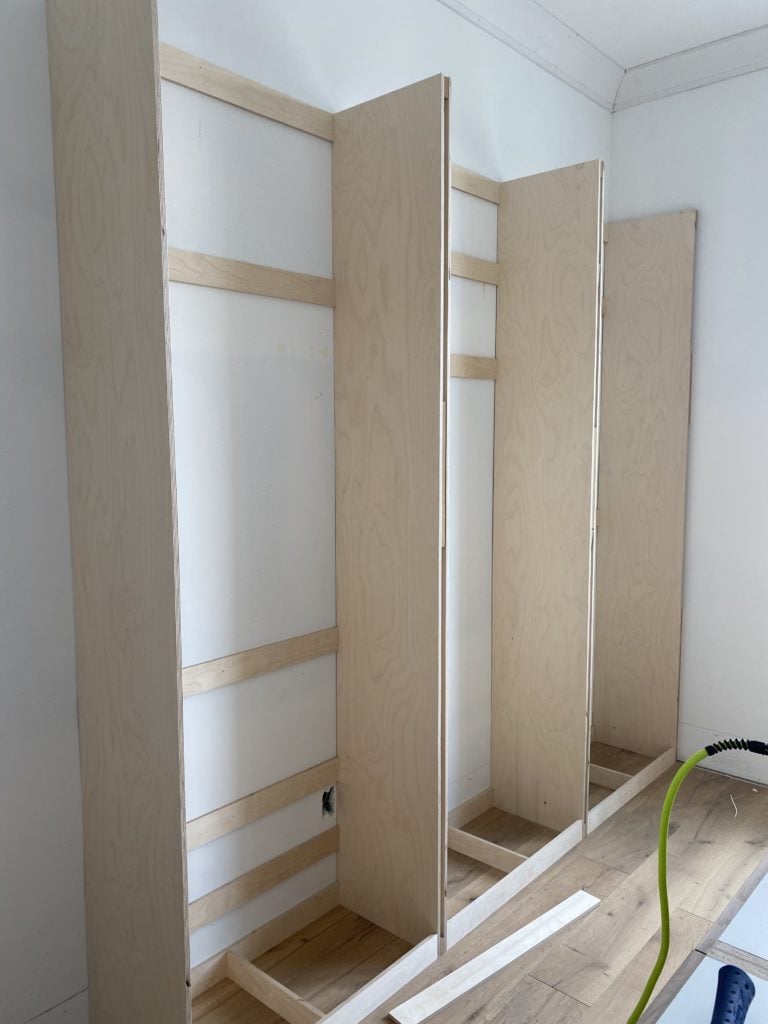
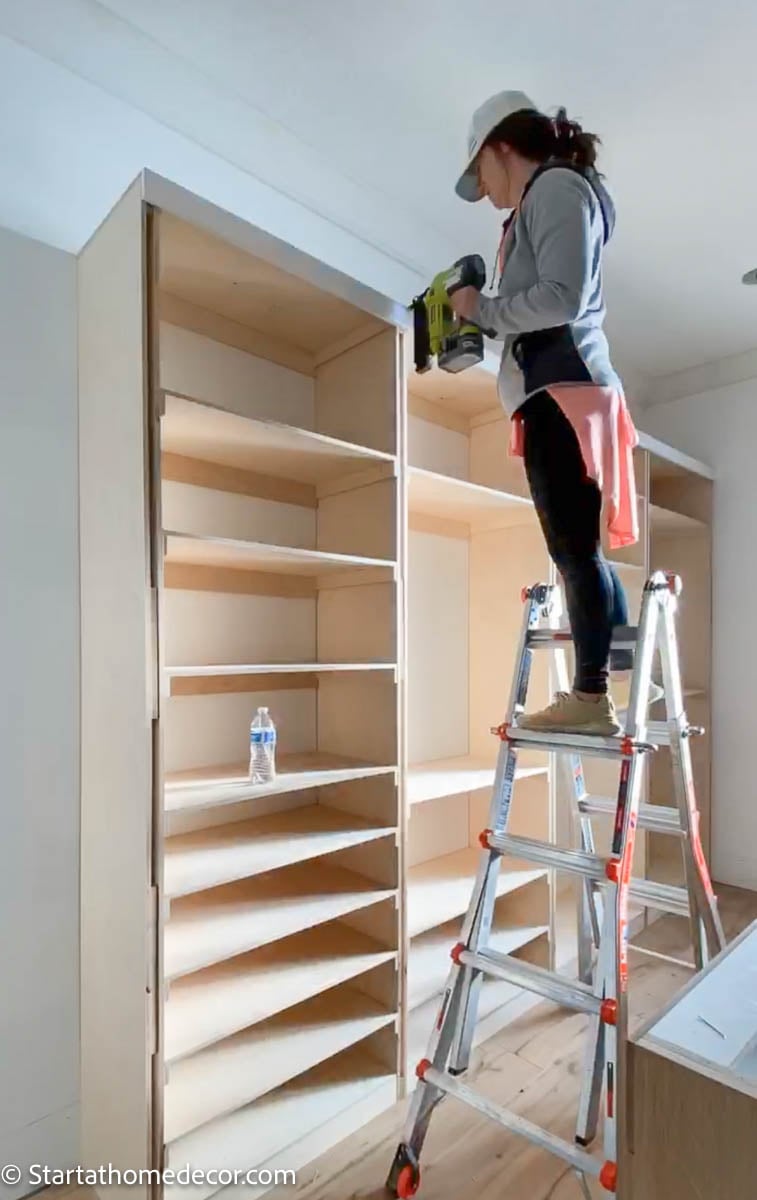
I started on the right side of the closet, up against the corner existing wall and worked my way out. It was helpful to work section by section. This was easier for me so I didn't have to plan the specifics of the whole closet at once, though I did have a general idea of my plan and measurements. I planned each section in more detail as I reached that point.

For the first step I used ¾" MDF to space the section from the wall. I did this because I am going to attach a front piece of trim on the edges as plywood isn't pretty from the sides of the closet.
You can use edge banding to hide the sides of plywood. However, I wanted my dividers to be thicker than ¾" so I will use a piece of trim to look the best.
I then lined the plywood right up to the MDF and nailed it in to the back wall. I would recommend using a stud finder to find as many wall studs as you can. It is best to nail into a stud if you can for optimal support pieces.

Building the Base and Shelf Hook
Next, I built the base. I used 32" x 3 ½" strips of plywood to do this. I put one in the back and one in the front and then a 15" piece of 3 ½" plywood in the center for the support board.
After the base is built I added shelf hook to the wall. Shelf hook (the vertical pieces) is the 3 ½" strips of plywood from the cut list. The shelf hook is what your shelves will sit on top of. Make sure these are placed with the correct spacing for your shelves.
The shelf hook is also what you will nail the dividers into down the road. Since they are used for strength, make sure to find the studs to nail into. And you will use wood glue to attach them to the sheetrock. This will add lots of strength.
Adding the Next Section
After the first section, I added the next divider and nailed it into the shelf hook on the closet walls. The dividers are the 8' x16" strips of plywood from the cut list. Then I nailed the bottom into the base for added strength.
Now nail the ¾" thick scraps to the 8' divider. After the spacers are attached I added the next 8' divider. This will give me 2" thick dividers. Thicker dividers give a closet makeover a more custom look.
Continue working down the wall. I placed the shelf hook where I wanted a shelf to be. Once I got all the way down the wall with the main structure, I went back and finished the shelves off.
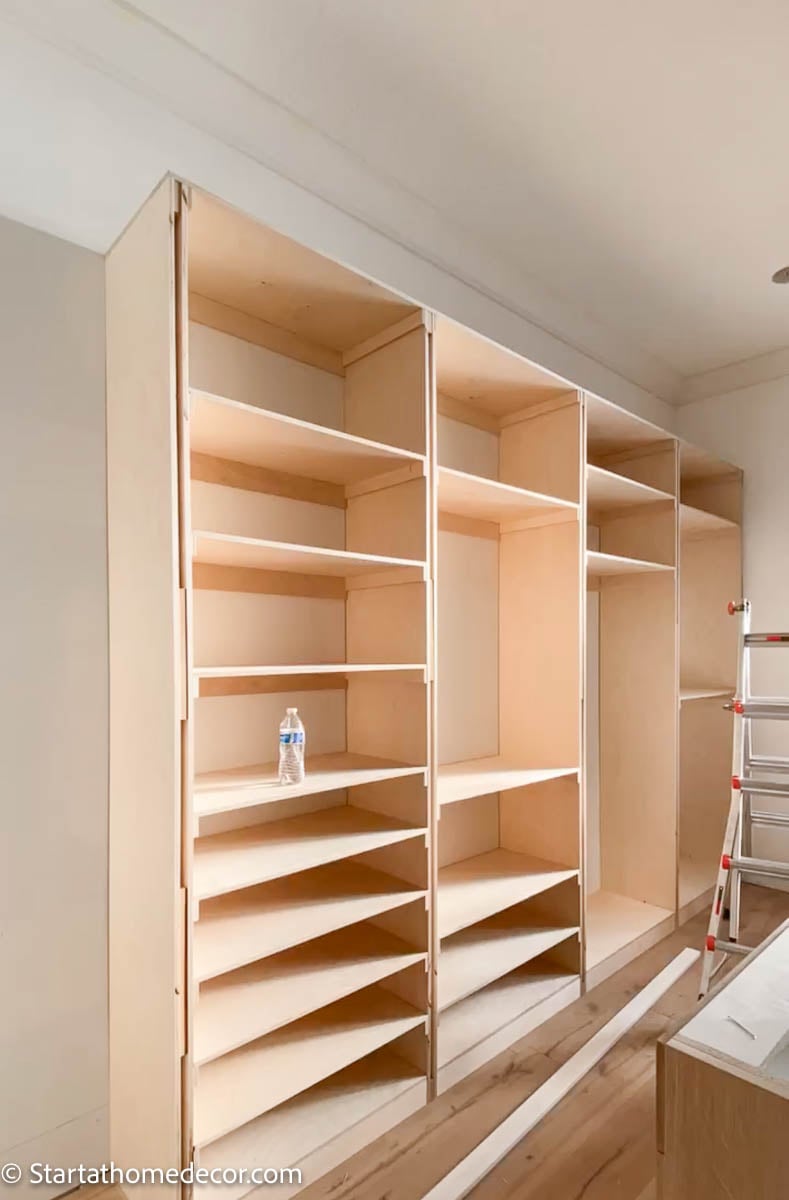
DIY Built-in Closet Shelves
Adding a piece of plywood over the top of the base will create your bottom shelf. Then I put up the shelf hook on the dividers.
You will also put the shelf hook on the sides of the plywood, because they are your shelf supports. These are not adjustable shelves. I felt like we had enough extra storage in our walk-in closet that it wasn't needed. Plus, adjustable shelves are more expensive.
For our closet organization system, I made shoe shelves in 2 different sizes. One to fit tennis shoes and the other to fit boots.
We included a few different sizes for hanging rods. I have one hanging rod size for shirts, one for coats and one for long dresses. I made sure to have plenty of hanging space for the entire closet. My husband also has 10"x10" cubbies for his hats. You can see all sizing below.
Sizing for a DIY Plywood Closet
- Small hang up 36" tall
- Medium hang up 40" tall
- Tall hang up 60" tall
- Shoe shelf 6 ½"
- Boot shelf at least 10"
- Clothing shelf 16" to 20"
Finishing Off the Closet
Once all of the shelves are in, add plywood to the top shelf area. I nailed down into each divider, making the closet even stronger.
Our ceilings are 10' tall and the plywood is 8' tall. I thought about creating longer closets and extending all the way to the ceiling, but it can take a lot of effort to reach stuff that high up. Instead, we left the closet height at 8' and use the top shelf for added storage.
Adding Finish Trim
I started with adding MDF molding to the top of the closet. For the top and shelving I used 2 ½" molding. Using molding that is a little bit bigger covers more of the shelf hook.
The top molding helped to connect the dividers finish trim. My divider trim measured 1 ¾". I ran the dividers trim all the way to the floor then added the shelf trim in between the dividers trim.
Caulking and Filling Holes
Caulking a closet is long and tedious work. But oh so beautiful once that labor of love is complete! Since my shelves are stationary, every individual shelf and shelf hook has to be caulked. Do not skip this part. This is what will take good finish work to GREAT finish work.
Use putty to fill in all of the nail holes. Again, this is time consuming and boring. But it will make all the difference in the finished product. Wait for everything to dry and then lightly sand down all the surfaces.
Painting a DIY Custom Closet
You have finally reached the best part! It's time to paint and apply any finishing coats on your wood surfaces.
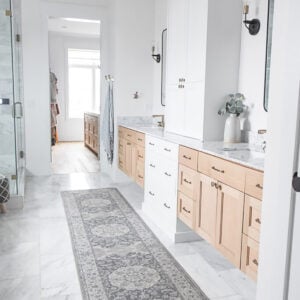
First, start by priming everything with a primer. Since the material is all wood, priming first will give you an even better finish and help your paint to stick evenly. I used a sprayer to spray the entire closet in Chalk White satin by Benjamin Moore, walls included. Spraying is my time saver. I applied 2 coats and let it dry over night.
I did not use any finish coat. However, if you are leaving natural wood or staining, you may want to consider applying a clear coat finish.
Finished Custom Closet Organizer
Here it is all finished up! I am so happy with how this turned out. It gave us that custom expensive look for a fraction of the cost.

The countertop for the island is porcelain. We decided to waterfall the edges for a fun design element. For the cherry on top I added an elegant chandelier to bring the space together.

Finishes for My Plywood Closet
- Paint - Everything is Chalk White by Benjamin Moore
- Light - Progress lighting discontinued
- Island - Natural white oak from Foxwood Cabinetry
- Countertop - Porcelain from Dal-Tile
- Flooring - Vintage Beige from ADM Flooring
- Hanging Rods - White
- Hooks
- Hangers
- Drawer pulls
I recently added wallpaper to this space. View all the details here.

And don't miss these helpful closet organizing favorites!


DIY Custom Closet Build
Building your own DIY built-in closet is a great choice if you are looking for a way to transform your closet space for low cost. It can help you to cut down on your budget as well as creating something functional and stylish.
See more closet upgrades here!
- Easy DIY closet upgrades
- Build a small DIY walk-in closet
- Lazy guide to easy closet organization
Happy Building!
Brooke
Sonia says
I'm envious of your master closet size. I see this was just recently done so nice to see the cost wasn't overboard considering how much plywood has gone up. I'm pinning this for my future master closet build. Beautiful work.