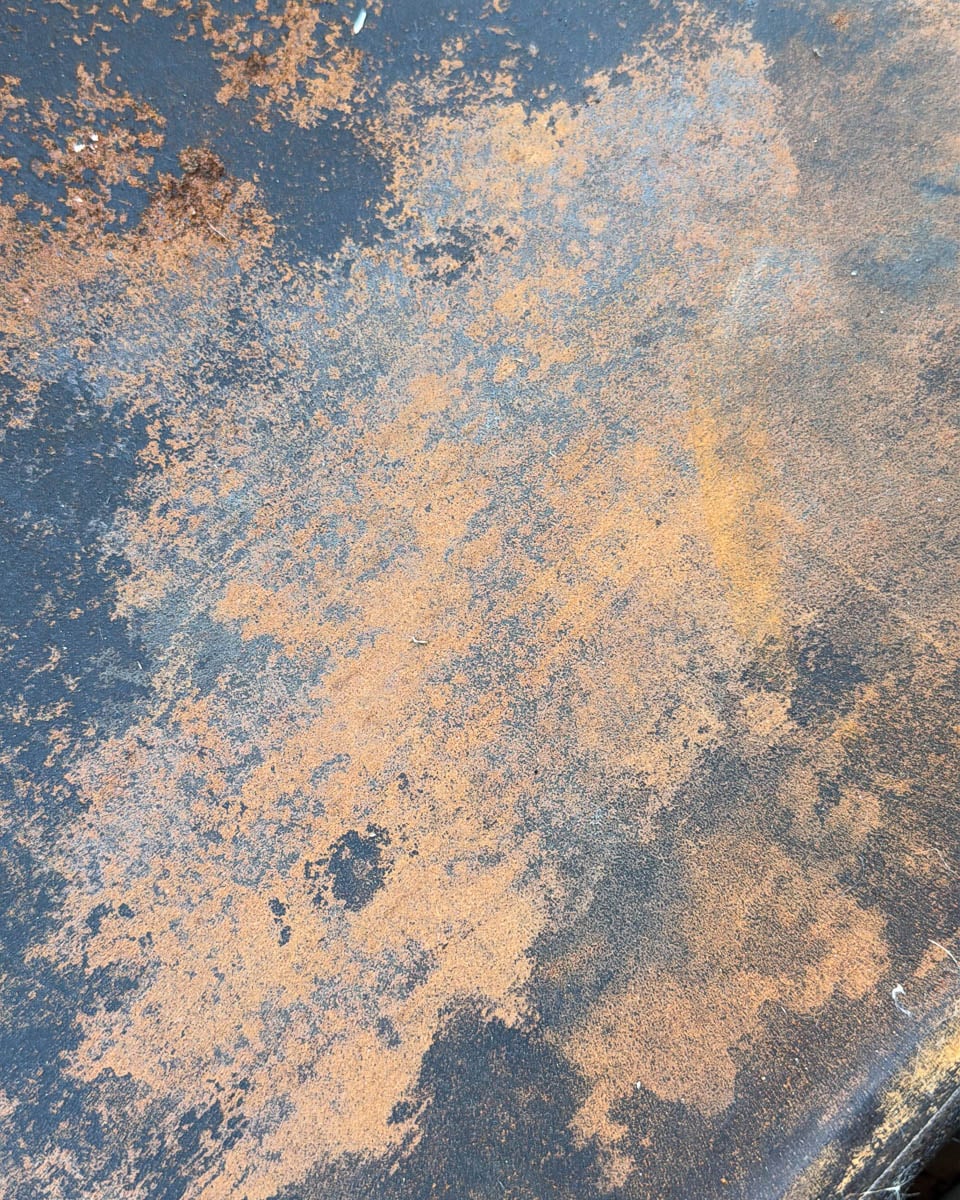
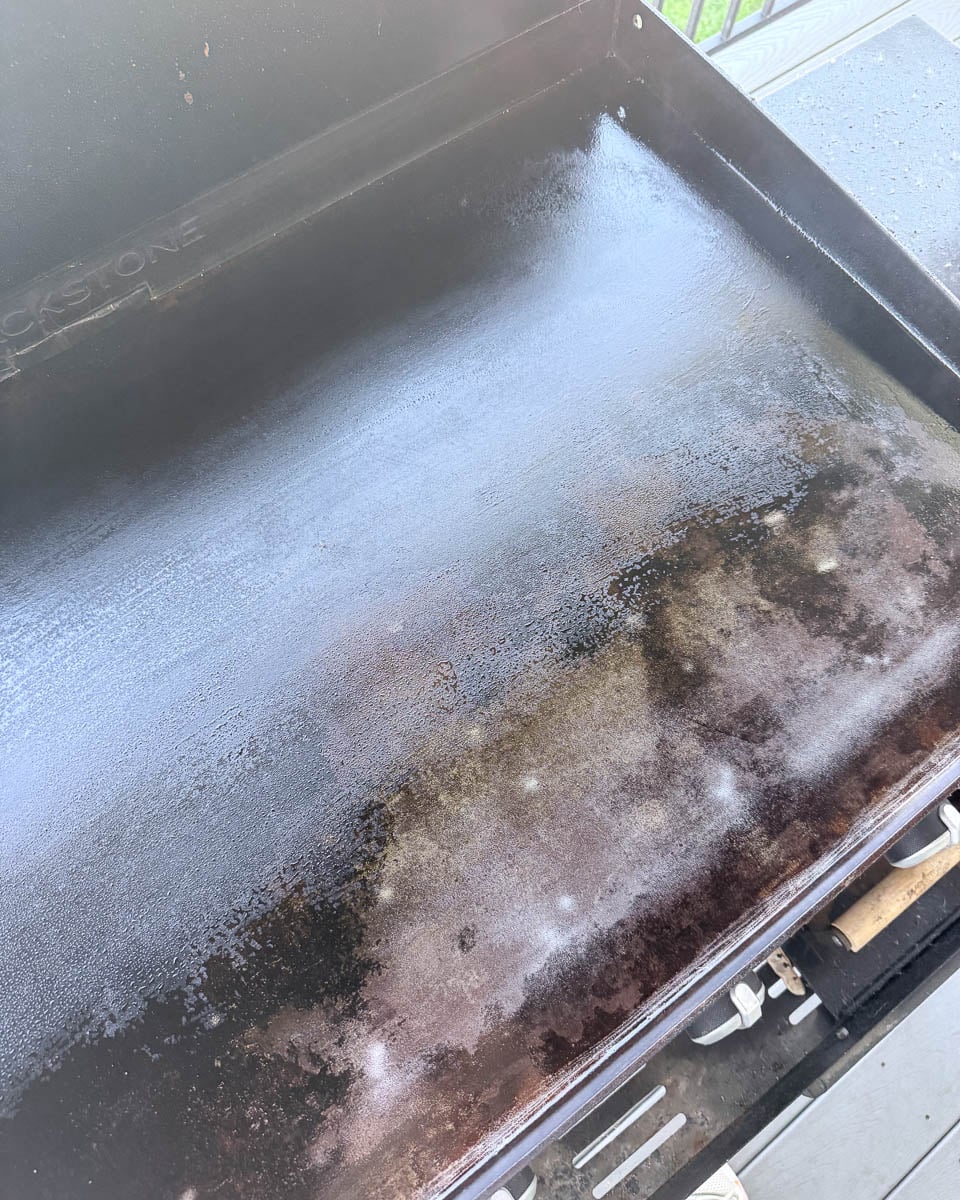
If you pulled the cover off your Blackstone griddle and found rust staring back at you, don’t panic! Whether your griddle sat outside through winter, got moisture trapped under the cover, or simply lost some of its seasoning, rust is actually very common and thankfully, it’s fixable.
The good news? You don’t need to replace your griddle. With a little elbow grease and the right steps, you can restore your Blackstone cooktop and get it looking (and cooking) like new again.
Here’s exactly how to remove rust from a Blackstone griddle and properly reseason it.
Why Does a Blackstone Griddle Rust?
Before we jump into the fix, it helps to know why rust happens in the first place.
Rust usually shows up because of:
- Moisture getting trapped under the cover
- Leaving food or grease residue sitting too long
- Skipping the seasoning process after cooking
- Winter weather or humidity
- Water accidentally left on the cooktop
Even if your griddle looks bad, most surface rust can be completely restored.
Supplies You’ll Need
Before getting started, gather these supplies:
- Metal scraper
- Grill stone or griddle stone
- Steel wool or sandpaper
- Paper towels or microfiber cloth
- Cooking oil (avocado oil, canola oil, flaxseed oil, or griddle seasoning oil)
- Heat-resistant gloves
Step 1: Heat Up the Griddle
Turn your Blackstone on to medium-high heat for about 10–15 minutes.
Heating the cooktop helps loosen old grease, rust, and buildup, making it easier to remove.
Once heated, turn the burners off and allow the surface to cool slightly before handling.
Step 2: Scrape Off Rust and Debris
Using a metal scraper, begin scraping away loose rust, old seasoning, and any stuck-on residue.
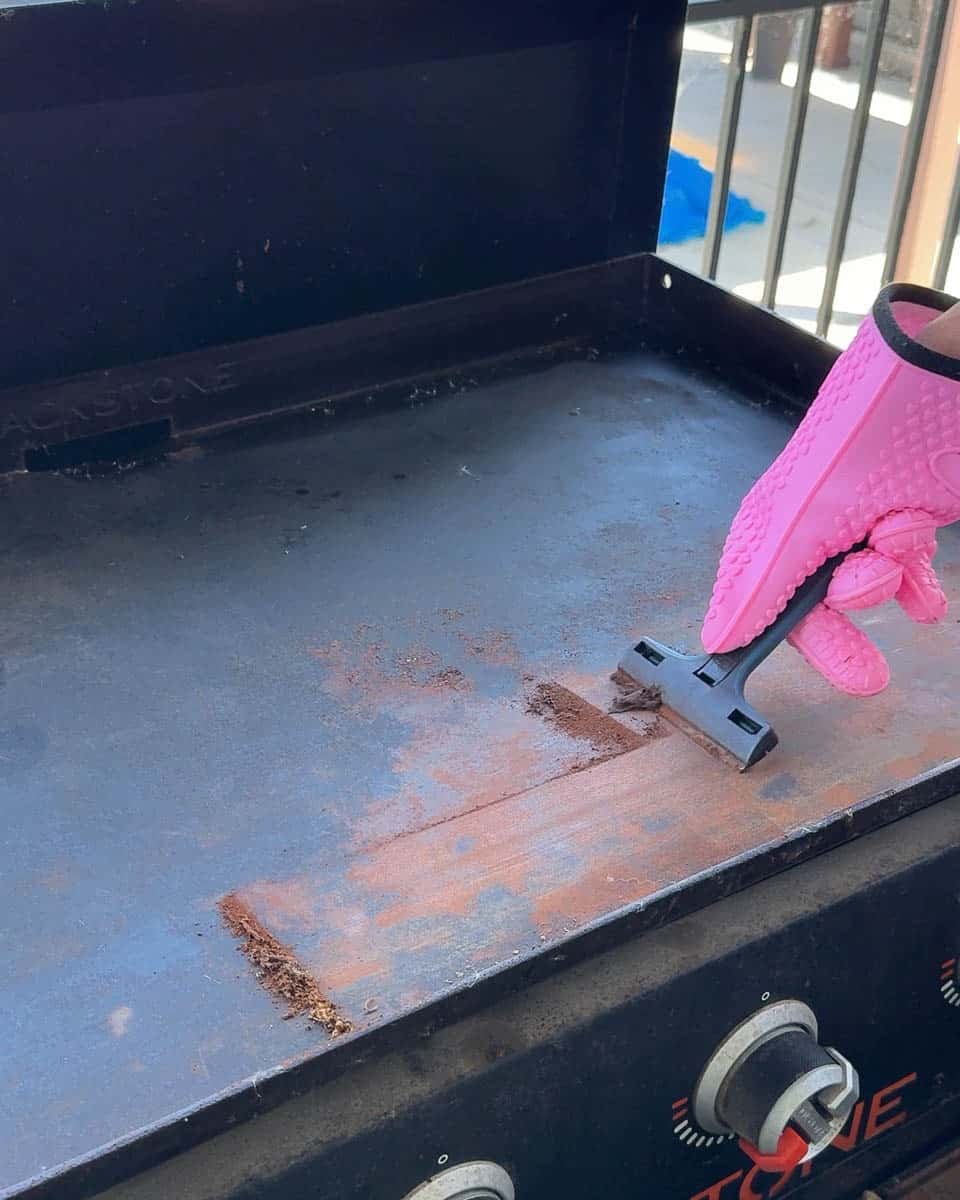
Don’t be alarmed if parts of the surface look uneven or discolored — that’s normal during restoration.
The goal here is to remove as much flaky rust as possible before scrubbing.
Step 3: Scrub the Rust Away
For light rust:
Use a grill stone or steel wool with a small amount of oil and scrub in circular motions.
Luckily for me this worked on my rust. But if that doesn't work try this for heavier rust.
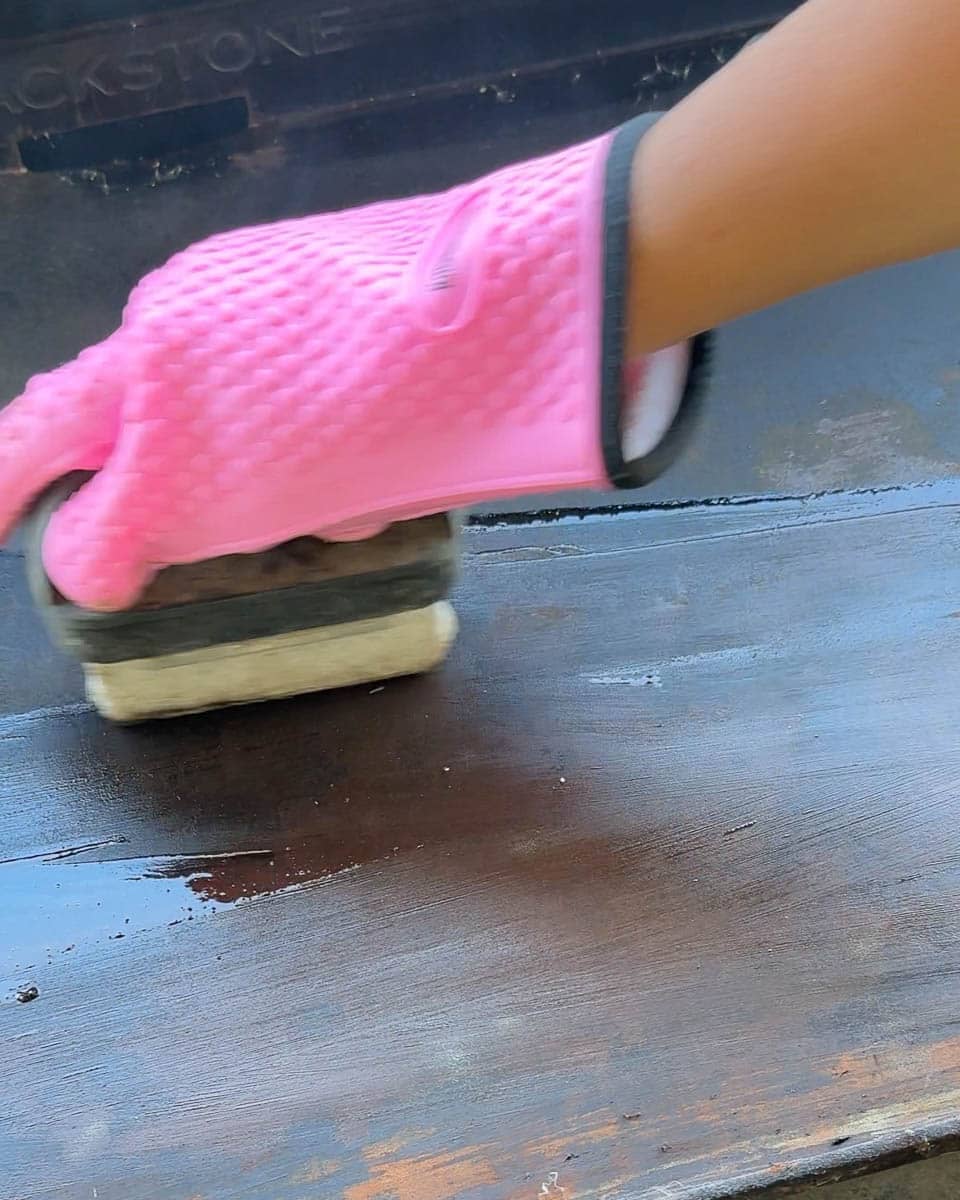
For heavier rust:
You may need medium-grit sandpaper or a more aggressive grill stone to remove thick rust spots.
Keep scrubbing until the surface feels smooth again.
Pro Tip: If you see bare metal, that’s okay! You’ll reseason it in the next steps.
Step 4: Wipe Everything Clean
After removing the rust, wipe the entire cooktop thoroughly with paper towels.
You want to remove all rust dust, debris, and residue before reseasoning.
Repeat until the surface feels clean and smooth.
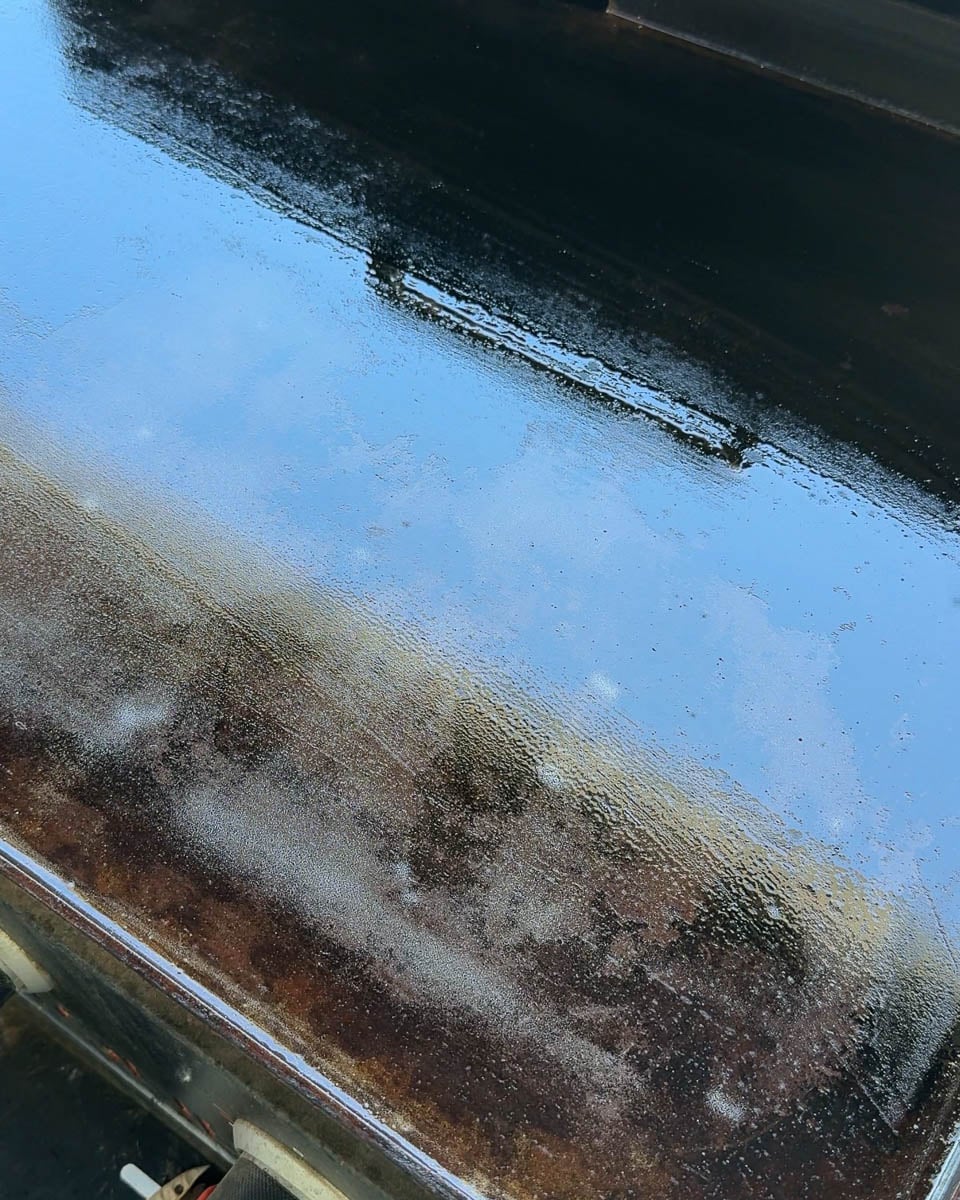
Step 5: Re-Season Your Blackstone
This is the most important step.
Turn the heat back to medium-high and apply a very thin layer of oil across the entire cooktop.
Make sure to cover:
- The entire cooking surface
- Edges and corners
- Any spots where bare metal is showing
Let the oil heat until it starts smoking and burns off completely.
Repeat this process 3–5 times.
Over time, your griddle will develop that dark black, nonstick finish again.
What If the Rust Is Really Bad?
If your Blackstone has thick rust, orange scaling, or deep pitting, you may need to strip the surface more aggressively using:
- An orbital sander
- Drill brush attachment
- Heavy-duty grill stone
Then follow the same reseasoning process to rebuild the protective coating.
How to Prevent Rust on Your Blackstone
Once your griddle is restored, here are a few ways to keep rust from coming back:
Always Oil It After Cooking
A thin layer of oil helps protect the cooktop from moisture.
Keep It Dry
Never leave standing water on the surface.
Use a Hard Cover + Soft Cover
This extra layer helps protect against moisture and weather.
Check for Condensation
Sometimes covers trap moisture, especially during colder months.
Say Goodbye to Blackstone Rust for Good
Finding rust on your Blackstone can feel frustrating, but the good news is it’s almost always fixable. A little cleaning, scrubbing, and reseasoning can completely bring your griddle back to life.
If your Blackstone has been sitting unused or looks rough after winter, don’t throw it out — give it a refresh first. You might be surprised at how quickly it comes back looking brand new.
And if you want to see exactly how we did ours, make sure to watch the video for the full step-by-step process!


Leave a Reply