
Easy tips to help achieve a professional finish on your walls as you paint a room using a sprayer.
Did you know that using a sprayer to paint a room can cut your painting time in half? According to a recent study, using a sprayer can cover an average sized room in less than 20 minutes, while traditional methods take over an hour or more. But painting with a sprayer can be intimidating for many homeowners, and you may be wondering if it's worth the investment.
In this article, we'll walk you through the process of painting a room using a sprayer, breaking down each step and providing helpful tips along the way. By the end, you'll have all the tools and knowledge you need to tackle your next paint job with confidence.
Why I Love to Paint a Room Using a Sprayer
- Eliminates how fast you go through paint brush supplies
- Less time spent painting
- Best choice for even application instead of painting by hand, no dripping paint roller or brush
- A lot of coverage all at once
- Smoother, more professional finish
Ultimately, when you paint a room using a sprayer, you will significantly cut down on the amount of time spent painting because you can do large areas quite fast. It's a total game changer for time and ease.
Paint Sprayers
There are generally three different types of paint sprayers - compressed air sprayer, HVLP sprayer (high volume low pressure) and airless sprayer.
Compressed Air Sprayer
- Traditional, uses a hose and air compressor
- Can spray with thick quantities of paint but usually need to thin paint
- Great for large areas
- Easy to use but can waste a lot of paint with the high force
HVLP Sprayer
- Mixes air with paint like the compressed sprayer but at a much lower pressure so safer and cleaner
- Great for small projects for the precision and smaller puffs of paint
- Thinning paint may be required for some models
- Painting can take longer with these sprayers because the paint is more efficient, but you don't use as much paint
Airless Paint Sprayers
- Uses an electric pump
- Applicator nozzles allow for targeted adjusting for big and small projects so there is less waste with efficient spray tip
- Usually easier to clean
- Don't need to thin paint
Supplies for Spray Painting a Room
Whatever paint sprayer you choose to use, make sure to follow the instruction manual and use proper safety precautions.
- Latex paint - I used Benjamin Moore White Dove for the Moldings and Halo for the Shiplap
- Primer
- Paint brush
- Painter's tape
- Floetrol - you can add to your paint to eliminate brush marks when doing touch up
- Masking paper
- Paint gun (my personal favorite)
- Paint mask

How to Paint a Room Using a Sprayer
Let me first start by stating that I do not spray rooms that have carpet. Why? It seems that no matter how much prep work I do to only keep paint on the interior walls, it still gets on the floor underneath. Wood, tile or laminate are easy to clean up, but carpet? Not so much.
Taping - Prep Work
First, do the prep work. This will be the most important task you do to get clean lines. Plus, it's also the easiest way and most effective to eliminating a lot of paint on the floor. Tape off the floor with masking paper and painter's tape. Get as close to the baseboard edging as you can.

Paint sprayers can have a lot of overspray, regardless of brand. It's a good idea to protect outlets, light switches, vent covers and anything else in your work area you don't want covered with spray paint.

If your baseboards have not been painted, don't worry about adding paper to cover them. Because these baseboards had already been painted, I taped the paper over the baseboards and down to the floor so it would not fly up when spraying.

Don't forget to include windows so they stay free of paint as well. I wanted the shelves to be the same color as the molding so I taped them off too.

Once everything is taped off and covered it is time for painting walls. Don't forget that if it is absolutely needed, you can cover items in your room with drop cloths or plastic sheeting. But I highly recommend moving everything out of your room if you have not used any type of paint sprayer before.


Prime the Walls
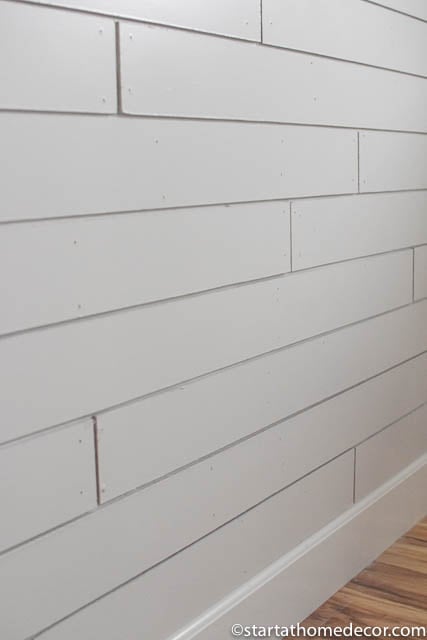
Shiplap is one of my favorite designs to incorporate on a wall. I also used the faux shiplap in my new kitchen pantry because I love it so much. But I especially love it painted white. So since I used hardboard to create my faux shiplap (tutorial here), it has to be primed first. You will want to prime any type of woodwork on your wall before adding coats of paint.
My preferred choice of spray equipment is the Graco paint sprayer, which is an airless sprayer. It's great for smaller projects and larger projects because you can adjust the spray gun tip. Plus, I can't complain about the significant time saving. I love using this sprayer for cabinets and a multitude of other reasons that you can read more about.

Before applying primer, make sure you do a test spray before tackling your wall so you have your spray pattern setting where you want it. Then, proceed to prime your wall, spraying evenly in back and forth motions. Make sure to stand at least a foot away from the wall surface for decent application.

For extra coverage, I applied a second coat of primer after the first one had dried, before starting on paint. Don't forget to clean the primer out of your sprayer before you add the paint.
Paint the Wall
Make sure to allow your primer enough dry time before starting on paint. I used a latex paint for these walls and applied two coats with drying time in between. Again, go slowly and make sure you are covering the entire surface as you go.
Let your paint dry overnight. You may need to do a few touch ups with a paint brush. If that is needed, you can add floetrol to your paint to eliminate the look of brush strokes. Don't remove any of the protective paper until you are completely done with painting. When you have pulled up all the paper, your room is now ready to move in furniture. See all of the final touches on this little girl bedroom.
If you want more tips on painting a ceiling, take a look here.

Painting a room using a sprayer may seem intimidating at first, but with the right approach and technique, it is the easiest way to save you time and effort while also producing professional-looking results. From preparing your space to choosing the right sprayer, you have all the best tips to achieving a fresh look for your room.
Remember, the key is to take your time, follow the instructions, and practice before tackling larger projects. So go ahead, grab that sprayer, and transform your space with a fresh coat of paint.
Happy Painting!
Brooke


Leave a Reply