
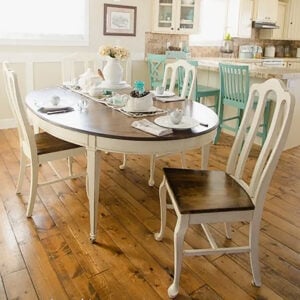
Restore your vintage desk to its former glory with a DIY desk makeover.
When you find an old piece of furniture that still has a lot of life left, don't throw it out. Instead, try refinishing. Restoring your solid wood desk to its glory days will prolong its use and save additional cost of replacement. See how this old desk makeover can be easily transformed into a masterpiece.

Refinishing an Old Wooden Desk
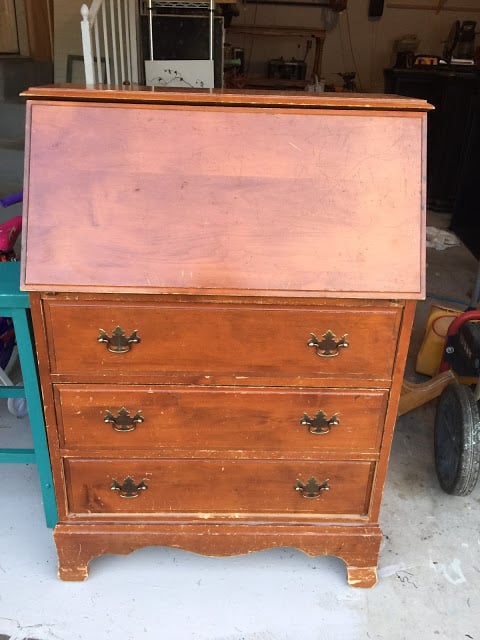
When this desk first arrived it was obvious it had seen better days. Though in relative good condition, there was a missing desk leg and multiple deep scratches and dings along the surface. Luckily, the missing piece was found in a desk drawer. Whether you find it at a thrift store or yard sales, desks like this are a perfect choice for DIY projects. Affiliate links below.

Supplies for a DIY Desk Makeover
- Paint stripper
- Putty knife
- Mask
- Sandpaper
- Sander
- Wood filler, if needed
- Paint color
- Paint brush
- Paint tray
- Rags
- New hardware
- Stain
- Finishing coat
Prep Work for DIY Desk Makeover
The first thing to do when you have your piece is to complete all of the prep work. This is often the hardest and most time consuming process of the whole thing. Don't get deterred! Beautiful things come to those who are willing to work.
Strip
The first step with renovating this desk is to remove stain and get it down to the natural wood. When removing any finish down to the wood, I have found it easiest to use a paint stripper. Using paint stripper can take a lot of time, but your furniture will be cleaner and easier to apply your paint or finish.
Apply stripper to the desk area that will be stained. Allow the paint stripper to sit for approximately 15 minutes before scraping off finish with your putty knife. For more information on using a paint stripper, head over here.
Sand
When you have scraped off your finish, use a sander on the entire desk to get a smooth finish. Make sure to use a clean cloth to remove all wood particles.
Use Wood Filler
Most of the scratches came out of this desk after the initial sanding. After you have sanded, you should be able to see if there are any deep scratches that didn't come out. For those areas it is a good idea to apply some type of wood filler on your solid wood furniture.
Sand Again
Use fine grit sandpaper for one more sanding after you have used wood filler. Make sure your desk is dust free and clean before moving on to the next step.
I am happy that I was able to salvage so much of this wood because the grain is so rich and beautiful.

Painting Your Desk
I opted to use both paint and stain on this DIY desk makeover.
Prime
Because I am using paint and stain, the first step is to apply primer on the body of the desk where it is getting painted. For tips on using primer, take a peek at this post.
Paint
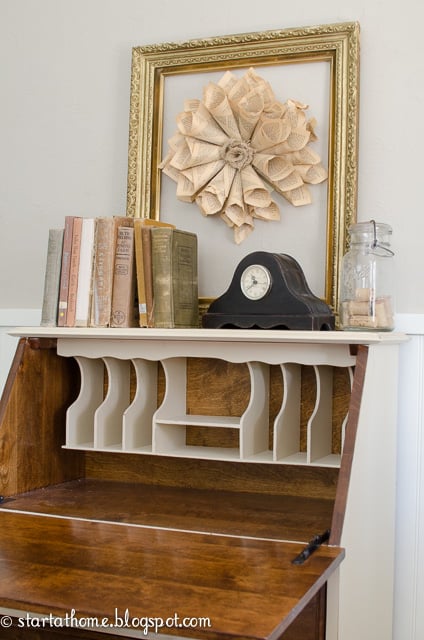
When the primer is dry, the next step is to add paint. Though you can choose to use different colors, I opted for natural wood tones to balance each other. This desk is painted with a custom mixed cream paint color.
Use long brush strokes to apply a fresh coat of paint. Wait for your first coat to dry before adding a second coat. You may need multiple coats of paint depending on the quality of your paint. Take a look at this painting furniture post for ideas on what type of paint to use for refinishing.
Because I also painted the letter dividers in the top of the desk, I had to stain that part of the desk area first.
Stain
The next step for this DIY desk makeover is to stain your wood. I opted to put stain on the drawer fronts and the folding desk area where this desk will see the most use. Stain has a better longevity for high traffic areas compared to paint.
I chose a dark stain for this piece and used Minwax's Early American wood stain. This dark stain is beautiful and is not too dark to pick up the wood grain texture. Follow instructions on your can of stain for application and directions.
Deciding how dark you would like your wood to be can be determined by how many coats of stain you apply.

Desk Finishes
You will want to apply some final finishes after your desk is painted and stained. A protective topcoat is a must for any amount of longevity with furniture makeovers.
Topcoats
I covered the wood portion of the desk with a topcoat application of a Spar Urethane in semi-gloss. Then, I used a glaze on the painted part of the desk and sealed it with a Spar Urethane in satin. Give your topcoats ample time to dry before moving your furniture anywhere.
The contrast of the dark color wood with the light shelving is just beautiful.

Add Hardware
The final step is to replace the old hardware with something new and updated. While you can reuse the original hardware, I find that it is not as convenient and often takes a good deal of cleaning and restoration to get it to optimal function especially if it is covered in rust.
Do yourself a favor and swap out the hardware for something more functional and stylish. Check out our beginner's guide for installing hardware here.

Why Refinish Furniture?
- Save extra cost from buying furniture that is new
- Old furniture tends to be better built than current furniture unless it is custom made or very high quality
- You can add a custom look to the furniture to fit your space
- Retain furniture value longer
- Learn a new skill or develop a hobby
Farmhouse DIY Desk Makeover
This DIY desk makeover is the perfect project for transforming an old piece of furniture, instead of throwing it out. And I just love the vintage farmhouse style of the furniture. What a great project for all of you refinishing enthusiasts out there!
If you are looking for more inspiration on DIY farmhouse furniture, why not try one of these ideas restoring and painting a curio cabinet? Curio cabinets are ideal for storage in the kitchen, entry or a bathroom. You can also use them for displaying dishes or home decor.

Or this easy DIY farmhouse sofa table with a pallet top? It's perfect for an entry way or decorating behind a sofa in a living room.
Now that the desk is complete don't forget to add some supplies to keep it organized. See more ideas here and even more here
Happy DIYing!
Brooke


Tone says
Oh wow! That is just lovely! It is amazing that you got to keep the wood! It looks so new and fresh! Great job:) And a great piece of furniture:)
Gilly Morrison says
This is amazing! I always love it when people can restore original wood, especially the two tone look! Gorgeous!
Two PlusCute says
Very well done!
It was pretty beaten up but now it is gorgeous.
Marie Blackburn says
You did a fabulous job on this makeover Brooke! The wood is gorgeous and so worth staining rather than painting.
upwithfurniture.com says
This is beautiful. I love the colour you chose for the wood. I think it was a good idea to paint the mail slots as they would be difficult to sand and strip.
Kimberly Lewis says
I absolutely love this! Thanks for sharing it with us. Pinned and tweeted. I hope to see you tomorrow night at 7 pm. We can't wait to party with you! Lou Lou Girls
Sharon @ Elizabeth & Co. says
A really stunning piece! Love the wood and paint combination. Thanks so much for sharing. Featured you at Be Inspired this morning.
Kristine at The Painted Hive says
That wood is gorgeous! And I adore the custom cream: it has a really lovely earthiness.