Transform that outdated curio cabinet into a modern masterpiece with these easy and inspirational ideas.
When you have limited built-in storage in your home, a display cabinet is the easiest solution to create much needed space. Unfortunately, an old curio cabinet no longer has the appeal that it once did with current styles and trends. But it doesn't have to be that way! Create a contemporary look by applying these 3 easy ideas for restoring and painting a curio cabinet.

Supplies You Might Need for a Curio Cabinet Makeover
These products might change depending on what you are using for your painted curio cabinet. Affiliate links listed below.
- Paint
- Sealing top coat
- High grit sandpaper
- Razor blade
- Wet rag
- Dry rag
- Power tools
- Paint brush
- Paint sprayer
The hardest part of a furniture restoration project is coming up with a vision for a new look. Let these 3 ideas help you create the ultimate statement piece with your vintage curio cabinet.
Idea 1: Double Door Colored Curio with Chalk Paint and Wax
I found this curio at a local thrift store. You can see more tips here for finding the right piece of furniture to renovate.
For old furniture, the condition of the cherry wood frame was in good shape. The glass and mirrors were also intact. However, those glass display cases didn't last for very long once I put my hammer to good use. Stress reliever, anyone?

Prep Work for Double Door Curio
Remove any glass or hardware from the cabinet that you don't want to get painted. Glass doors are definitely outdated, so it is a good idea to remove those completely.
The next step is to lightly sand your cabinet with a higher grit sandpaper. Because you are painting this project, you do not need to completely remove the existing finish. However, you will want to remove any flaking and make sure that your exterior is smooth as possible.
Exterior Design
Removing every glass shelf and panel can leave your cabinet pretty bare. I added bead board and other paneling to fill in the empty spaces on the doors and sides.
Painting Your Curio Cabinet
Apply one coat of paint using a paintbrush or sprayer and allow it to dry. I applied two coats of paint total.
While both milk paint and latex paint are good options for furniture makeovers, I opted to use Renaissance Chalk Paint in Tranquility. The softness of this lighter color is exquisite. I have experimented with many types of chalk paint and this paint is one of my new favorites. The coverage is awesome and it goes on very smooth.

Apply Sealant Coat
After applying 2 coats of paint, first use a soft clear wax to seal the piece. Sealing furniture pieces with a clear wax is preferable before using a dark wax because it allows you to have more control of the dark wax. If the dark wax goes on too dark in one spot, you can use clear wax to remove it. I don't often use wax as a sealant but it is durable enough for an accent piece like this.
Interior Curio Design
Now for the inside of this upright, I painted the back panel white for some contrast and added a white shelf in the middle for extra storage.

Replace Hardware
Put on new hardware and you have a finished and beautifully painted curio cabinet. A curio like this one is the perfect storage cabinet. It has so much character and doesn't take up a lot of space.
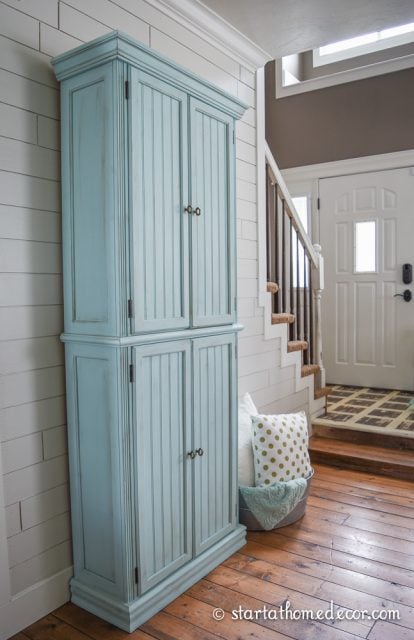
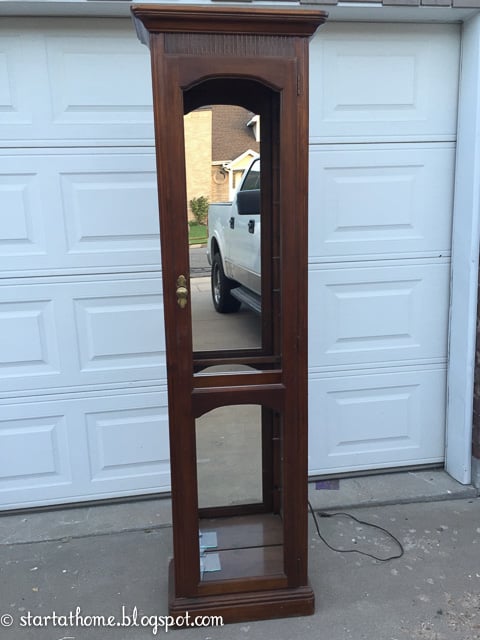
Idea 2: Chalky Finish Single Curio with Dry Brushing
For an old china cabinet, this single door curio was in great condition. I decided to do a chalky finish with dry brushing for this cabinet makeover.
Prep Work for a Chalky Finish Curio Cabinet
Remove all glass from the curio. This might take a bit of work, but it is a necessary step when there are glass shelves, a glass back, and glass sides.
Sand your piece. Use high grit sandpaper to sand out any dings or scratches to get a smooth surface. This shouldn't be a super strenuous job as the paint we are using can paint over just about anything without sanding.
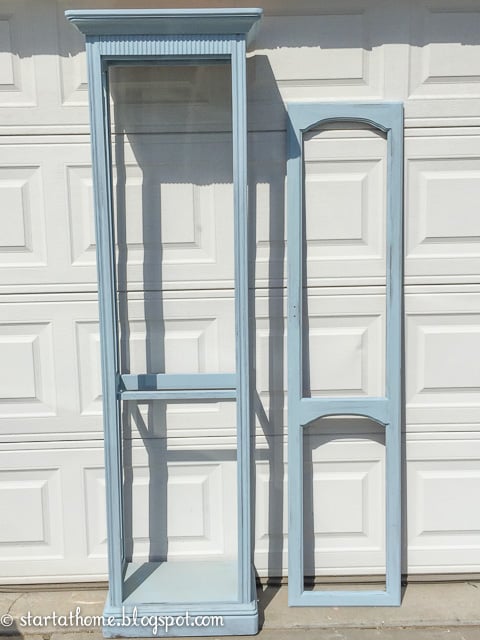
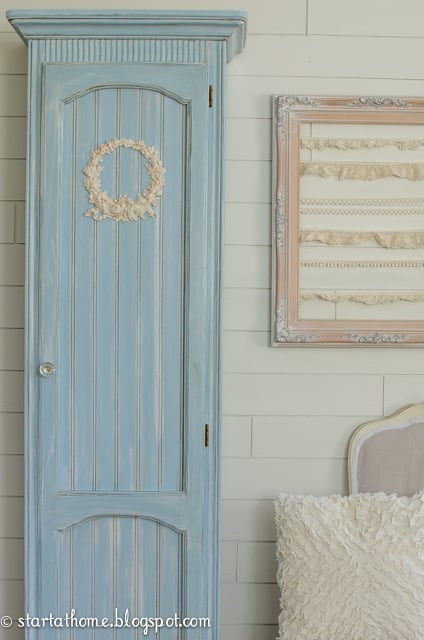
Painting the Frame
After sanding you will paint the frame. I painted the frame with DecoArts Chalky Finish Paint. I wanted this piece to be a soft blue so I mixed:
- 4 oz of Escape (blue)
- 10 oz of Yesteryear (grey)
- 4 oz of Everlasting (white)
You can see all the colors here.
The coverage looks pretty great after 1 coat. 2 coats were enough to paint this piece.
Add Panels to the Frame
After painting the frame you will need to add panels of bead board to fit in where the glass and mirrors used to be. This is an easy solution to fill in empty space. Paint those panels with the blue paint as well.
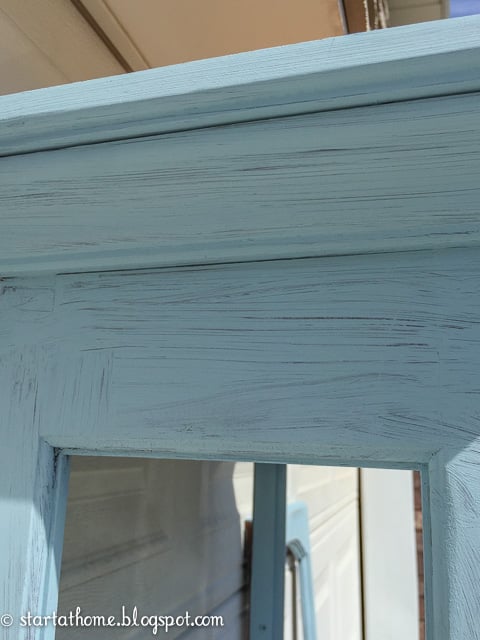
Dry Brush Your Cabinet
Once the blue paint dried, I used Everlasting (white) to dry brush the entire piece. Dry brushing brings great texture to any piece. You can see my dry brushing tutorial here.
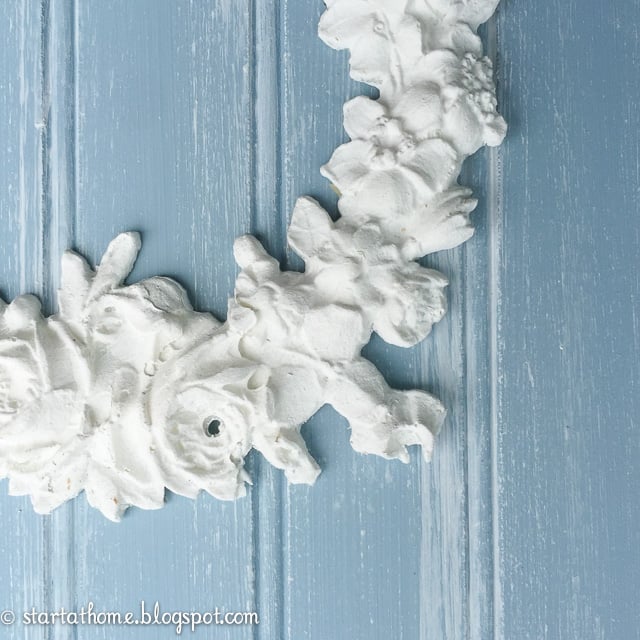
Add Applique
Another option to create a unique finish to a curio is by adding an appliqué. This just adds another decorative element to make it pop.
Seal Your Curio
When the paint is all dry it is time to seal your furniture. I sealed this piece with a water-based clear coat. When the top coat is dry you can also apply a glaze. I applied a glaze to all the cracks. I like to glaze after I apply a top coat because it allows more time to work with the glaze.
Glaze can be a great tool to use when restoring and painting a curio cabinet, or any furniture. It allows your piece to have more layers and dimension, as well as creating an antiqued effect.
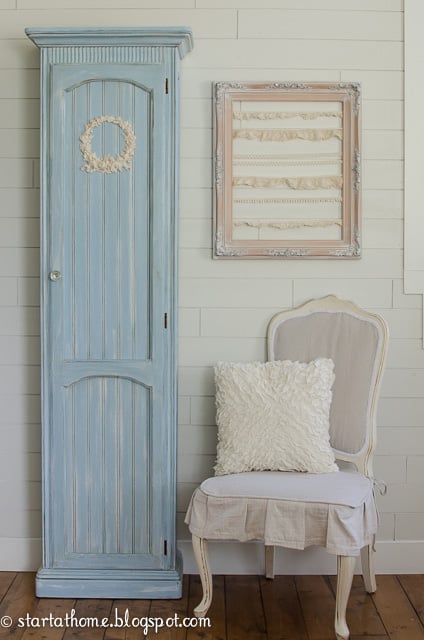
I love taking furniture and turning it into something that is so much more user friendly. This is now completely updated as well as provides storage that wasn't there before with all the glass shelves.

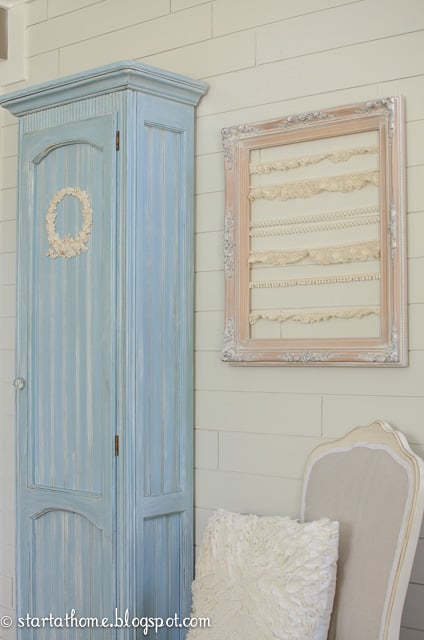
There you have a DIY painted curio cabinet with chalky finish and dry brush technique. What fun ways to see all of the wood details on these restored curios.
Idea 3: Double Door Curio with Chalk Paint, Chicken Wire and Bee's Wax
This double door old fashioned curio desperately needed a restoration update. See what you can come up with when you combine chalk paint, chicken wire and bee's wax finish.

And this is what my end result looked like! Beautifully updated and repurposed for much better use.

View the complete video of restoring and painting a curio cabinet here:
Prep Work for Double Door Curio
Remove all the doors and hardware including hinges and door latches. I also removed the glass from the doors and took off the back and the mirrors.
Sand everything down using a 220 grit sand paper and then wipe and vacuum any remaining dust off.

Cut Down Bead Board and Install
When everything is taken apart, cut down the bead board to fit where the glass on the sides and the 2 bottom doors used to be. To hold the bead board in place I used the previous clasps that held the glass in place.

I wanted to reuse the old back so I carefully used a putty knife to pry the mirror off the backing. Cut the bead board the same size as the mirror for the back.
To install the new back, I used double sided sticky tape to stick the backing and bead board together. This will hold the bead board in its place while screwing the back in place.
Make New Shelves
The next step is to make new shelves as this old curio didn't come with any shelving. I used ½" thick MDF to build shelves.

Paint the Curio Frame, Shelving and Doors
When you have assembled your shelves, it is time to paint the curio. I used Chalky Chicks Old Lace Paint in my Erlex HV5500 paint sprayer.
A paint sprayer will help you to get an even coat, but make sure to watch for overspray and cover any areas you are worried about getting paint on.

Add Chicken Wire
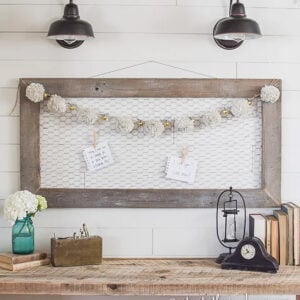
With the previous curios I used a more modern replacement with bead board to fill in doors where glass had been. Another option you can try is by replacing the glass fronts with chicken wire. Remember to pull the chicken wire tightly so that it lays flat, similar to this farmhouse frame with chicken wire.
After the paint is completely dry, add chicken wire to the door backs with an upholstery staple gun to attach. Use tin snips to remove any excess chicken wire.
If you are not a fan of chicken wire, you can either go back to the bead board method to install hard fronts or keep the glass and apply a frosted spray to it so it is no longer transparent.

Assemble Curio and Seal It
Assemble all the pieces back together. Make sure to double check that you are putting the hinges back on correctly. Once everything is back together, do any touch ups needed.
Seal it all with Amy Howard's Bee's Wax for an easy finish.

If you are wanting to give that old cabinet a much needed update, give any of these 3 easy ideas for restoring and painting a curio cabinet a try! It's simple and significantly less than purchasing a whole new piece of furniture. Look here for more hutch painting transformations.

Happy DIYing!
Brooke
Nancy says
Do you have a tutorial on how to add the beadboard? Thanks.
alicia says
Found you on a blog share and I love love this! We love chalk paint and this is simply stunning!
xoxo
Alicia
Evija says
Lovely makeover, you did a great job, so happy to have to featured this week on #OMHGWW! Have a great day x
jaime says
My jaw dropped! No, honestly, it did. What an incredible and beautiful transformation. I want to gush like a teenage girl . . . but I'll try to hold on to my dignity. Thank you so much for the idea for additional storage for small (or large) spaces. Well done.
Marty@A Stroll Thru Life says
I love this idea. How genius and what fabulous storage.
Christina Brewton says
I love your posts..........! They are so clear and specific. Well you’re so creative. Thanks
Rachel Atkinson says
Hi! This looks great! Would you say this "tranquility" color is a mint color?