An easy picture frame molding accent wall to make your home look like it was professionally designed.
DIY wood wall treatments are some of the best options for creating an accent feature wall or room in your home. Of course there are molding variations and different styles like adding wainscoting, shiplap, chair rail accents or crown molding. But picture frame molding is ideal for ease and classic style.
Picture frame molding, also called box frame molding, is one of my favorite ways to spice up an entire wall. It isn't big and bold like other molding pieces. But it adds a beautiful touch of elegance to any room it is in. It is also one of the easier wall treatments to install as a first timer.

Why You'll Love This DIY Picture Frame Molding
- Requires no additional decorations
- Frames your bed or table with a focal point
- Adds embellishment to a boring wall
- Suitable for a living room wall, bedroom or dining room
- Only needs paint on wall molding
- Creates the appearance of expensive finishes without the cost
Measurements for Trim Pieces

Above are the measurements I ended up with. You can use these if desired. However, I recommend measuring your space and then creating your own measurements so it is centered on your wall.
For now, the picture frame accent wall is only on one wall behind the bed. Down the road I would like to add it to the rest of the walls so our entire room is embellished with box molding. Finishing touches like these are a great way to make a good interior a stunning design space.
Supplies
- Level
- Hardwood ornamental molding (larger) - 5/16 in x 11/16 in x 96 in
- Hardwood ornamental molding (smaller) - ¼ in x 13/32 in x 96 in
- Nail gun
- Tape measure
- Miter saw
- Miter shears - Making cutting so much easier
- Caulk
- Paint primer
- 150 grit sandpaper
- Paint
- Painter's tape if needed
- Paint brush or sprayer
Shop all of my favorite tools here
How to Create Picture Frame Molding
This DIY wall molding is so beautiful and can be used in multiple places, not just a bedroom. It's a great way to create a classic look that doesn't require a lot of decorations. Follow along for this simple step-by-step tutorial.
Quick Steps at a Glance
- Measure your wall space
- Cut your molding trim to size desired
- Create your outside boxes (larger molding)
- Form your inside rectangle with (smaller) molding
- Create boxes on top using same instructions
- Caulk and fill holes
- Prime, sand and paint

Step 1. Measure Your Wall Space
Measure the width of your wall to figure out the center point of your wall and placement for your "boxes". Try to make precise measurements. This will assist in determining where to place your larger molding pieces to form your exterior wall trim.
Drawing this out on your wall is helpful. I measured 2 inches up from the top of the baseboards to start on the bottom boxes first.
Step 2. Cut Your Molding for Picture Frames
Measure and cut your trim molding pieces with your miter shears (seriously the greatest invention ever). No need to use a miter saw for these cuts.
Your trim work end should be cut at a 45 degree angle and fit together with the molding piece next to it (to form a rectangular corner).
Step 3. Create Your Outside Boxes
Use a pin nailer to hang up your (larger) molding. You will also want to use a level so your exterior boxes are nice and square.
If you find that your corners aren't exactly at a 45 degree angle and you have corner gaps, don't panic! These can be filled in later with a small bead of caulk. Above all, make sure your wood pieces are level and straight edge for your design plan.

Step 4. Form Your Inside Rectangle with Smaller Molding
Use your smaller decorative trim pieces to form molding boxes inside the first rectangle. Secure these with your nailer.
If you find that it is too hard or meticulous to make the indented corners, another option might be to only do a rectangle without the indents. Adjust as needed for your decorative wall panels.

Step 5. Create Boxes on Top
After the bottom trim work is done, move to the exterior boxes on top. Repeat the same steps you used with the lower boxes as with the higher, but using different measurements.
Place them high enough that you can see the decorative panels over the headboard of your bed. A beautiful feature wall isn't much of a feature unless you can see it.

Don't forget to keep using your level! Crooked boxes do not look good as an end result.

Step 6. Caulk and Fill Holes
When all of your decorative molding is up, it is time to do some finishing work like caulk and fill in nail holes. Caulking will help to fill in any seams or cracks. I love caulk because it can hide slight imperfections and make your final product look more polished. Big imperfections may require wood filler. Be sure to use paintable caulk.
Because my pin nailer gun makes the nail holes very small, I also use caulk to fill those in. If you use a brad nailer I highly recommend using putty to fill in nail holes. This will help you achieve a nice and smooth finish.

Step 7. Prime, Sand and Paint Picture Frame Molding
With the use of decorative wall accents, it is always a good idea to prime your wood. When the primer is dry, use 150 grit sandpaper for a light sanding to smooth everything out and create a nice finish. Make sure to remove all of the dust particles with a rag or a vacuum.

And as the final step, paint your wall molding with a fresh coat of paint to match with your wall color if desired. The finish will be personal preference. I like the look of satin finishes on the wall, but using a semi-gloss finish on your molding will make this DIY look stand out slightly against the satin. Test a small area with a paint sample in the finish if you are unsure.

DIY Picture Frame Molding
DIY wall moldings are the perfect design elements to add to any room in your house. It can easily be done as a weekend project with a couple pairs of helping hands. Plus, these type of wall accents make a huge impact on any style.
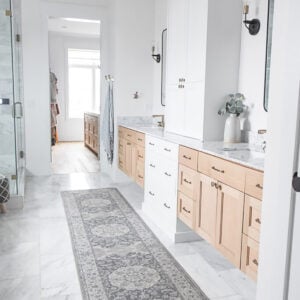
This master suite turned out so beautiful. The visual interest from this more modern accent wall makes all the difference. You can see how I continued this lovely full decorative panel into the master bathroom.
Happy Decorating!
Brooke

Leave a Reply