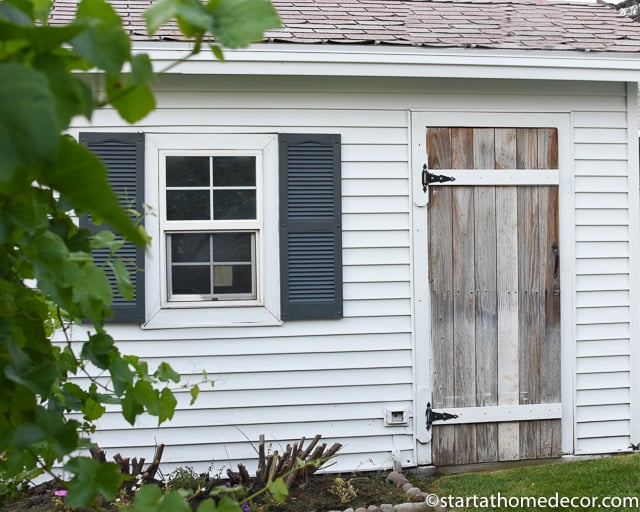
Start sprucing up those outdoor spaces by giving your exterior shed a fresh coat of paint.
When looking to give your backyard a dramatic facelift, an easy place to start is with an outdoor building or shed. This can make the most obvious visual difference that isn't landscaping.
After painting our home exterior and pergola, it was obvious that our garden shed definitely needed a little TLC. The shed walls had peeling paint, door handles were rusty and the shrubs were over-grown around it. The task of painting a backyard shed may seem daunting, but see how the painting process can be completed the easy way.

Supplies to Consider for Shed Update
- Paintbrush, sprayer or paint roller
- Exterior Paint
- Paint scraper tool
- Primer
- Power washer
- Painter's tape
- Painter's paper
- New hardware for door
Wood Shed Exterior Preparation
Prepping your outdoor shed and the surrounding area is the first step to restoring your backyard glory.
Cut Overgrowth
Cut down any overgrown bushes surrounding the exterior walls of the shed. It's surprising how different the shed looks when there isn't a mass of greenery overtaking the entire building.
Evict the Bugs
Next, we tried to evict all of the wasps that had taken up residence. I think we won, however, it wasn't without getting stung a few times. Ow.
Shed Surface Prep
After reclaiming the shed, the next step is to prepare the surface of the building by removing dirt and old paint.
Scrape Loose Paint
You definitely do not want to start painting on an unclean surface. Your exterior paint will not be smooth and the grime can ruin your brush if that is what you use. Use a paint scraper if needed to remove any flaking old paint.
Remove Grime
It is a good idea to spray the walls down and give the shed a good cleaning. This can easily be done with a pressure washer to get rid of all the dirt and grime. The power wash is an important step that is worth the time if you want to achieve the best results.
As you can tell, the siding on this shed has faded in the sun over the years. It was definitely time for a new coat of paint.

Tape Off Windows and Doors
When the shed has a clean and smooth surface, the next step is to tape off everything you don't want painted. That includes doors, windows, or any hardware. The right way to do this is with painter's paper and tape. Doing this will protect those areas from any overspray that will happen when we paint.

Prime and Paint Your Shed
Select the Best Type of Paint or Primer for Your Shed Material
This shed is vinyl siding so I used Sherwin Williams Extreme Bond Primer for my new paint to adhere well. One thing to consider is the paint compatibility with vinyl. If your shed vinyl is not compatible with the paint color you are using, your siding can warp in the sun. Whether it is a wooden shed, metal shed or vinyl, be sure to pick the best shed paint for your project.

Primer
Now for the fun part of the project. You might think that you can get away without using a primer as part of your surface preparation. But priming your project will help to adhere paint for a long time, creating longevity overall.
Consider what painting tool you would like to use for application of primer and paint. I chose a paint sprayer for the best coverage, but you can also utilize any paint brush or roller that you prefer. The sprayer I used to paint my shed is the Graco Magnum X-7. This paint sprayer makes a big project move much faster.
When you are ready to start painting, make sure to apply an even layer of primer over the entire shed for your first coat. If you are using a paint sprayer, be mindful of the overspray and being outside. Your neighbors might not appreciate a bunch of paint blowing through their fence on a super windy day, so be conscious of weather.
You can view my video on how I primed my shed here.

Fresh Paint
I picked a palette that was light and bright for my brick exterior and decided it was the best way to go with this space too.
Make sure the primer is completely dry before applying the first coat of paint. Try to apply paint with even strokes and full coats. This will also help you to achieve clean lines. Then apply 2 coats of Sherwin Williams Exterior Emerald Paint in Bright White Paint. I used a satin finish so it wasn't too shiny, but it would still clean up nicely.

Finishing Touches on This Storage Shed
Finally, the last step is to paint the shutters. The shutters are painted with Sherwin Williams Peppercorn in Emerald Exterior as well. This is one of those paint colors I had to have specially formatted so it wouldn't warp the vinyl shutters.

Be sure to allow enough time in the drying process before you make additional changes. You can also opt to replace your hardware if it is covered in rust or damaged.


The shed turned out fabulous! I love the paint colors. Adding the right paint color really made this shed look cleaner and updated. It is amazing what a little coat of paint and cleaning up did for this garden space.
If you have outdoor structures in need of some paint, now you know the easy way to tackle your painting project!

Other Ideas for Updating Your Outdoor Space
- Paint your deck with a new finish
- Add a porch swing
- Update your outdoor seating with some new garden furniture
- Change out your traditional flower pots for big and bold
- Adjust your curb appeal - also in the backyard, not just your front yard
Happy Painting!
Brooke


Leave a Reply