Create your own aged pottery piece with this easy mud vase DIY.
Are you looking to add a unique and trendy style to your interior décor? Making your own DIY mud vase is a great way to craft a perfect piece of artwork that is sure to impress while also appealing to your preference for an artisan vase. This process may seem daunting, but it is actually quite easy and straightforward.
In this article, we will explain the steps necessary to create a clay look, how to choose the best type of mud for this project, and caring for your vase so it will stay clean and in good condition for years to come. By the time you finish reading, you will be a master of the mud vase DIY project.

If you are someone who loves the look of antique and rare decor, this post is definitely for you. You might be thinking, a mud covered vase? I know that sounds weird, but bare with me because the outcome is amazing, especially if you love the look of vintage or farmhouse aged vases.
Supplies for a Making a Mud Vase
- Old vase
- Black or Charcoal spray paint
- Plaster of Paris
- Mud
- Water
- Plastic gloves, especially if you don't love getting your hands dirty
- A tool for mixing
- Fine grit sandpaper
- Top coat - matte finish

How to Make a Mud Vase DIY
Acquire Your Vase
You can use any old vase for this project. Grab some from your local thrift store if you do not want to use your Pottery Barn vases, or shop your house for no additional cost.
I am using old glass vases for this project. They no longer match my decor so instead of throwing them out we are going to bring them back to life with this easy DIY vase tutorial. You can also use a ceramic vase.
Clean Vase
When you have acquired your vase, even a thrift store vase, make sure it is clean before you begin. If it is really dirty, give it a good cleaning with some detergent and a scrubber. If the surface exterior isn't too bad then go ahead and use a damp paper towel and give it a good wipe down.
Spray Paint the Entire Vase
After your vase is dry, it is time to apply spray paint. I used Rustoleum's chalked spray paint in Charcoal for this simple DIY. Black spray paint or any dark gray leftover paints is fine.
Spray your vase with the first coat of paint. Allow it to dry and then add a second coat. Your vase might be ok without using multiple coats of paint, just check it as you go.

Mix Up Plaster of Paris and Mud
The next step is to create the mud mixture for this mud vase DIY. Mix three tablespoons of Plaster of Paris with about a cup of water and a cup of mud. I love this dirt method because I can literally go dig up a handful of dirt from my backyard or flower beds. Any dry dirt will work for this project as long as there are not big rocks in it. Measurements do not have to be exact, just mix until you have a mixture that isn't too runny or excess mud.


Add Mud Mixture to Mud Vase DIY
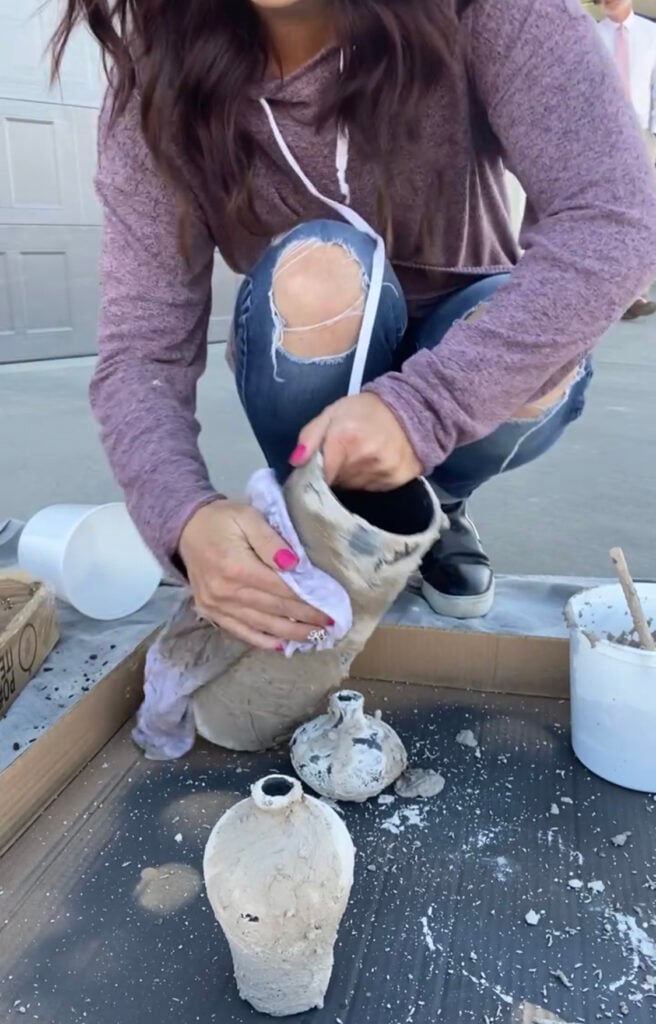
Next up, rub your mud mixture onto your vases. You can use plastic gloves if you really hate getting your hands dirty, but I prefer to use my hands to get the desired look I want. Apply mud all over the whole vase.

Allow for some dry time. But before the mixture dries all the way, take a wet rag and rub some of the mixture off. The Plaster of Paris will dry pretty quick so do not wait too long. If the Plaster of Paris mud mixture is too thick you can use 220 grit sandpaper to sand some of the mixture off of the vase.
Finish Coat
Feel free to do a little more sanding after the dry time if you prefer a smooth finish. I like mine to give the appearance that it is more authentic and imperfect so I do not sand the exterior as much. It's all personal preference on how much texture you like.
When your vase is completely dry, you can apply a finish for the final step. A spray finish works really well. Top coat this piece with a matte finish to get a good seal on the finished look and allow for time to dry completely.
The Finished Look - Mud Vase DIY
When your piece dries all the way you will have a beautiful mud covered vase that looks expensive and vintage. Check out how to use vases on shelves or pegboards, and find the perfect stems or florals for your new vases.
I love using these vases for my counter and table decor in my kitchen. They fit my neutral color scheme of my home decor perfectly. I hope you enjoy this easy mud vase DIY tutorial.

Creating unique and stylish pieces for your home doesn't have to break the bank. With this simple DIY it only requires a few materials and easy steps for anyone to follow. When it comes to designing beautiful, custom vases, you don't need to be a professional to get the job done! So, the next time you're looking to spruce up your interior design, try your hand at making a mud covered vase.
A mud vase DIY provides an opportunity to tap into your creativity and gives you a chance to save money while incorporating your own sense of style and design for your home. For those who love a vintage or aged pottery look, this project is for you!
Looking for other vase ideas? Check out this one from my daughter's midcentury boho bedroom. Or this whitewash technique on a terra cotta pot or vase.
This is a fun one made with dowel rods:
Happy Decorating!
Brooke


Leave a Reply