Instead of throwing out your old frame, update it with a new wall sign.
While it is often overlooked, a great way to update a room is by adding or changing out wall art. It can be easy to just throw out your old wall signs, but why not save time and money by simply updating your own sign? Learn how to make your very own custom DIY wall sign in a few easy steps.

How to Make Easy DIY Signs
This is a great option for making a beautiful sign because it doesn't require a lot of tools or supplies.
Affiliate links below.
What You'll Need for a Custom Sign
- An old sign you can update
- A squeegee or credit card
- Print from Ginger Print Co
- Razor blade, if needed
Ginger Print Co has several prints to choose from. Hop on over and browse through their prints. Ginger will size it for you and ship it out. All of our readers can get 25% off with my code: BROOKE25
This project is the absolute best because you hardly need any tools or supplies to make your own DIY signs.

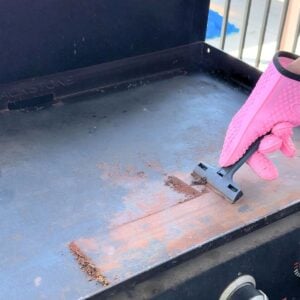
Find an Unused Sign
The first step is to locate an old large sign that is not being used in your home. An old welcome sign or a large wooden sign are great options. I located an old and unused Christmas sign with a rustic frame that would make the perfect DIY farmhouse sign.
Choose a Print
If you are using Ginger Print Co, head on over to check out their cute prints and pick the size and style you need based on your old sign measurements. Order and it will mail right to you. (Don't forget the discount code above!)
You can also use other prints if you want to go a different route. But Ginger Print is awesome for the easiest application ever.
DIY Wall Sign Application
When your print arrives, the next step is to line up the top of the print with your frame pieces. An easy way to do this is by taking a little bit at a time.

Pull back the sticky backing of your print down to about 6 inches and line up the corners at the top. For best results, the corner and top need to match perfectly. If they don't the rest of the canvas will go on crooked.

Once the print is lined up, it is a great idea to use a squeegee or credit card to press the peel and stick canvas onto the sign. This will help you to remove any air bubbles and get a smooth surface. When your print is completely sticking, you can pull the backing off another 6" and squeegee the next section.

Repeat this process every 6 inches or so on your DIY wall sign until the entire backing is gone and your print is secure.
Remove Excess
Sometimes frames are not entirely even and proportioned. When that happens you might have extra canvas that needs to be removed. The best way to remove excess canvas from your large wood sign is by using a razor blade to cut along the edges for a smooth finish. I free hand this process and it turns out great.

Hang Up Your DIY Wall Sign
The last step is hanging up your sign. Whether you have small signs or big ones, putting them up on a blank wall can really add to your overall home style.
Depending on the weight of your rustic sign, you can use traditional anchors for hanging. If it is lightweight, the picture Command strips are also a great option.
There you have one of the most easy DIY projects ever! The final product turned out so well and ties in nicely to the existing home decor.

More Options for a DIY Wall Sign
Though I love a custom printable sign, it's not everyone's first choice. Here are some of the best DIY wood signs to accent your wall space in different ways.
These plaid signs use napkins and are a cinch to make!

Wallpaper signs are similar to the napkin signs with a simple wood frame and an elegant pattern. But you can also make them with any wallpaper you have to incorporate bright color or a more rustic look.

Modern art signs can be done with leftover paints or white paint and a few neutral colors. See more on this great tutorial for an abstract art DIY wall sign.

One of my favorite DIY wooden signs is this boho inspired wood sign. It is a great idea for using up scrap wood or even pallet wood. What a fun addition in my daughter's room.

And if you want an easy project that won't take much time, this Sharpie DIY wall sign is so fun!

Try out a DIY wall sign in any room to make a beautiful statement with your existing home decoration.
Happy Decorating!
Brooke


Leave a Reply