
Update Your Home’s Curb Appeal without Replacing Your Door
When buying a new home isn't in the budget, the only option is to update. Updating your current home can feel like a big job. You'll find that as you remodel to your liking, everything can easily be done in segments.
Breaking your projects down into simple steps will save you stress and help to budget along the way. We knew this home would require work and regular maintenance. Updating it in sections lessened the overwhelming amount of work.

Since buying this house we have put many hours of labor into updating. The previous owners had done dryscape landscaping in the front yard. The first thing we did was remove that to plant grass. The next change was replacing the vinyl siding with hardy board. (You can see that full renovation here.)
Exterior Door
Making exterior changes like replacing the bottom windows and a new door was on the future projects list. After living there for about 4 years, the paint on the front entry door started to bubble and chip all the way down to the metal. Years of exposure to the elements and sun damage didn't help. It had definitely seen better days.
When exterior doors start to fall apart, it's time to either refinish your old door or replace it with a new one. Looking around at new doors was fun, but not very realistic. It cost $3000 for our top choice door. Unfortunately, our finances couldn't accommodate.
An alternative option that was more budget-friendly became priority. I opted to give my front door a makeover and remove the existing paint since the actual door was in fairly good condition.

How to Refinish an Exterior Door
Follow the DIY steps below to get an amazing new exterior in no time!
Remove Old Finish From Metal Door
To start this DIY project, removing the existing finish is the first step. Attempting to sand down the door made it apparent that the entire door needed to be stripped down to the metal in order to get a smooth finish. Plus, the surface of the door had many coats of paint on it. It needed something more heavy duty than sandpaper.
Applying Chemical Stripper
Applying a chemical stripper will do most of the hard work for you to remove the many layers of latex paint. I used Kleen Strip from Home Depot to take the exterior paint off.
As a word of caution, this stripper will eat anything it touches, including your skin. Battle marks on my body prove it! It also ate the plastic around the side light windows.
If I am being honest, I was slightly excited about that because I wanted new ones that didn't have the lines through them anyway!

Adding Casing Around the Door
While working on our front door, my husband had the most brilliant idea to case in the front door to match the upper windows.
To do this, we first cased the brick around the door. Then we added the hardy board to the outside edges. We used silicone and Gorilla Glue to hold the hardy board in place. Once the sides were dry we added the header. This helps with fluidity into the entrance of our home.

Unhinge Door to Remove All the Previous Finish
Here is the door all cased in with the header and stripped down. You can see on the main door there is still some areas of paint around the edges. Taking the door off of the hinges will give you the best results for removing the remaining paint.

Time For a New Coat of Finish
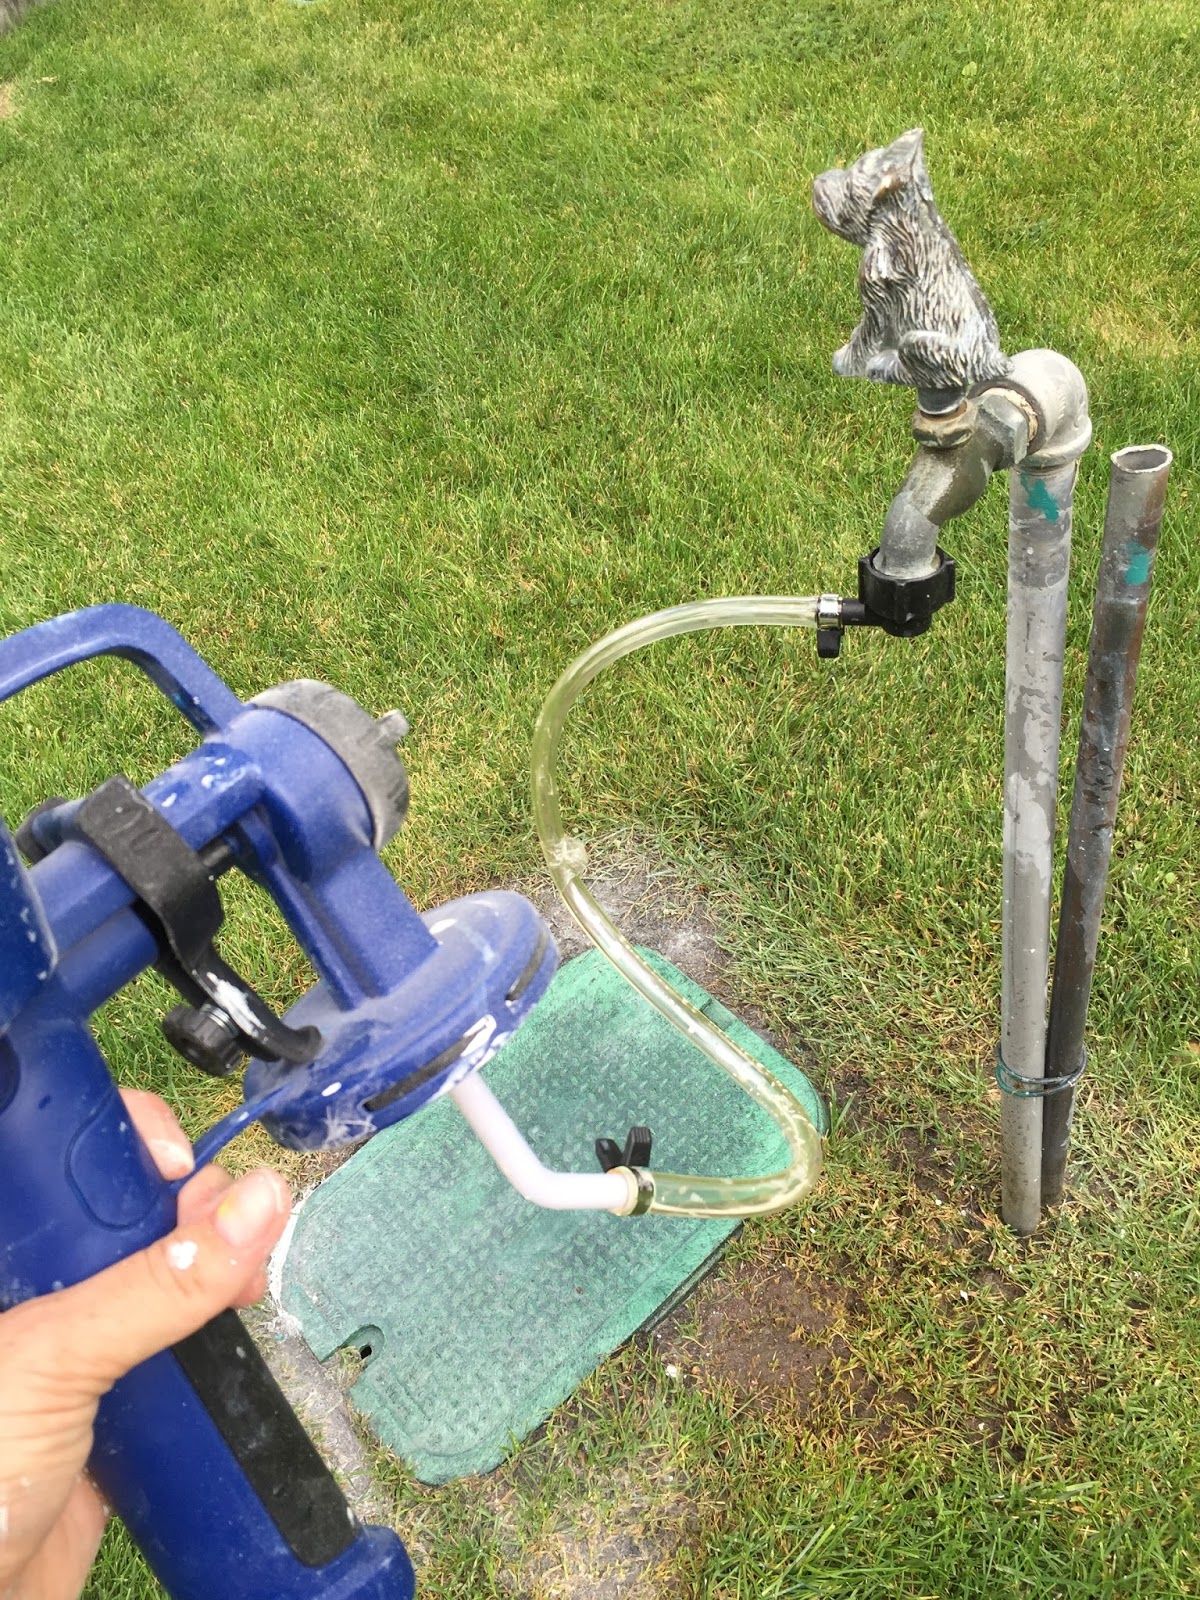
Now it is time to paint. I wanted a very smooth finish with no brush strokes. Using a paint sprayer for this project is the preferred method to eliminate brush strokes. It is a good idea to take the extra time and use painter’s tape to cover parts of the door that doesn't need to be painted. Also add a little more paper or plastic around the door to allow for the over-spray.
I used my Home Right sprayer for this project. This sprayer is ideal for projects like this because it doesn't have as much over-spray as some of my other guns and it is easy to work with.

Applying a Coat of Primer
For the first coat, prime your door with a type of primer made for metal if your door is made out of metal material. This will prep the finish for paint.
When the primer has dried, apply 2 coats of paint to your exterior casing and sidelights if using a different color, allowing time in between the coats for drying. My door is a different color, so I first painted the casing and sidelights using Pratt and Lamberts Grey Moire.

Once you are done painting, make sure to clean out your spray gun fast so the paint does not get stuck in there. The Home Right sprayer now has this awesome attachment that makes a quick and easy way to clean out your sprayer. Hook it up to your water, turn it on and it washes all the paint out.

Final Coat of Paint
After the side lights and casing are painted, remove the exterior door off its hinges. Take your door to a separate area to spray it. I used Pratt and Lambert's Putty for my door.

Final Step-Replace Door Hardware
After the paint is dry, rehang your door. Replace the kick plate and door handle for a fresh hardware update. And we FINALLY have a new, but old beautiful front door.

Adding More Curb Appeal
To help add to the curb appeal I found these boxwood trees at IKEA. Faux plants are an excellent option to use all year round. Other planters here.
You can also see how we ended up changing our brick here.

Enjoy your new door with this DIY front door refinish!
Have double front doors? Check out how to use the same technique to make them stand out here

Brooke


Parlor Room Ponderings says
Very nice! You're blessed to have a husband with an eye for design. You must feel so satisfied every time you walk through that door! Great job! Diane
the cape on the corner says
love the look for fall!
b
Mary K.- In the boondocks says
Your front door looks very nice, The new color makes it pop and gives it a focal point.
lala says
WOW!!!! Amazing transformation - it looks fabulous!!!!
Kim says
What is the frame of the door made of Wood or metal clad? Love the idea. I need to frame out a door, it is metal clad and think this might work.
Earl Mark says
I’m glad I came across your post. We may give our front door a new look soon, and I’m going to look into the Home Right sprayer. It also looks like using the Kleen Stripe to remove the paint worked out for you. I think the new color of your front door looks so bold and beautiful.
Cris says
Just wondering, he didn't use any screws or nails to hold the side pieces or header piece to the brick, just Gorilla glue?
Also, is the header piece, made of 3 pieces or did you buy it that way?