
Dress up your bedroom with a DIY modern farmhouse bedside table.
Why buy a new nightstand when you can customize your own for half the cost? Instead of buying a new piece of furniture for Little Buddy's bedroom makeover, I opted to build our own nightstand with leftover wood from building the house to avoid much additional cost.
Learn how simple it is to build a modern DIY nightstand with accompanying storage and style with this easy-to-follow full tutorial.
This farmhouse nightstand is a wonderful way to utilize extra wood. I used white oak wood remaining from our building project. The only thing I purchased for this DIY project was hardware for the drawers.
I found free DIY nightstand plans for this easy build from Shanty 2 Chic (view here) and then adjusted them a little bit to fit our needs. These base plans provided a solid foundation to work from and allowed me to add my own unique touch to the project. I thought about incorporating a DIY floating nightstand with drawer, but this style fits the room the best. Get ready to impress with a handmade, unique drawer nightstand!
Supplies for a DIY Nightstand
Refer to Shanty 2 Chic's plans for exact amounts on wood on these modern nightstands. If you don't have project wood around the house, head to a hardware store to pick up your supplies.
- White Oak
- Baltic Birch
- Pine wood
- Paint
- Paint brush
- Ryobi Planer
- Ryobi Biscuit Joiner
- Wood glue
- Wood screws
- Drawer slides
- Kreg jig
- Drill
- Pocket hole screws
- Sander
- Sandpaper
How to Build a DIY Modern Nightstand
Shelf Bases
The first step after gathering the right tools and all of your supplies is to build the two shelf bases that will fit into the frame. I used white oak for the simple design of the shelves. Follow the step-by-step build plans listed above. You will end up with an open shelf for the top and one for the bottom shelf.
Build the Frame
For the next step, follow the easy DIY nightstand plans to build the nightstand frame. The overall shape will end up looking like a U. I strongly suggest painting the frame before installing your shelves. You can use spray paint or a paint brush. Do touch ups after your shelves are installed.
Picking a dark color for your frame is the best option to make it look similar to using black iron or metal. This modern farmhouse design makes a great bedside table.

Install the shelves into the painted frame. You will want clean lines so it is best to have two people to get this level. Remember to take your time and be patient during this step. It may be tempting to rush and get everything done quickly, but accuracy is key when it comes to this step. Having an extra set of hands to hold the shelves in place while you secure them will make the process much easier.

Build Drawers
Now it is time to build the drawer boxes and the top pieces. Shabby 2 Chic uses baltic birch and trims their drawers with pine. Since I used white oak for everything, including my trim pieces, I had to biscuit join my wood. A biscuit joiner is a woodworking tool that joins two pieces of wood together. This is a biscuit joiner from Ryobi.

Plane the Wood
After the wood is joined together, an easy way to get a nice and smooth surface is to plane the wood. I used this handheld planer from Ryobi for these solid wood nightstands. It was the first time I had used either of these tools, but I absolutely loved them.
Not only did the planer provide an efficient way to achieve a polished finish, but it also allowed for a sense of satisfaction as the rough edges become smooth and refined. It definitely important to have the right tools for the job.

DIY Nightstand Install
When the top piece of your DIY end table is done, it is time for installation. First, you will install drawer slides on both sides of the drawer frame. Next, secure the top piece for both shelves. Then, attach the drawer front face while everything is closed and assembled.
Finally, the last thing you will install is the hardware on the drawer front. Drawer pulls are a fun way to bring in more style with your home decor.

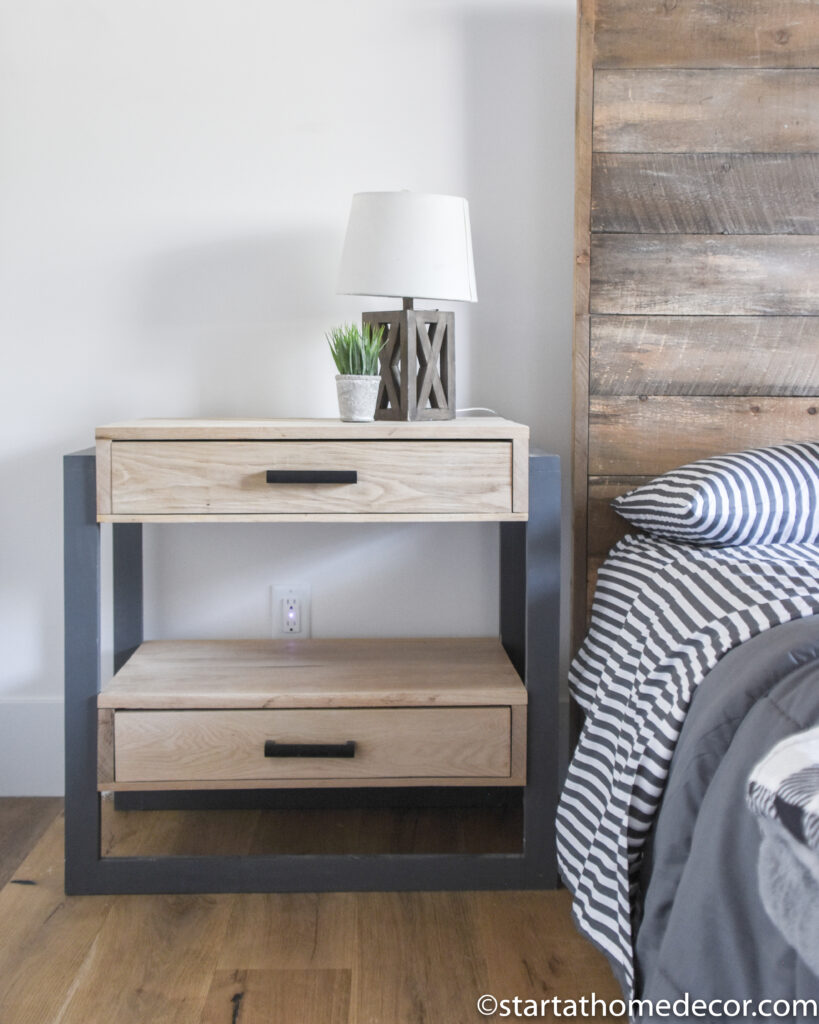
Once complete, this night stand offers a modern look, while creating endless storage options. From the storage provided in the drawers to the open storage concept on the top of the nightstand and between the two shelves, there is plenty of storage space. By following the basic steps listed in the free plans from Shanty 2 Chic, this DIY can fit any space. Using affordable materials and simple building techniques makes this project accessible to anyone, regardless of their skill level.
Simple Nightstand Project
This is the perfect nightstand for Little Buddy's new room. Not only does this nightstand perfectly fit the aesthetic of this contemporary boy bedroom, but it also offers a practical solution with its balance of modern and farmhouse style.
The added bonus of having two drawers for storage is a game-changer, making this piece versatile enough to use in a guest room or even as a small side table in a living room. The possibilities for this DIY night stand are endless, making it a must-have in any space.

Boy Room DIY Projects
View my other projects completed for this room including a shiplap ceiling, a bleached oak desk and a custom bunk bed.

Or this easy bleached oak desk.

And finally, see how I made his bed here.
Creating a DIY modern farmhouse table for the side of the bed is a cost-effective and rewarding way to add a touch of style and charm to your bedroom. From finding the perfect piece of wood to adding personalized details, this project allows you to unleash your creativity and transform your room into a cozy and inviting space.
Get started and see the transformation for yourself. Remember that the possibilities for your DIY project are endless, so don't be afraid to explore and experiment until you get the final product you are looking for.
Happy Building!
Brooke


Leave a Reply