
The best DIY floor vent cover to modernize your home flooring.
Are you dreaming of renovating your dusty old floors with something modern and up-to-date? Do you have an eye for interior design and want to show off your creativity? Look no further than a DIY vent cover upgrade! Everyone loves having the latest trends in home decor and floor vents are no exception. Personalize the look to your unique style with something for everyone.

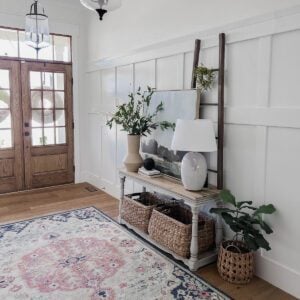
Talking about a floor vent is not number one on most people's agendas, but it's hard to pass the opportunity by without sharing all the details on my new obsession.
Finding the perfect floor vents to go in our house was a labor of love. We've always had builder grade floor vents in our previous homes and honestly, I didn't know there was anything better out there. Cheap floor vents can be SO obnoxious because they are always popping off, getting scuffed up or breaking with slight movement.
The Ideal DIY Floor Vent Cover
My ideal floor vent included all of the following:
- Flush with my flooring
- Metal
- Custom to match my flooring (box stores just do not have the options needed for all of the different types of flooring)
- Easy to install
- Visual appeal
- Reasonably priced
- Won't move if the edge of your furniture is placed on top

The Best Custom Floor Air Vent Covers
I could not contain my excitement (yes, even over a floor vent!) when I discovered these vents by Aria that met every single requirement on my list. The absolute best part about these air vents is that they are easy DIY projects and can be customized for all of the different flooring in your house. As a huge DIY advocate, that is a 100% WIN!

Aria has really nailed it with the sleek modern look for our master bedroom design with a stylish vent cover. They may just be floor vents, but everyone wants a design choice that is visually appealing even if it's on your floor. I should also add that you can easily adjust the air flow with these floor registers. I also really like that they are made in Canada.

How to Install an Aria Vent Custom Cover
From hardwood floors to tile flooring, these decorative vent covers are some of the best options for floor air vent registers. See my video and DIY guide for more detailed instruction on how to install.
Supplies Needed for Decorative Air Vent Cover
- Aria custom cover
- Measuring tape
- Extra flooring
- Tools for cutting flooring to size
Remove Tray from DIY Floor Vent Cover
The first step for installing this new floor vent cover is to remove the bottom tray inside the cover. Simply pop it out by pushing the edge over to the side with your finger.
Measure and Cut
Your next step is to measure your tray and then cut your chosen flooring. Do not cut your flooring to the size of the air duct opening. Instead, you will cut to the tray dimensions. Make sure that you have the correct type of tool for cutting your flooring.
You do want to have a snug fit inside the tray. If there are small gaps then your flooring may move around or get dirt wedged inside the air register.
Add Additional Thickness
The trays are fairly deep to allow for various thickness of flooring. The flooring in our new home was not as thick as the tray so I placed some extra pieces of wood filler on the bottom to give needed height inside.
Lay Flooring Inside
When you have the correct height for your flooring, you can then adjust the direct airflow at the bottom of the base of the cover. If you want more or less air coming through, simply move the vent opening in the base by positioning the two flaps at different levels.
Then, lay the cut flooring piece right on top so it's flush with the metal tray. No tape or gorilla glue needed. Pop the tray back inside the vent base and you're good to go!

I used this with my wood flooring in the kitchen and living area as well as my bathroom tile and I just love the look! This is a perfect quick fix for upgrading to a decorative air vent cover that isn't builder grade from the hardware store.
If you are looking for an easy way to revamp your floor vents in your old house, the ultimate DIY floor vent cover is the perfect project for you. Not only does it provide an aesthetically pleasing addition to any room, but it is an efficient way to conserve energy. The project is straightforward and requires minimal materials, so it’s not just doable, but also affordable.
The most impactful DIY projects start with just one small step. So, let the ultimate DIY floor vent be yours and see how dramatically it can change the look of your room at a fraction of the cost.
Happy DIYing!
Brooke


Leave a Reply