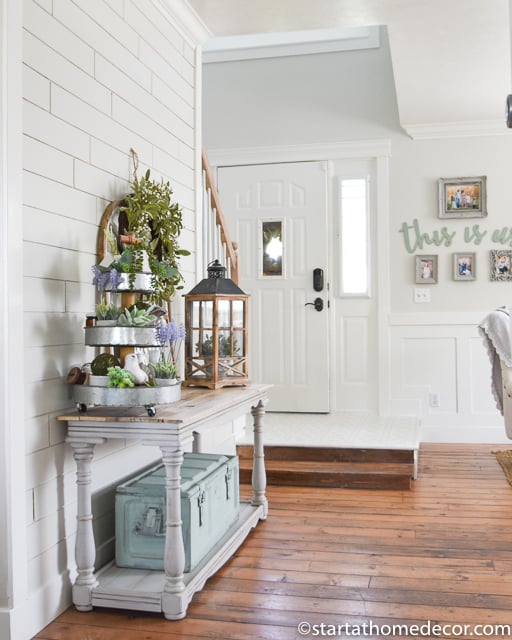
Learning how to use Bondo to fill holes in wood has saved so many things from being ripped out. Like this floor.
Do you have a hole or damaged area in your wood project you are wanting to paint? If you need to repair old furniture, dented trim work or even holes in floors like I had. Check this out, I have a quick and easy solution for you!
Let me show you how to use Bondo Body Filler to fill in holes and do an easy wood repair! If you think Bondo body filler is just for cars, think again!

It makes a very quick and durable wood filler too. Take a look below and I'll show you how I used Bondo filler. It is an easy fix to fill the holes in my wood floor.
After they were filled, I painted my floor for an updated and inviting feature in my entryway. I love how it turned out and I hope you do too!

What is Bondo?
- Bondo is a brand and there are many different types of Bondo but today for our type of repair we will talk about the Bondo Body Filler which is a body putty for use on cars.
- The body filler is a 2 part mixture. It has the putty and a cream hardener. The hardener comes with the product but you can buy more if needed. There are different color options but it doesn't really matter for this purpose what color you have because we will prime and paint it.
- Bondo Body Filler is body putty and is one of the most popular brands used for auto body repair. Many use it instead of using body solder.
- It cures fast and is great because it is non-shrinking and finishes up to be a durable, permanent repair. It makes for easy timely repairs.
- It has excellent adhesion. It will adhere to steel, aluminum, fiberglass, concrete, bare metal and even wood!
- It also adheres to itself so if you find a low spots in your project after the first time using it, you can do these steps a second time or more if needed.
- It comes with hardener needed to make the mixture to do the repairs.
- Great option for surfaces that will be painted.
- Can be molded with the use of masking tape.
What do I use Bondo For?
- I have been using Bondo for a few years now to fill in holes from old hardware.
- Also to fill in small dings and small dents on wood surfaces or trim.
- Lots of other repair work on my wood furniture and many other small areas around my home.
The reason I love to use Bondo for my wood projects is because it has minimal shrinkage and doesn't crack like a normal wood filler. I have found it to be the best way to do an old furniture repair or any other restoration project.
After it is painted you can't even tell there was a hole or crack in the wood.
Take a look below and I'll show you some simple steps on how to use Bondo filler, the most useful substance, to fill holes or large gaps in wood the right way.

When you walk into my front door one of the first things you would see was a banister. I didn't love it and I thought it would be a great idea to open up that area, make it more welcoming and it needed updating too. We decided to remove the old bannisters from the floor.
Which, of course, after we removed our old bannisters from the floor we were left with huge holes in the floor.
The holes were too big to just fill and paint over. I needed something permanent and durable. Also since I wanted to paint the floor again I needed a smooth surface, so the use of Bondo was the perfect fix!
What you need
- Bondo Auto Body Filler or there is an option for wood at Home Depot. Either will work just fine
- Putty knife or plastic spreader
- Stir stick
- Glass bowl to mix the Bondo in or a mixing board
- latex gloves
- Sander or power sander
- 100 fine grit Sandpaper
- tack cloth
- Primer and paint stick
- Paint
How to Use Bondo to Fill Holes in Wood
Here is my complete YouTube video on how to use Bondo. I made this video so you could see exactly how I used Bondo to fill the holes in my floor. Explaining it can be a little tricky.
Once you get the process down it is pretty easy to use. Check out my video and you will see how easy it is to use this product to fill holes in wood. SUBSCRIBE TO MY YOUTUBE CHANNEL HERE
First Step Prep Bondo and Hardener
- Put a small amount of Bondo in your glass mixing bowl or mixing board and add very small amounts of the cream hardener to it.
- It is best to mix in small batches to avoid having excess bondo and to get the ratio of filler to hardener correct.
- Don't add too much hardener because it will dry out and harden too quickly before you can use it all.
- If you use too little hardener it will dry too slowly or maybe not harden at all.
- A good rule of thumb is about a golf ball size of Bondo filler to a dime size amount of hardener.
- You can wear plastic gloves, if desired.
- Beware it is stinky. Make sure you are in a well-ventilated area.
Next Step Mix the Bondo and Hardener Together
- With your stir stick you can mix the Bondo and Hardener together
- After I have the mixed Bondo I like to take the putty knife and work the Bondo together to remove any air pockets.
- Make sure you have a clean surface before you apply Bondo.
Apply Bondo to the Surface
- With the Bondo mixture on your putty knife, place your Bondo into the hole or repair area in thin coats.
- If using on a flat surface try to use thin layers so you have less to sand off.
- Use your putty knife try to create a flat and smooth surface area on the top.
- Let dry. If the temperature is 70-80 degrees Farenheit, it should dry in 10-15 minutes. It may take longer if the ambient temperature is cooler.
- If the majority of the gap got filled but you still need to add more Bondo you can do so now.
- Just repeat the first couple steps on mixing the Bondo and cream hardener
- you can add as many coats as needed to fill the holes in your project.
Sanding Bondo Down
- Make sure you are in a well-ventilated area and you can put on a safety mask too before the next step if desired.
- Sand your Bondo when it is all dry to remove excess material from the repaired area. I use 100 grit sand paper and my orbital sander. A sanding block would work great too.
- For best results use a primer as the first coat before painting, after you have given the Bondo enough time to completely cure.
This is how nice and smooth Bondo is after it is all sanded down. It is a good solid material.

Painting Over Bondo
It is now ready to be primed and painted. Bondo made it so easy to fill in these large holes in my wood floor.

Prime over the top of it with your favorite primer. I like to use Zinsser primer which you can find in many home improvement stores. Once your primer is dry it is now ready to be painted however you like! I chose to do a stenciled pattern in gray and white.

Didn't the final product turn out so great? The holes are no longer visible. Even if you pay close attention you cannot see the holes that the old banisters left behind. And I love that it will be very durable and won't crack because this area gets lots of foot traffic. I think it made a big difference to open up this area and make it more welcoming. The painted floor in a fun pattern with light colors just makes it feel like home. Right when you open the door it is now has a warm and inviting entryway! I love it!!
I hope this helps on your next project! Happy DIY!
Brooke
You might also like...
Details on my pine plank flooring


SJ says
Thanks so much for this rundown! You made what seemed like a scary process super accessible! I filled some large gaps left on my upper stair runners (not supports!) easily and the result is excellent! Thanks for putting this out into the world!