
DIY Fluted Coffee Tables add so much texture to any space. Check out how I updated my old farmhouse table to this beautiful coffee table.
I have seen fluted tables everywhere lately! I love this style because it adds such great texture to a room. Did you know fluting has been around for centuries. The ancient greeks even used fluting in their columns and buildings. It is such a classic and timeless style.
DIY Coffee Table Update-
In my old house this coffee table was in my living room and it looked great in that space. My new house is not farmhouse style. Which landed this coffee table a spot in my unfinished basement.
Instead of buying a new table, I decided to give it a little makeover and turn it into a fluted coffee table .
Why a fluted coffee table? I love the texture it adds to any space and I love the fluted trend.
Dowels are a great way to update any old piece of furniture laying around. Don't be afraid to get creative!
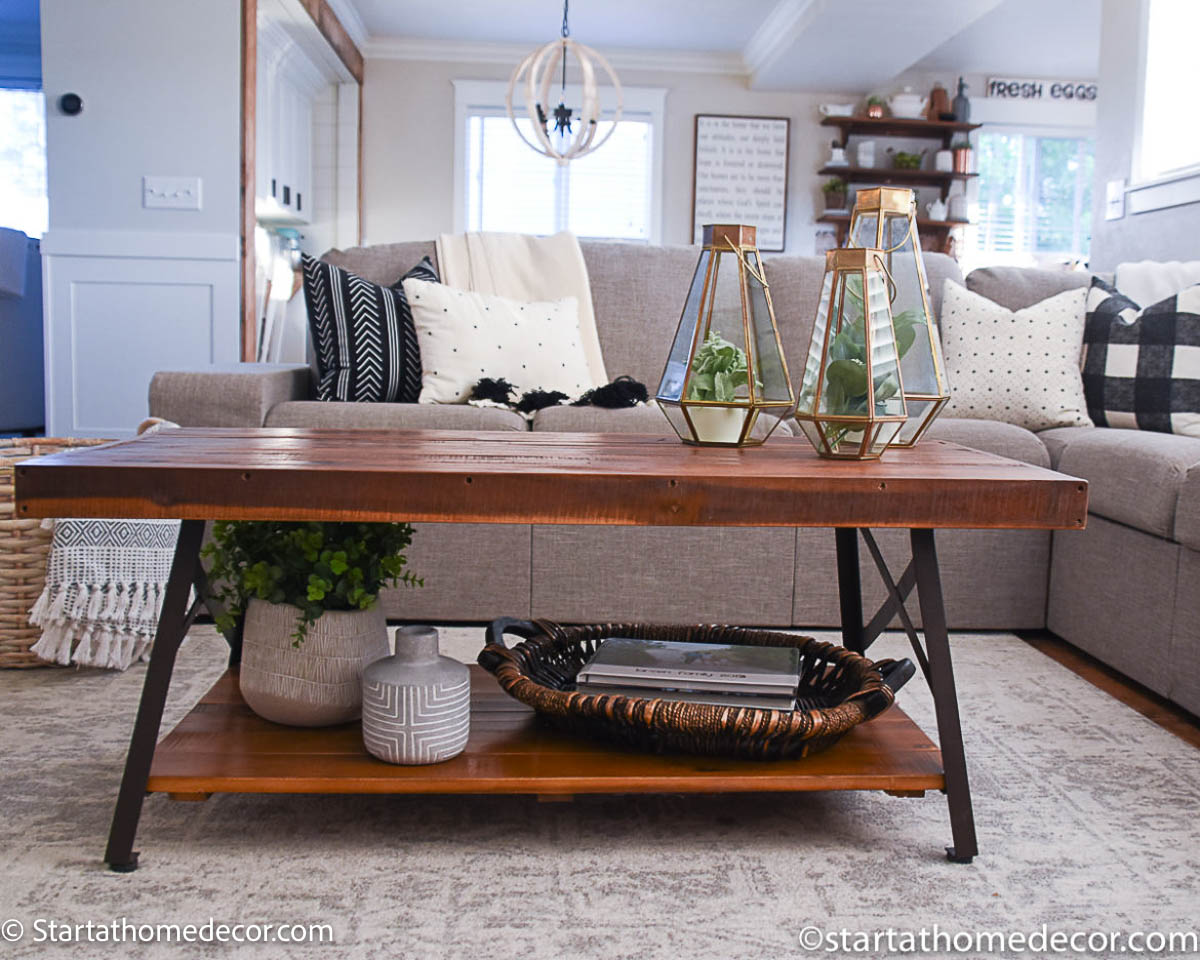
Before-My Living Room Wooden Top Coffee Table
This is a great and sturdy table and the wood top is beautiful. I just wanted something a little more modern for my new bonus room space. Instead of getting rid of it and buying a new one, I decided to add some extra detail by adding fluting to it.
No Need to Buy a Brand New Coffee Table
If you don't have a table in your home to update check around your local area for a used one. You may find a great deal.
- Check out Facebook Marketplace.
- Look around locally and maybe even find a basic thrift store table that can be turned it into a stylish fluted side table.
- Another option would be to get a large circular wooden board if you want a round coffee table.
- End tables or accent table would look great too! Get creative with your fluted table.
Easy DIY
- Timing - This project is quick and easy. I finished the whole table in 2 days
- The transformation of this coffee table went smoothly and was pretty straightforward.
- The most time consuming part was adding all of the dowels to the bottom of the table.
Supplies for a Fluted Coffee Table DIY
- 4- 2x4's that are 8ft long
- 1- 4'x8' sheet of plywood that is ½" thick
- wooden dowels 300 5/16 x 18" long wood dowels
- Brad nails
- wood glue
- Orbital sander
- pre stain
- Weather oak Minwax
- matte spray top coat
- Tape Measure
- Safety Goggles (if desired)
Power Tools to Make DIY Projects Easier
- Miter saw
- skill saw or table saw
- kreg jig
- Brad Nailer
- pin nailer
Complete Tutorial on my YouTube Channel
Instructions for a Fluted Coffee Table
Remove Table Base or Table Legs
- First I started by removing the original base.
- I used my 2x4's to build the base and attached it to the old top of the table.
- To make pocket holes I used the Kreg jig.
- To attach the top of the coffee table I used the same screws that were used for the original base and wood screws will work.

Next Step-Plywood
- Now rip down the plywood for each side of the coffee table.
- This kreg jig makes ripping plywood so much easier.
- I applied the plywood around the outside of the 2x4 frame and used glue and a brad nailer to secure
- End Result= perfect base to attach dowells.

Molding- For an Expensive-Looking Finish
- Before I attached the dowels I added molding around the bottom edges of the table.
- These trim pieces provided me with the best way to slightly set the dowels into the table so the end result is a clean edge all the way around the bottom.
- I like how it looks. It adds a nice finished look to this piece.

Best Part- Adding Dowels for a Modern Fluted Look.
- Adding dowels gives this coffee table a touch of sleek sophistication.
- Attach dowels to the plywood
- Pro tip- I used my pin nailer to attach the dowels so I didn't have to fill all of the holes with wood filler.
- Now is has the fluted look and adds great texture to any living space.

Final Step of the DIY Fluted Coffee Table
- My original plan was to leave the top surface of the coffee table as is and paint the bottom. After I got it put together I was not loving the 2 tone. I thought a better way would be to have a matching wood top and base.
- I pulled out the sander and sanded the top down with a medium grit sandpaper.

Important Tip
- Before applying wood stain add a pre-stain.
- This will help your stain on your table top to go on more even.
- A quick and easy step to help you get better results.

Staining
- When staining I put the stain on a section that has a good stopping and starting point.
- I applied stain to the entire top of the coffee table.
- Then let it sit for about 5 minutes and then I used an old rag to wipe off the excess.
- I repeated that on the bottom of the fluted coffee table.
- Notice how smooth the stain is going on. This is the beauty of a pre stain

Top Coat
- Let the stain dry over night and then you can apply your top coat.
- I like to use a top coat in a spray can so I don't have any streaks or brush marks.
DIY Fluted Coffee Table Reveal
The texture and dark rich color of the DIY fluted coffee table are just what this family room needed for the final touch of sophistication. Now this room is a stylish haven worthy of a design magazine or just cozy enough to just curl up with a good book and cup of hot chocolate.
You can view more details on this room here

Bonus Room -Now I Have My Own Fluted Coffee Table
This DIY fluted coffee table is the perfect finishing touch for our newly finished bonus room. I created a media room, home office and a game room above the garage. You can view the detail of our bonus room here. I also added some built in bookcase to this room. Tutorial can be found here.

Can You Add Fluting to a Wall?
Yes you can. The only difference I have seen it is usually slats of wood, rather than dowels. I would imagine this is has a lot to do with cost. To find enough tall dowels to achieve this look on an entire wall would be tricky.
Nadine Stay has a great tutorial on how she did this to her wall. Check out the tutorial here
You can also buy fluting in panels. It is referred to as pole wrap. I found them at Lowe's here
These panels would be great to go around a round table since they bend nicely. You could even use them in the center of cabinets or wainscoting. This would add a great texture to any space.
Plus, it would save a lot of time in installation. Instead of nailing each dowel use a generous amount of liquid nails to attach a panel at a time.
I hope this helps you create a one of a kind statement piece of furniture for you home.
Happy Building,
Brooke

Leave a Reply