Don't throw a piece of furniture out! Instead, learn how to strip and refinish a piece to fit into your new home.
Furniture pieces are so EXPENSIVE. So much so, that some days I feel like I might be 100 years old before I can actually acquire the funds to get new furniture whenever I want. (Who am I kidding, I do not want to live that long!) Why not learn to strip and refinish your furniture instead?

How to Strip and Refinish Furniture
However, that doesn't mean I have to wait and save up for new furniture to get something I love. I can update the furniture I already have to make it something I enjoy. With the high price of good quality furniture these days the easy and affordable way to update my wood headboard and desk was to add a coat of paint! I have tutorials on how I did both. The results are worth seeing. It totally changed the look of my rooms and I love how they turned out.
DIY How to Strip and Refinish a Bed
It is easier than you think! This is how I got started on this easy DIY project. Let's look at this.
Before - Wooden Headboard
For a wedding gift my wonderful in-laws gave us some beautiful wood furniture for our bedroom. Including a new bed. It is a nice wooden bed frame complete with foot board and side rails. Originally it was wood with some decorative metal frames on it.

Eventually I got tired of the wood and metal.
One of the first things I did was cut off the metal pieces.
Adding Creamy White Paint
Then I put a coat of primer and some fresh paint on the wooden bed frame in a soft, cream paint color with light distressing.
I think it turned out to be a beautiful bed and worked great with my home decor.
.
Old Bed Frame Gets Updated.....Again!
Since I get bored of things easily and my children so kindly picked at the paint, Eventually I decided it was time for a new color!
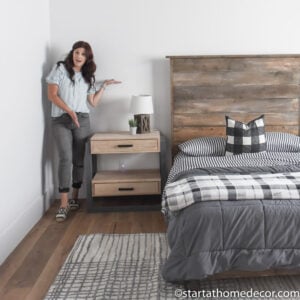
I came up with a new design idea. I wanted lighter walls and a darker color on my bed. This would make the bed frame contrast nicely against the light walls.

I thought black paint would be too dark but, how about some Charcoal! I used Sherwin Williams Peppercorn paint to achieve the perfect charcoal color.
See my full bedroom reveal here.
How to Strip and Refinish a Bed
When to Use Paint Stripper
- I use paint stripper on a piece when I want it to go all the way down to the wood surfaces, especially if I have a piece with a veneer on top. Veneers can be very thin. Unfortunately, if you accidentally sand through the veneer there is no fixing it without replacing the top.
- If a piece of furniture has has more than 1 layer of paint. Paint removal is easier with chemical paint strippers.
- If you are dealing with lead paint you must use a chemical stripper instead of sanding it. Sanding lead-based paint causes the lead to be released into the air allowing you to breathe it in and creating a very dangerous environment. If you don't know if your paint is lead based, testing kits are available to check.
Since the bed frame already has a couple coats of paint I thought the best way to get the best results would be to strip off the existing paint rather than painting over it.
Different Types of Paint Stripper
There are a number of ways to remove paint. I have used electric sanders before, but it was so much work. I found I could save a significant amount of time to strip paint with one of these options below:
- Heat Gun- Heat guns are great for areas that are surrounded my materials you don't want ruined. I used a heat gun to remove the paint on my banister. To do this use the heat gun to heat up the paint until it bubbles. Then use a metal paint scraper to quickly remove the paint before it cools. Continue applying heat and scrapping the paint off.
- CitriStrip - This type of paint stripper is not quite as strong. To apply the CitriStrip, pour it on to the painted surface and use an old paint brush to spread the stripper around making sure to leave a thick application on the entire piece. Cover with plastic wrap, this will help the stripper stay wet. Let it sit for 30 minutes and then check it. When checking make sure it is still wet and the paint surface should start to bubble. If the whole surface isn't lifting it is a good idea to let the stripper sit for longer. If some areas are drying out or not lifting remove plastic wrap and apply more CitriStrip, then replace the plastic. Once the paint has bubbled. Use a metal scrapper and scrape with the grain of the wood. Going against the grain can cause deep scratching.
- Kleen Strip - This is my favorite chemical paint stripper. It works really well, fast and removes thick layers of paint. You do want to make sure you are in a well-ventilated area. It is a good idea to wear gloves and wearing protective clothing is a best practice. Below I made a complete YouTube video on how I stripped this bed down.
Supplies needed
- Kleen strip stripper
- Chip Brush
- Hyde Contour Scrapper
- Putty Knife
- Sand Paper or sanding block
- Shop vacuum (optional)
- Primer
- Paint
Quick Steps for Stripping Furniture
Take the piece of furniture outside with good ventilation.
Pour a small amount of Kleen strip onto your painted piece.

Spread the stripper around with a chip brush. Make sure to get it in all the small cracks and corners.To strip this desk I applied the paint stripper generously. No need for thin coats during this process. You want it to be on there pretty thick.
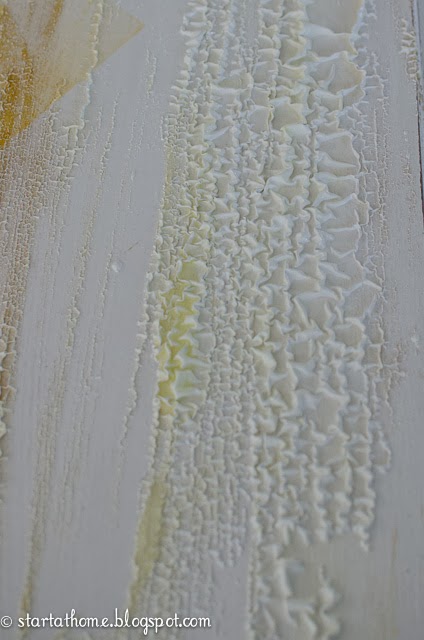
After the stripper has been applied, allow it to sit for about 15 minutes. Your paint will start to bubble and look like this. Some areas will bubble more than others - that is normal.
Don't let the stripper dry out - add more in areas if needed.
After about 15 minutes, take your metal scraper (putty knife) and begin scraping your paint off. Make sure to scrape in the direction of your wood grain as to minimize any scratching to the bare wood. I like to scrape my paint on to a paper plate so I can dispose of it all.
After you have scraped all the loose paint and stripper off the entire surface, you may need to apply a second coat of stripper if the first coat didn't take off enough paint. Follow the same steps until all your paint is off.

Use a contour scraper for the detailed areas. You can also use a wire brush. Just make sure to go with the grain of the wood.
After all the paint is stripped allow the wood to dry out.
Vacuum remaining loose paint off and then use a sander to get any remaining paint off. This is a good time to add wood filler or Bondo if needed to repair any damage. View my complete tutorial on how to use Bondo here
Now that I sanded the top smooth the final step is to paint it again with regular paint. See I told you to strip and refinish a piece is easier than you think.
Now the Top of Our Desk is as Good as New

I love the way both my bed and desk turned out. It is amazing how adding a new paint color can go a long way when it comes to adding style and decor to a room.
I have shown you how to strip and refinish old furniture so you can repaint and have a perfectly smooth finish as a result. You can apply the same techniques to any other pieces you may want to update. Here are some other great ideas.
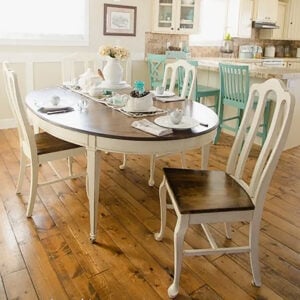
- Dining Table and Chairs
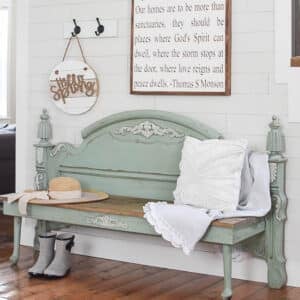
- Traditional Headboards
- China Hutch
- Dressers
- Desks
- Bookcases
Happy painting!
Brooke

Leave a Reply