Refresh your old upholstered dining chairs with a beautiful wood seat replacement.
Updating Dining Room Chairs
Vintage treasures can be well worth the money saved instead of buying something new. But refreshing those older pieces can be difficult and time consuming. Let me help you restore your chairs to their former glory! Take that old upholstery and turn it into a beautiful wooden masterpiece with this DIY wood seat replacement.

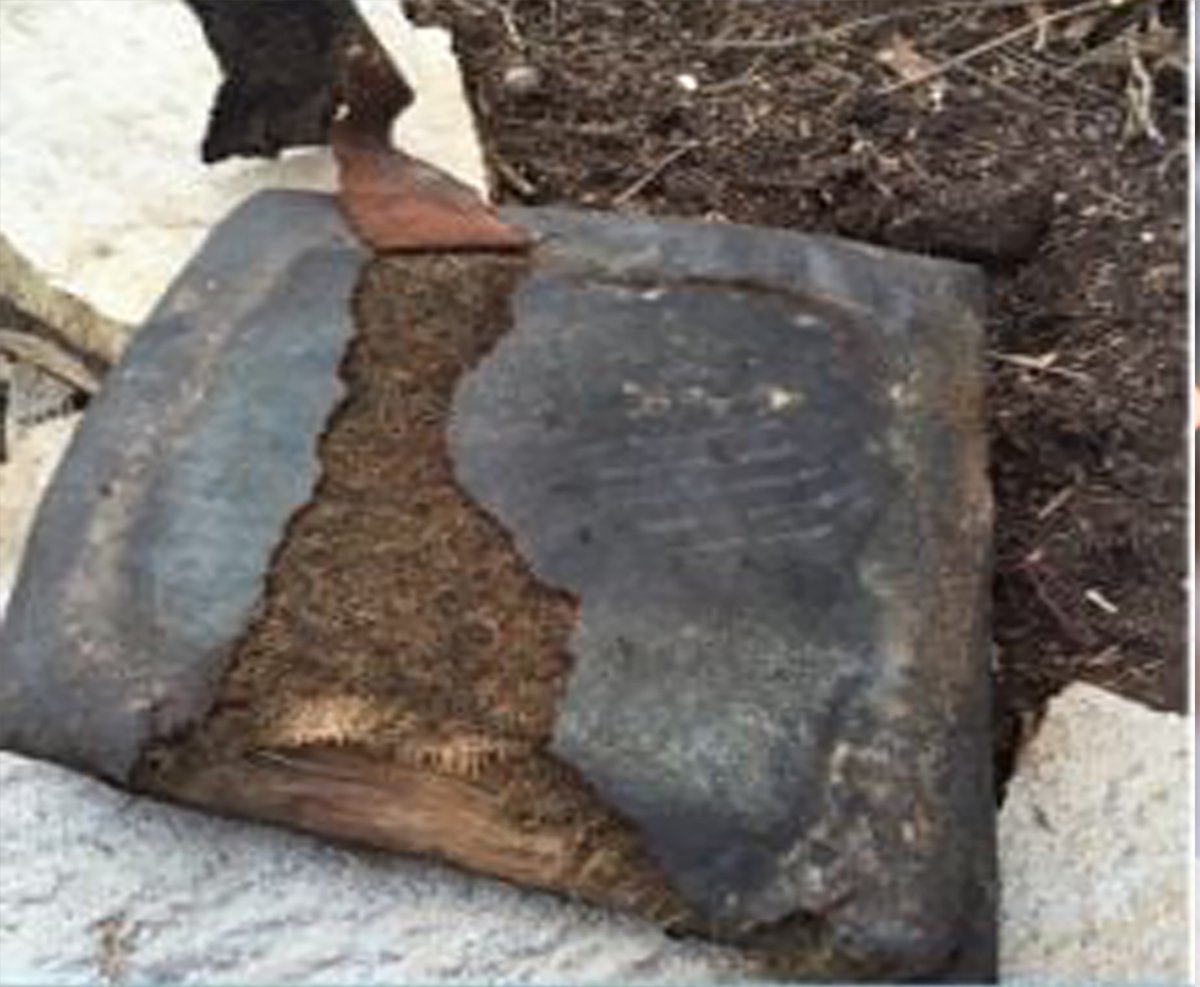
I found a beautiful set of dining chairs but they were in major need of repair. The seat cushion were rotting and falling apart, they were in desperate need of chair seat replacements.
To give you an idea of how old they were, horse hair was used for the seat pads. Apparently this was a popular technique in the 19th century. I thought about just buying replacement cushions but they didn't have the aesthetic appeal I was going for. I also wanted something that would clean up better with kids.
Take a look at how to turn upholstered dining chair seats like these ones into wooden seats, and give them a new life!
A New Look With Wooden Seats
The vintage chair frame is so beautiful on these particular pieces of furniture. Buying new chairs was out of the question when I saw these lovely frames.
There are a few different options when repairing these old chairs. Some people wash and reuse the horse hair in the old paddings and make covers with new fabric. Anyone else ready to sign up for washing old horse hair? No? This is the least appealing option.
The original plan was to make a pattern from the original covers and then reupholster the seats and add new foam pads for a soft chair cushion. However, I was hesitant to do that because with 3 young children making messes, I thought they might look dirty very quickly. I needed to get years of use out of them.
My husband suggested making a seat out of wood instead fabric. Absolutely brilliant! Wooden seats are easier to clean. And I love the timeless look that comes with any wood project.
Come and see how to turn upholstered dining chair seats into wooden chair seats!
Supplies for Replacement Seats:
Here is a list of tools and supplies needed to make wooden seats for dining sets.
- Cardboard and protractor - to make a pattern
- Pine sheet or whatever wood you are using for the seats
- Tape Measure
- Table Saw
- Sander
- Stain (I used Dark Walnut)
- Screws to attach the wood seats to your chair
Steps To DIY Wooden Seats and Make Replacement Parts
Step 1 - Chair Frame
First, strip the chairs all the way down to remove any prior paint or stain. Then you will paint or stain them in your desired color. I chose to paint the chair frames in a custom mixed cream color.

Step 2 - Make a Sturdy Base
Next, I handmade pieces for the base. To do this I cut out strips of wood to make a nice and sturdy base for the new wooden seats. This is needed for additional support for securing the seats on top.

Step 3 - Make a Cardboard Template
When making custom furniture it is best to make a template so there is some uniform. Making a template for the seats can be a little tricky, but it is worth it to get the perfect custom size. Using cardboard for this step will simplify the process for measurements and cutting.
PRO TIP: Use a protractor to produce the curved shape along the back of the chair. It works like a charm!
I wanted my seat tops to hang over roughly a ½ inch. Cut out your cardboard template to the exact shape and size that you want your finished wood seats to be.

Step 4 - Use Template to Trace onto Sheet of Wood
Once your template is cut out, use it to trace your seat shape. Trace your seat shape directly onto the sheet of wood. We used pine for our wood selection. You can buy sheets of pine like this from Lowes. You can use other types of wood to meet your specific needs.
Make sure to use caution when cutting out the wooden seats. Protective gloves are always a good idea if you are unfamiliar with using powerful tools.

Step 5 - Cut Your Wood
Once your wood seat is traced, you will use a jigsaw to cut out the rounded edge for the curved back of the seat. A jigsaw is a great product to have around the house for those curvy cuts. Then run the straight edges through the table saw for clean lines.
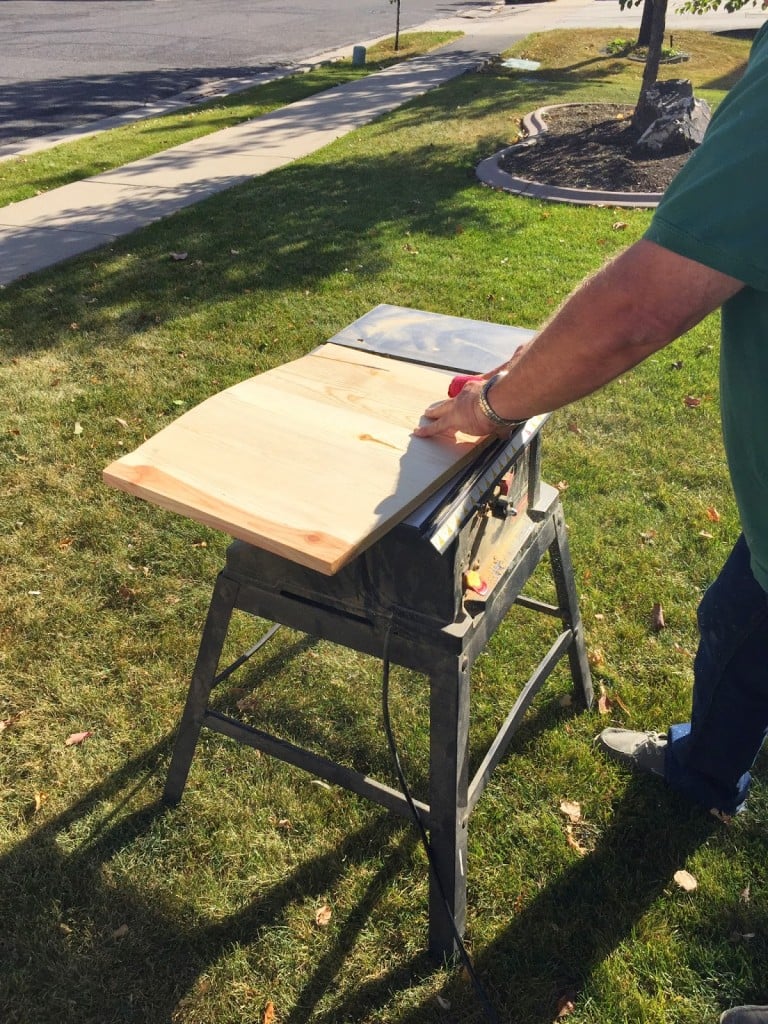
And this is what you get! Beautiful and sturdy wooden seats that are easy to clean!
Step 6 - Stain Your Wooden Seats
Before assembling your chairs to the frames, make sure to sand your wood with a high count grit paper so you can have a smooth finish. This will also help to adhere any color or stain.
To stain the chairs I first used Minwax stain in Dark Walnut. Once that stain dries apply a Minwax Cherry color stain over the top to warm it up just a bit! The color choice will be personal preference.
Apply a clear coat finish to seal your wooden seats. You can choose matte or gloss depending on the style of finish you like.
Step 7 - Secure Your DIY Wood Seats to Frames
Once your new wooden seats are dry and sealed, use a drill to secure your seats from the bottom. You don't want any screws visible from the top of the chair frame.
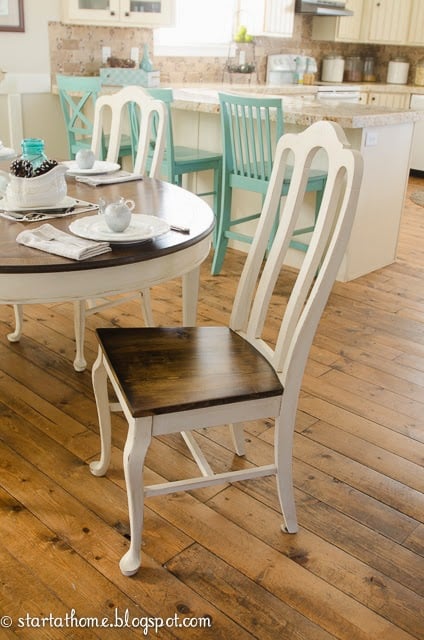
Wooden chairs are so nice to have instead of upholstery. Wood chairs clean up so well and hold up great with kids.

That is how to turn upholstered dining chair seats into wooden seats! Now they match my indoor table beautifully.
The good news is they are now durable enough to withstand all the family meals with young kids and beautiful enough to host a fancy dinner party with guests.
If your dining chairs need an update or if the upholstery on your chairs is in need of repairs, then this DIY wood seat replacement could be a great DIY option for you to try.
Another fun chair DIY is taking old metal folding chairs from drab to fab. These metal chairs were not so pretty to look at but they were in good condition. So instead of throwing them out I opt for a makeover! Tutorial here.

To complete this I first cleaned and then lightly sanded down the metal frame. Next I used spray paint I found at Home Depot to give them all a colorful finish. Now they are beautiful outdoor chairs that can be used with my other outdoor furniture.
Happy DIYing!
Brooke

Hillside Garden says
What a beautiful chair, very courageous from you, to restore it. A lot of work, but well done.
Sigrun
Addie Rogers says
Love the red bandage on the finger while he uses the saw!!!!...lololol
The chairs look great too!!!!
Addie
Mindi Carwin says
Beautiful!!! I love these Brooke!
Hannah Pearson says
My parents have a BUNCH of old furniture. My boyfriend just bought his first house and I've been trying to pawn it off on him. He says there won't be enough room, so I'm thinking about refinishing and selling it for them! Your blog is an inspiration and certainly will be helpful in this endeavor! THANK YOU!
Angie says
How did you attach the new seats to the chair?
startadmin says
I used the same screws that attached the old upholstered chairs.
Jennifer Clark says
What was the thickness of your wood? It's probably cheaper to replace wood, then to refrabric them.