Repurpose an old crib into a new piece of furniture instead of throwing it away.
Finding and repurposing an old piece of furniture to give it new life is one of the best hobbies. There is so much fun that can be had with furniture projects that involve the process of tearing things apart and then turning it into something amazing. And a lot of patience too!
When you look at a baby crib repurposing most likely does not immediately come to your mind. In fact, by the time you are done using your crib you are probably so ready to just get it out of your house and be done. But a crib can be a fantastic way to upcycle a piece of furniture.
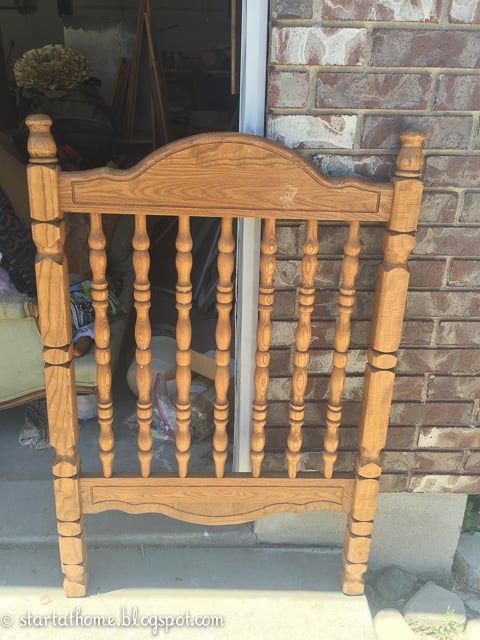
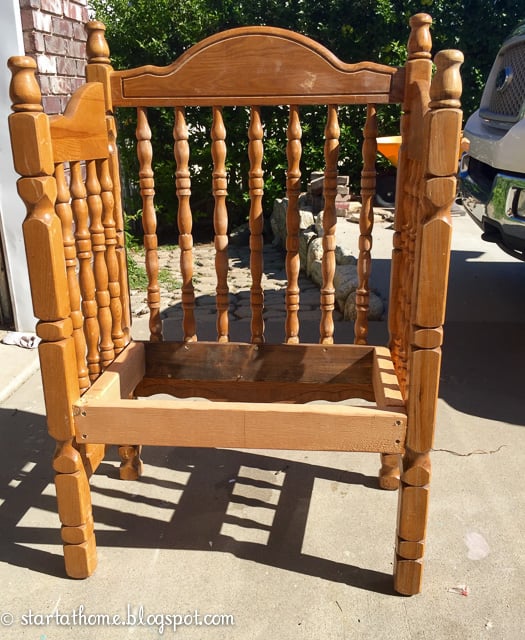
When first purchasing this old baby crib, I didn't have any plans in mind to turn it into an upcycled crib. But all of the character in the wood was enough to convince me to bring it home. The crib is a great piece. Solid wood, beautiful spindles and a price just right. I opted to turn it into a bench. For more bench options, look here!
This repurpose idea is fairly easy to make as long as you have the right power tools! If you have a kid’s old crib and some leftover lumber laying around that you don't know what to do with you are in the right place!
It's always a great idea to try and upcycle instead of throwing away furniture.
Follow along to see how I turned this old crib into an adorable bench with repurposed life. Perfect for a cozy reading nook in the kids’ room!
Supplies Needed to Repurpose Crib:
- Old crib
- Table saw
- Tape measure
- Drill
- Screws
- Gorilla wood glue
- Wood filler
- 2 x 4s
- Sand paper
- Paint
- Pine planks
Crib to Bench Tutorial
Repurpose old cribs by making a DIY crib bench that won't cost you your life savings.
Make Your Side Frame for Bench
- Take crib apart
- Use one end piece of crib to cut in half for side frames of bench
- Cut crib legs down to right height
Prepare your crib piece by removing all hardware and taking it apart.
The first step is to make your frame for the back and the sides of the bench.
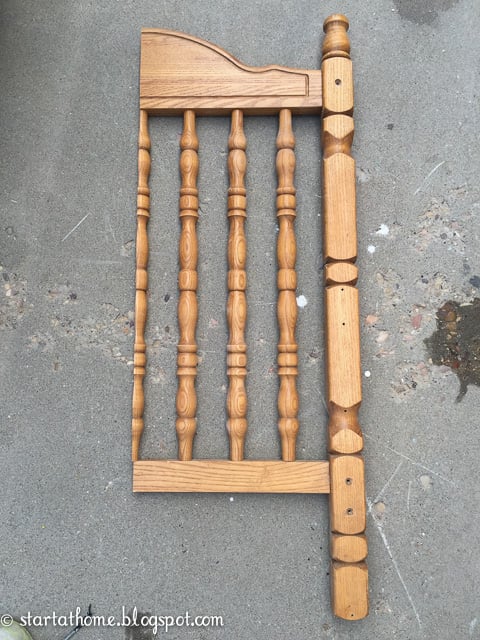
To make this bench I used the 2 side rails or end pieces of the solid wood crib. One of the end pieces will become the back of the bench so no changes need to be made to that piece until later in the building process.
The second end piece takes a little elbow grease. It will need to be cut in half in equal parts, the easiest way to do this is with a table saw. After the cut there should be 2 equal halves. These will become the sides of the bench.
The most common height of a bench seat is usually about 16-17 inches tall. You can adjust this if needed. I cut 5 inches off of these legs so they would line up correctly on the back and be the perfect height for the bench seat.
Bench Seat Frame
- Build seat frame with 2 x 4s and screws
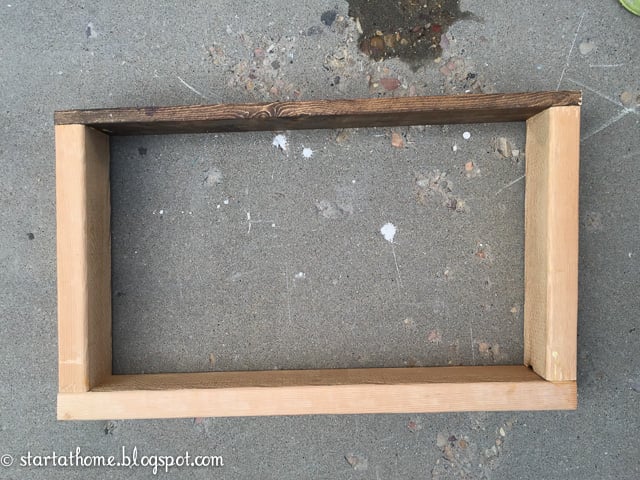
To make the seat for the bench, one of the first things that need to be done is to build a frame for extra support for the pine planks. Those will be put on last.
The frame will be built by using 2 x 4 boards cut to the proper length and then screwed together to use as a sturdy seat.
The length of the seat frame will depend on the length of the piece that is now the back of the bench. It should be long enough to run from post to post and the seat should be at least 15 inches deep to be comfortable to sit on.
Attach Seat Frame to Bench
- The second end piece will be used as the back of the bench
- Attach seat frame to the back of the bench with screws and wood glue
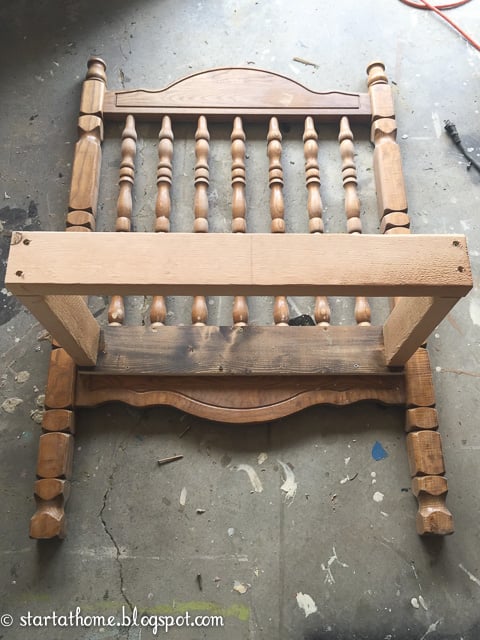
Once the seat frame is made it will then be attached to the back of the bench with several screws and wood glue. It is a good idea at this point to pull out the level to ensure the bench is going together square and straight.
Add Side Pieces
- Attach cut side pieces to the back of the bench and the seat frame
Once the seat frame is secured to the back of the bench, the side pieces that you already cut can be added one at a time.
To make this bench as sturdy as possible it is a good idea to attach the side pieces to both the seat frame and the back of the bench with screws. This will make the whole thing very sturdy and well-built.
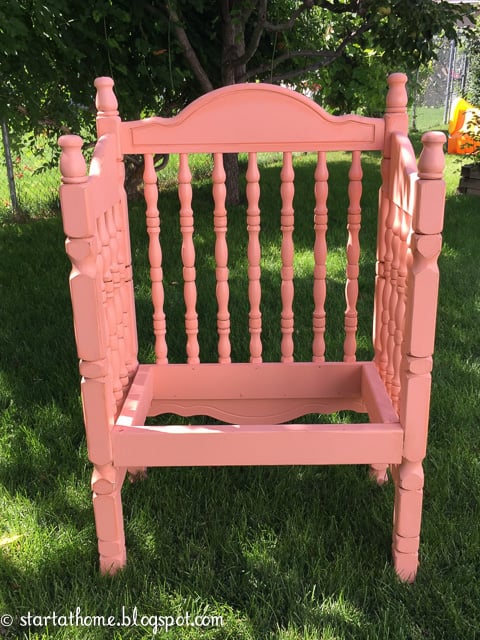
Prep For Paint
- Use wood filler to fill in screw holes
- Sand the entire piece smooth
- Paint your bench in desired color
Now that the bench is all put together (except for the seat planks), take some time to fill all of the screw holes with wood filler. Be sure to let dry and sand the entire piece smooth so the paint will have a nice smooth finish. Now the bench is ready to paint!
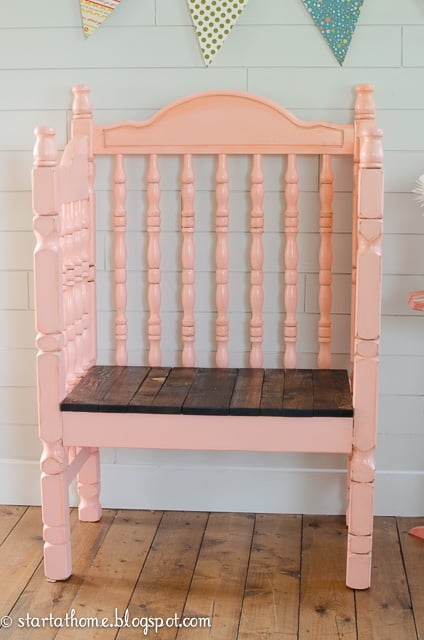
Pine Planks for Top of the Seat
- Optional paint or stain pine planks
- Cut pine planks to match seat depth plus overhang
- Attach pine planks to bench seat frame with finish nailer
Now that the bench has been painted it is time for the final step. This bench needs a seat. To make the seat, cut pieces of pine planks to match the depth of the seat plus you will add at least ½ inch overhang. Mine are about 15 ½ inches. You can paint or stain the pine planks before attaching if you choose to do that.
Use a finish nailer to secure the pine planks to the 2 x 4 frame of the bench seat.
Repurposed Crib Into Bench
This crib bench was one of my favorite DIY projects! What better way to make good use of an old repurposed crib rail and some pieces of wood.
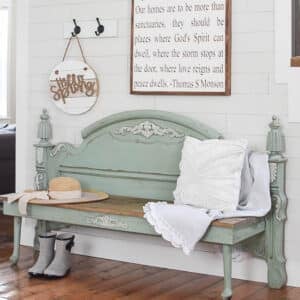
Style this in a kid room as a reading nook or use it as a porch bench or in your entryway for extra seating.
I hope this tutorial helps you come up with a better way to use that old crib and turn it into a gorgeous and useful piece of furniture for your home. Looking for more furniture overhauls? Update your dining room chairs or give your bed a new look.


Marie Blackburn says
Gosh, I love your crib benches Brooke - especially the pretty colors you paint them. I have made a few headboard benches (have one in the works right now for a client) and it's good to see you construct yours the same way I construct mine. Believe me, Mr. Frugalista and I had a few too many arguments about the assembly process. I'm right, yessssssssss!