Upgrade your dining experience by building a farmhouse table for under $100.
When kids are frequent visitors to your house all day, the ideal kitchen table is one that is durable, a simple design and easy to clean. You want it to be beautiful to look at but also suitable for a house full of kids.
A farmhouse dining table can be absolutely stunning. However, the accompanying price tag is not so easy to like especially when you can make one for much less. Let's DIY together as Dave and I show you how to build an X frame farmhouse table for a total cost of under $100.

DIY Farmhouse Table Plans
This DIY project will turn out beautiful without spending a ton of money. Dave and I will show you how to make the entire table. We go through step-by-step so we can help you make your own new dining room table.
X-Frame Farmhouse Table- Material Lists:
To make your own farmhouse table you will need to make a trip to the home improvement store like Home Depot or a lumber yard. Specifically, you will need some 4" x 4" pieces of wood for the legs, some 2" x 4"s for extra support and some 2" x 12" boards for the table top boards.
X Frame Farmhouse Table - Cut List:
- 2 - 26" 4 x 4
- 5 - 34.5 " long 2 x 4s
- 4 - 57" long 2 x 12s
- 8 - 17 ⅜" long 4 x 4s with a 45 degree angle on each side
- 2 - 14" long 4 x 4s with a 45 degree angle on each side
You will also need:
- Wood glue
- 2 ½" screws
- Table saw
- Drill
- 4" screws
- Orbital Sander
- Stainable wood fill
- 100 grit and 220 grit sandpaper
- 14" long 4 x 4 braces
- Stain
- Rags or brush to apply stain
- Clear coat water-based polyurethane finish
SUBSCRIBE TO OUR YOUTUBE CHANNEL HERE!!
Your Farmhouse Table: Table Legs
Make sure all of your leg pieces are cut and ready to assemble. First step, you will create the table legs.
Center one of the 26" long 4 x 4s along the 35.5" long 2 x 4. Once centered, pre-drill for screws to insert and then apply glue, followed by attaching the 2 pieces together with the 2 ½" screws.
Flip it over and do the same on the other side. You will use this process twice, as these will be the legs for either side of the table.

Farmhouse Table: Table Top
Next up is to create the top of your table with the 2 x 12s.
Run both sides of your 2 X 12s through the table saw so the edges will fit nicely together. Don't take too much off here. You will barely trim them - an ⅛" at most!
Cut the 2 x 12s down to 57" in length.
Assemble Your Table
Attach your legs to the table top.
After your 2 x 12s are cut, lay them out on a flat surface so you can then attach the legs. First, pre-drill your holes and then use 2 ½" screws to attach the legs to the top. You will want to make sure your table has some overhang, so don't place your legs right on the edge of the table.
Add a 2 x 4 in the center for additional strength.
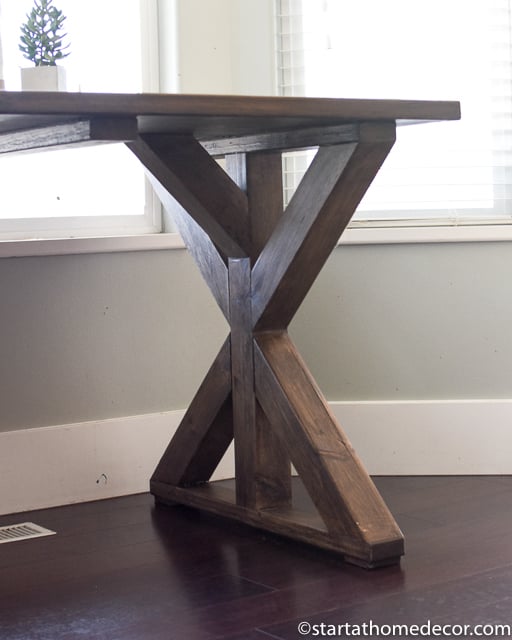
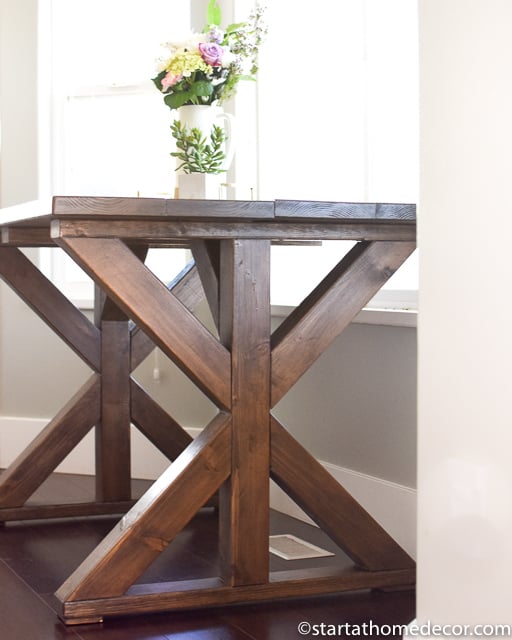
Create Your X Frame Legs
Next, cut your 8 - 4 x 4s down to 17 ⅜" long with a 45 degree angle on either side. Remember, measure twice, cut once!
Measure where you would like the 4 x 4 to hit on the table leg so the pieces will all be the same. Pre-drill for 2 screws on both ends, then attach them to the top of the table and legs using 4" screws. Flip the table over and repeat those steps on the other side of the legs.
Add 14" long 4 x 4 braces to the under side of the table for added support.

Finish Work for Your Modern Farmhouse Table
Sand your table to get ready to stain or paint.
Sand down the table legs. You can add stainable wood fill to all of the screw holes so when it is stained the holes will be less visible.
Route the edges of the table if desired with a router. You can also use a sander to get the rounded edge.
Finally, sand the table top using 100 grit sand paper followed by a 220 grit sandpaper to make sure everything is nice and smooth.
Stain or Paint Farm Table then Apply Clear Coats
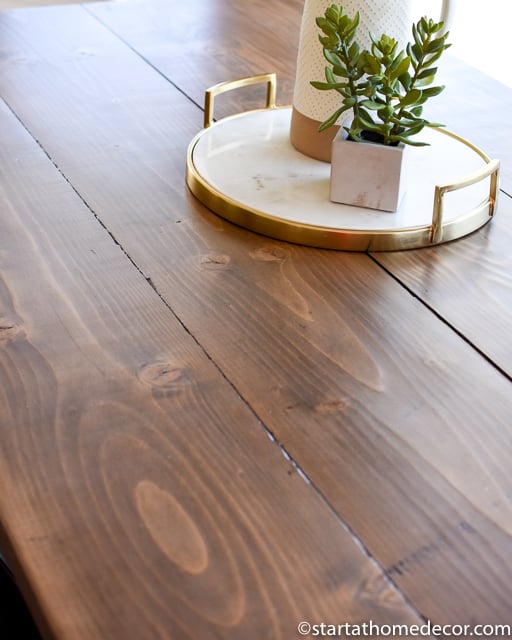
Last of all, stain or paint this piece using whatever color you desire for the appropriate finished look! I especially love a dark walnut stain.
We applied 1 coat of Minwax penetrating stain. Afterward, this was followed by 5 top coats of water based polyurethane finish for the rest of the table.

Use matte finish if you don't want a shiny exterior.
Pro-tip: using spray cans is the best way for a much nicer finish and even coat. The finish will go on better than brush strokes.

So with only a few pieces of wood and a little time we made a stunning new table. This table would look great in any dining area or breakfast nook. It is a simple table but beautiful and is the perfect table to accentuate the farmhouse style in your house.
Making your own table is basically something everyone can do! So give it a shot and try out this X frame farmhouse kitchen table!
Brooke
You might also like this additional farmhouse furniture...

or how to refinish a table top!


Leave a Reply