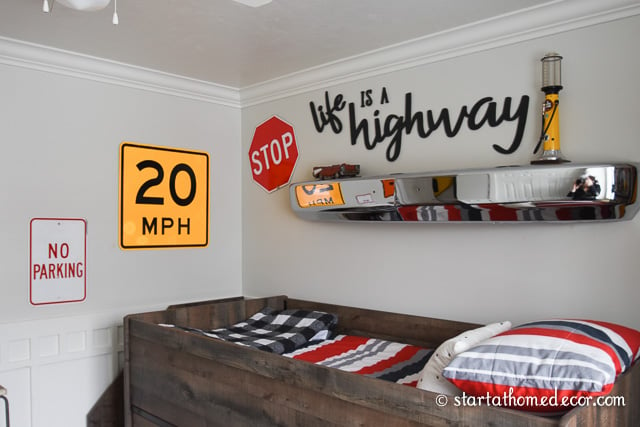
Get creative with your storage with a classic car bumper shelf.
Do you want to add a unique and decorative touch to your home? With minimal supplies and effort, it's possible to transform a recycled bumper into a custom bumper shelf you can proudly display. The best part? You can do it yourself with just a few tools and some creative thinking.
Not only is turning a bumper into a shelf an excellent way to repurpose an item, but it's also customizable and much more cost-efficient than buying a pre-made shelf. Learn all the steps you need to create your own, from sourcing the bumper to finding the perfect place to hang it in your home. Get ready to turn a bumper into a shelf today!

DIY Car Bumper Shelf
To complete the little guy's room, we wanted to add a little creativity that also served a purpose. I decided early on that I wanted to create some kind of fun and classic, car-related shelf for storage. Making a car wall shelf out of a metal bumper was the perfect solution.
Tools and Supplies Needed for Shelf Bumper:
- Metal bumper
- Laser level
- Blue tape
- Permanent marker
- Grinder and metal blade
- Wood for the shelf and cleat
- Drill
- Jigsaw
- Sandpaper
- 1-2x4 pine
- Wood gun
- Screws
- Level
A note about shelf bumpers - I found one at an auto body shop for pretty cheap. But, you can also check a car junkyard or other auto shops. Broke bumpers are usable as long as you can get one big main piece from it.

SUBSCRIBE TO OUR YOUTUBE CHANNEL HERE!!
How to Make a Bumper Shelf
Mark the Cut Line
Begin by adding blue tape to your bumper so you will be able to see the laser line. Since you will want a good visual, trace the line with a permanent marker.
Cut the Metal
Use a grinder and metal blade to cut both edges of the bumper so it will sit closer to the wall. To place the car bumper on wall, you want it as flush as possible.
Cut Your Wood Piece
Place a piece of wood (I used reclaimed pine) on top of the bumper. Trace it underneath with a permanent marker to get your cutting pattern. Use a jigsaw to cut out the wood pattern. Because most bumpers have a slight angle, in order to get the wood to sit down flush inside the bumper you will need to then use the jigsaw to cut the edge at a 45 degree angle.
Once the wood piece is cut, fit it back into the bumper and make any cutting adjustments necessary. Sand down the edges of the wood so they are smooth.
Add Hanging Attachments
Now it is time to add hardware to install the car shelf for wall attachments. Use a drill to make smaller holes through the existing bumper brackets to attach a 2x4 underneath. This 2x4 will be used to attach the top shelf and cleat. We used a variation of a French cleat.
For the bottom cleat, create a shelf with a ledge on top. For the top cleat, create a ledge on the underside of the wood so the 2 will hook together and slide. This will make it easier for the car front shelf to center on the wall.
Install Car Bumper Wall Decor
Place the cut shelf onto the top of the bumper. Use a nail gun and 3 screws to attach the wood to the installed 2x4. Because this is so heavy, you will want to use studs and a level. Place the bumper on the bottom cleat to make sure it is centered and snug.

Car Bumper Wall Art
This bumper wall art is the perfect design for your automotive lover. And what better way to dress up your open shelving than with a fun focal point. Try it out and see how you can DIY too.

You now have all the knowledge and tools needed to create your own custom car bumper shelf. With some creativity and attention to detail, you can give your car an eye-catching, unique shelf that will keep your items safe and secure.
This shelf is a great way to customize your car, express your creativity, and ultimately make your car more enjoyable to drive. Now that you know the basics of customizing your car, there are countless other opportunities to explore. So go out there and make your car the talk of the town!
Happy DIYing!
Brooke


Leave a Reply