
Create a modern sponge accent wall out of paint instead of wallpaper.
Love the look of wallpaper, but not the application or removal? You can create a fun modern design on your walls with a simple kitchen sponge and paint. No wallpaper needed! Learn how to easily paint a DIY sponge wall with this easy sponge painting.

Supplies for DIY Sponge Wall
- Black latex paint in satin Paint color - Tricorn Black by Sherwin Williams
- 5 rectangular sponges
- Paper plates or a paint tray
- Drop cloths
- Tape measure
- Damp rag
- Ladder or step stool to reach high ceiling areas

How to Paint a Modern DIY Sponge Wall
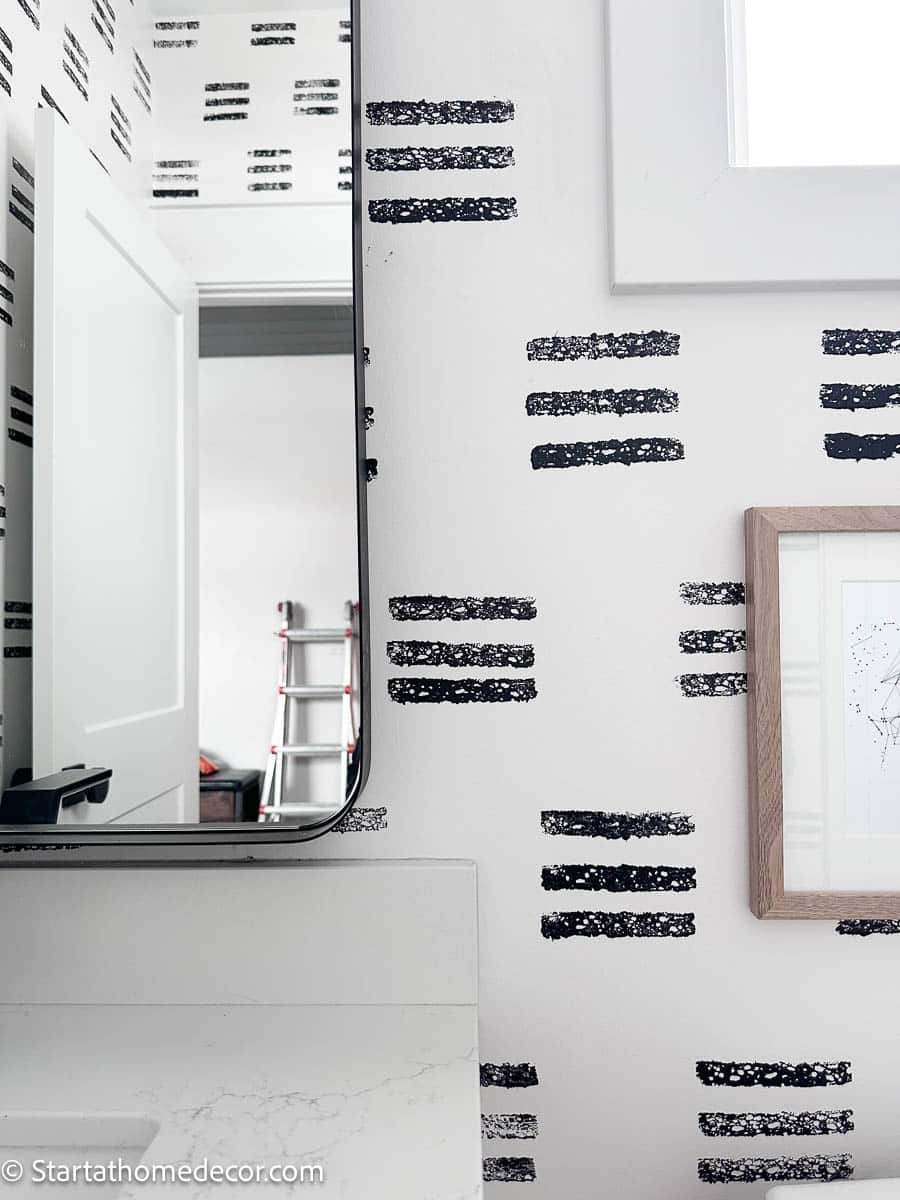
You'll want to have white paint as the base coat on your wall for this tutorial. I used black paint for the wall color accents, but you can also use whatever darker tones you have that ties in to your room design.
First step is to take a look at the paint surface. My walls do have a smooth surface. If you have textured walls I would first try it in a small area to make sure you like the look and know how to accommodate the wall texture.
Application for Sponge Painting Walls
To begin, pour paint onto a paper plate, piece of scrap cardboard or in a paint tray. Gently push your sponge into the paint and pat off excess paint on the plate or piece of cardboard. You want a good amount of paint, but not too much paint that is runs down the wall.
No special sponge painting technique is needed for applying paint to the wall. Simply get paint on the dry sponge and push onto the wall horizontally to make your first line (if this is the pattern you choose). I used the sponge thickness to determine where to place my first line, ½ inch from the baseboard. It is important to work in small sections and take your time. If you don't like how the sponge paint was applied you can quickly use a damp clean rag to wash the paint off and then try again,
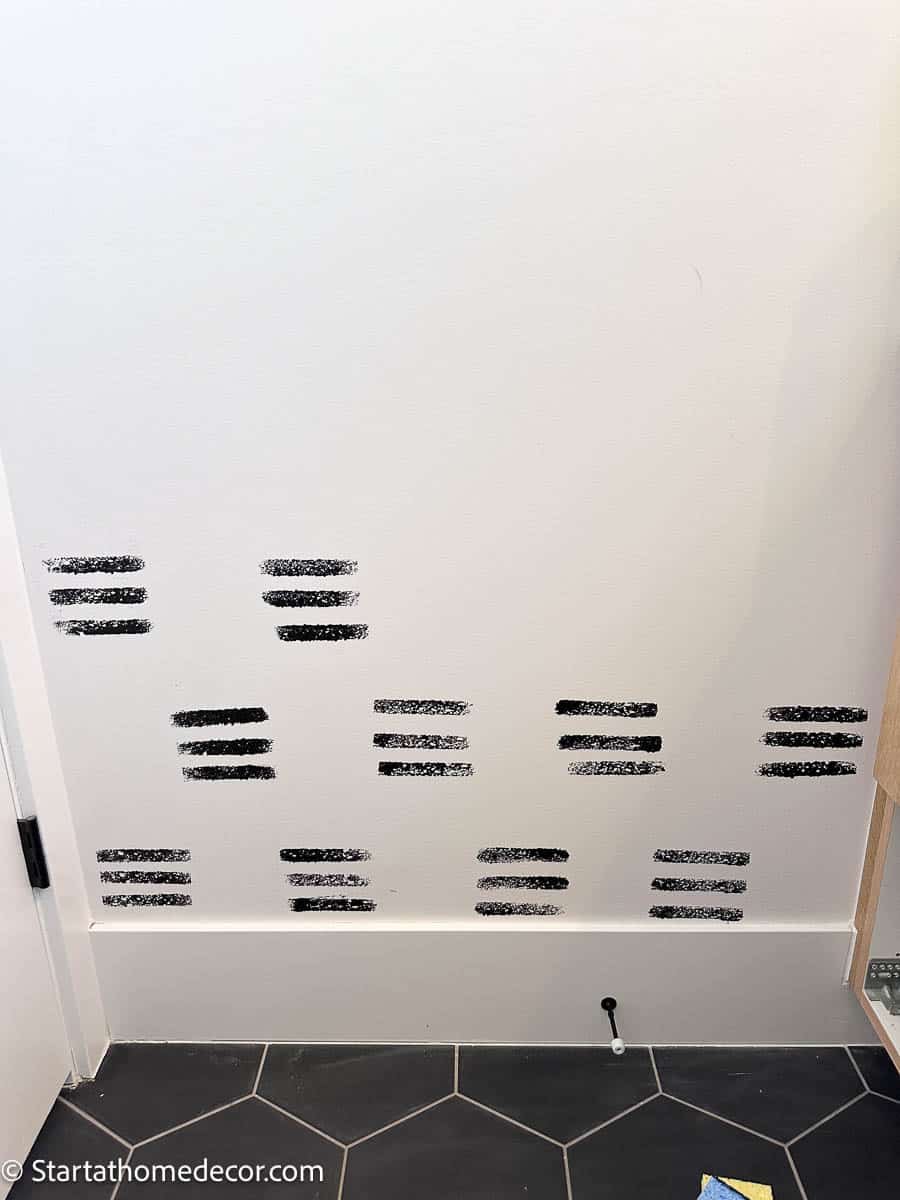
Spacing in Between Lines
Before making your second sponge line, make sure you know where to space it. The lines are approximately ½ inch apart. An easy way to do this is by measuring with a clean extra sponge as you go.
Use a full sponge length in between each grouping of sponges. From the top as well as the side.

Continue Pattern Until Finished
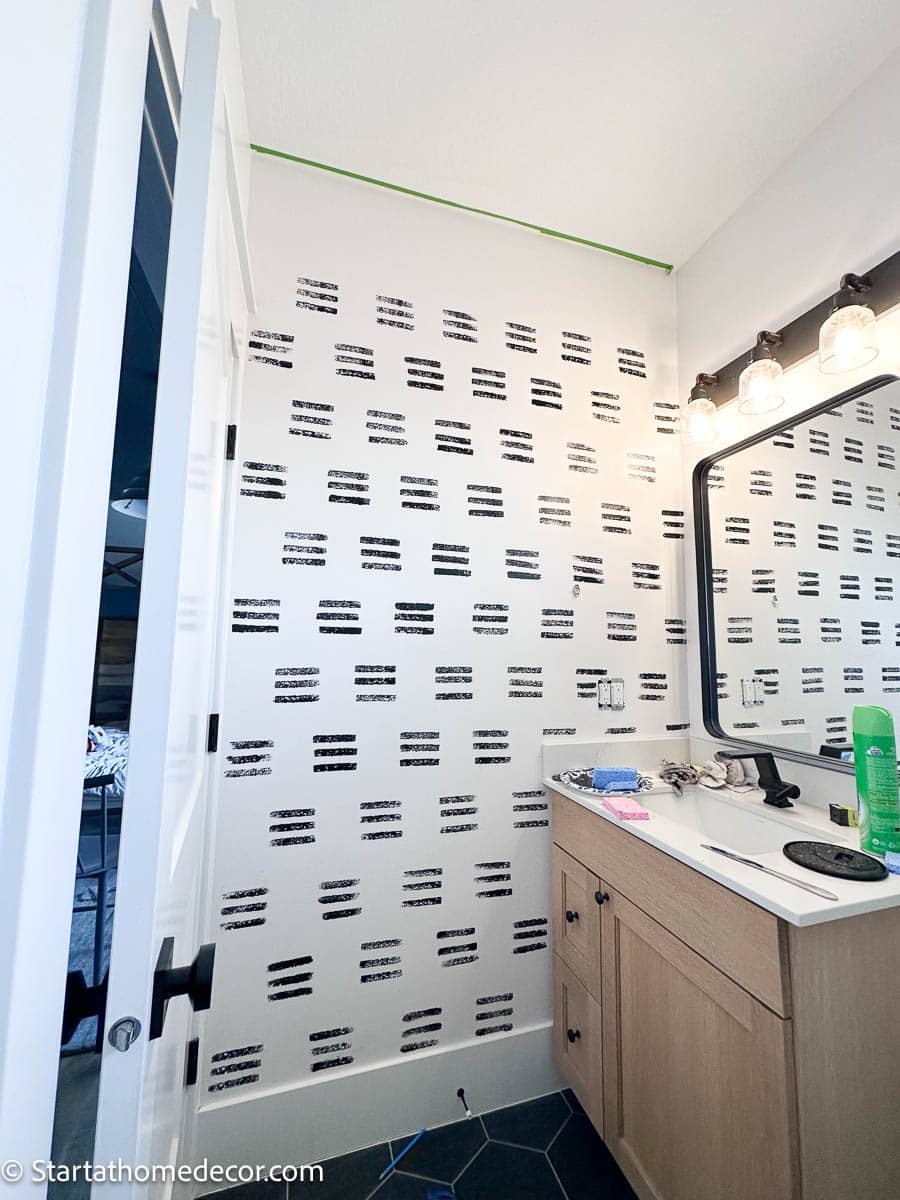
Once these 3 groups are established, continue the pattern to the end of the wall. I prefer my lines to have a slightly imperfect look so I painted by sight instead of exact measurements each time. This is an easy technique that will create a beautiful wall finish.
This is a forgiving sponge painting project where lines don't have to be perfect. However, for best results it is still a great idea to pull out a tape measure every so often to make sure your lines are staying as straight as possible.
Make sure to have a damp rag on hand to clean up runs. There were a few times where my grouping was a little off. A great way to help with this is by quickly wiping it off with the wet rag and then try again.
Little Buddy even jumped in to help a little bit with the sponging. If you do not mind that every line isn't precise, this is a fun project for kids to help with that still produces a good result.
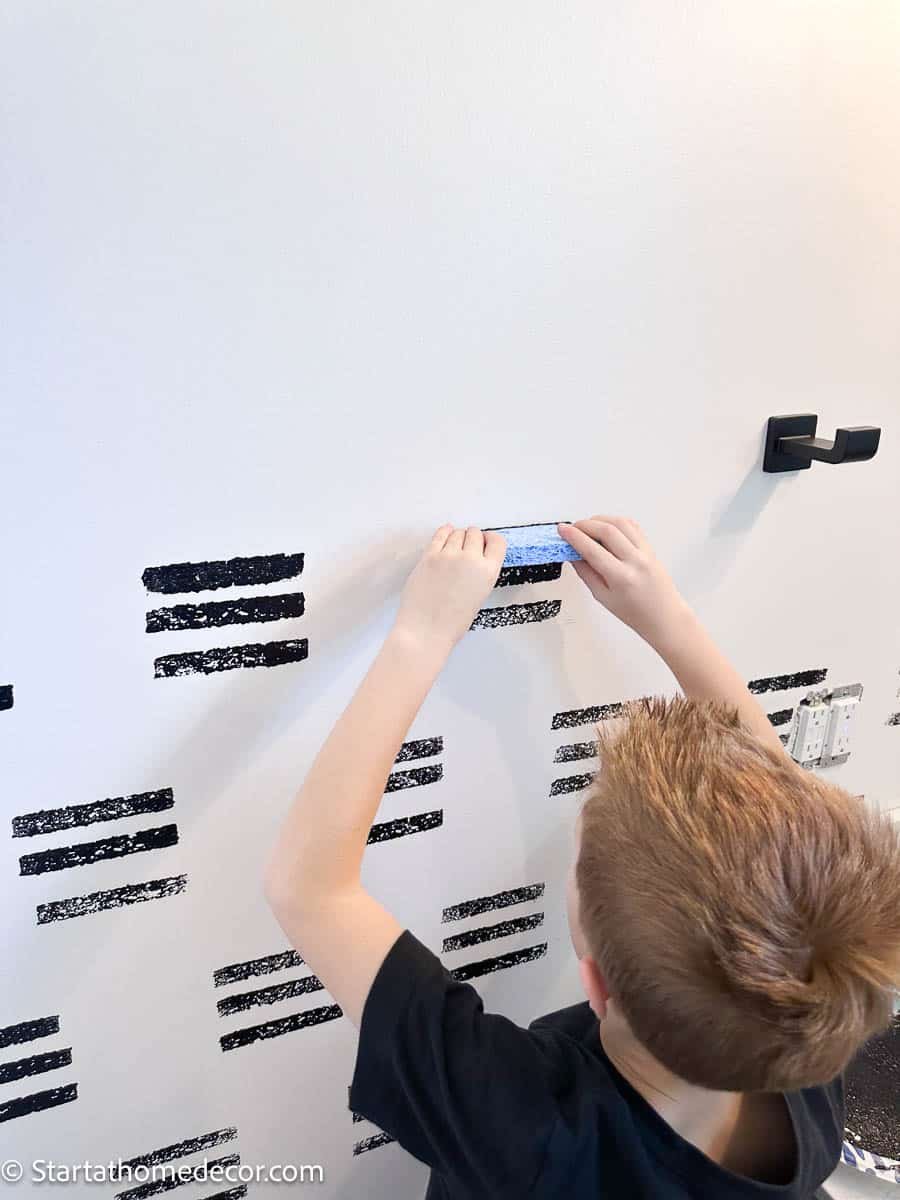
Make sure to keep your measurements the same as you work your way around the room or just complete a whole wall. Allow plenty of time for the paint to dry.
Cost Effective DIY Sponge Wall
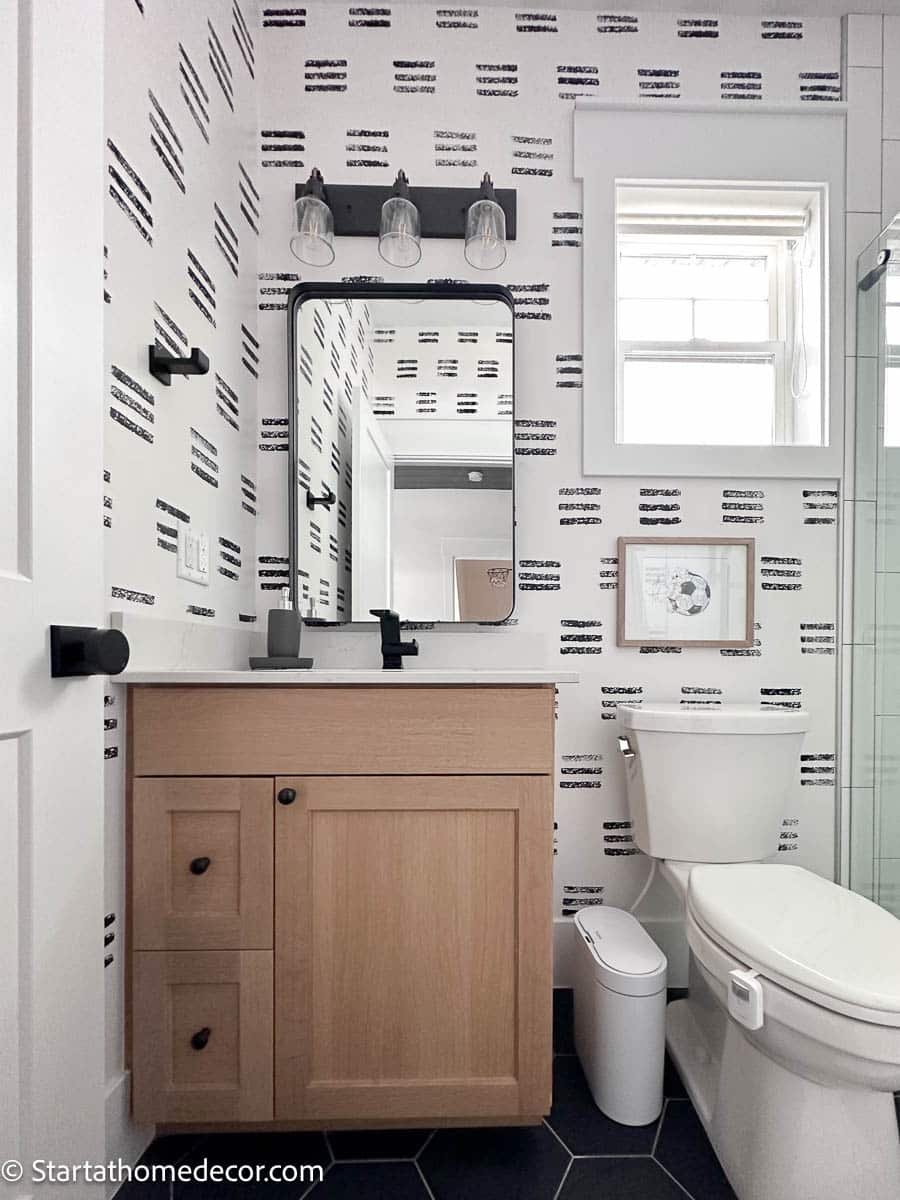
This painting technique looks like modern wallpaper at only a fraction of the price! This inexpensive way only cost me $10. I used leftover paint I already had in the garage from another project. There are a lot of different sponge painting techniques you can use, but this one if my favorite for an entire room.
In this case, the painting technique discussed not only provides a cost-effective solution, but also yields a modern and stylish result. It creates a great focal point for this bathroom.
As you embark on your own home makeover journey, consider this sponge painting technique as a great option for transforming your walls into a work of art.
Other Fun Designs
The best part of painting a DIY sponge wall is that this style is very versatile on a plain wall. Change up the design to create other fun patterns.
- Different colors can change the look. Consider using extra paint on hand or add in an additional color
- Use a herringbone pattern
- Diagonal lines instead of horizontal
- Vertical lines
- Use a small piece of sponge instead of the whole thing
- Experiment with a small brush or sponge paint roller instead of a kitchen sponge
Decorating a Small Bathroom
Don't clutter a small space with needless trinkets. Instead use accessories you would put in the room as the decor. And of course it's a good idea to add something fun to the walls.
- Mirror
- Vanity light
- Faucet
- Wood vanity
- Shower doors
- Pictures
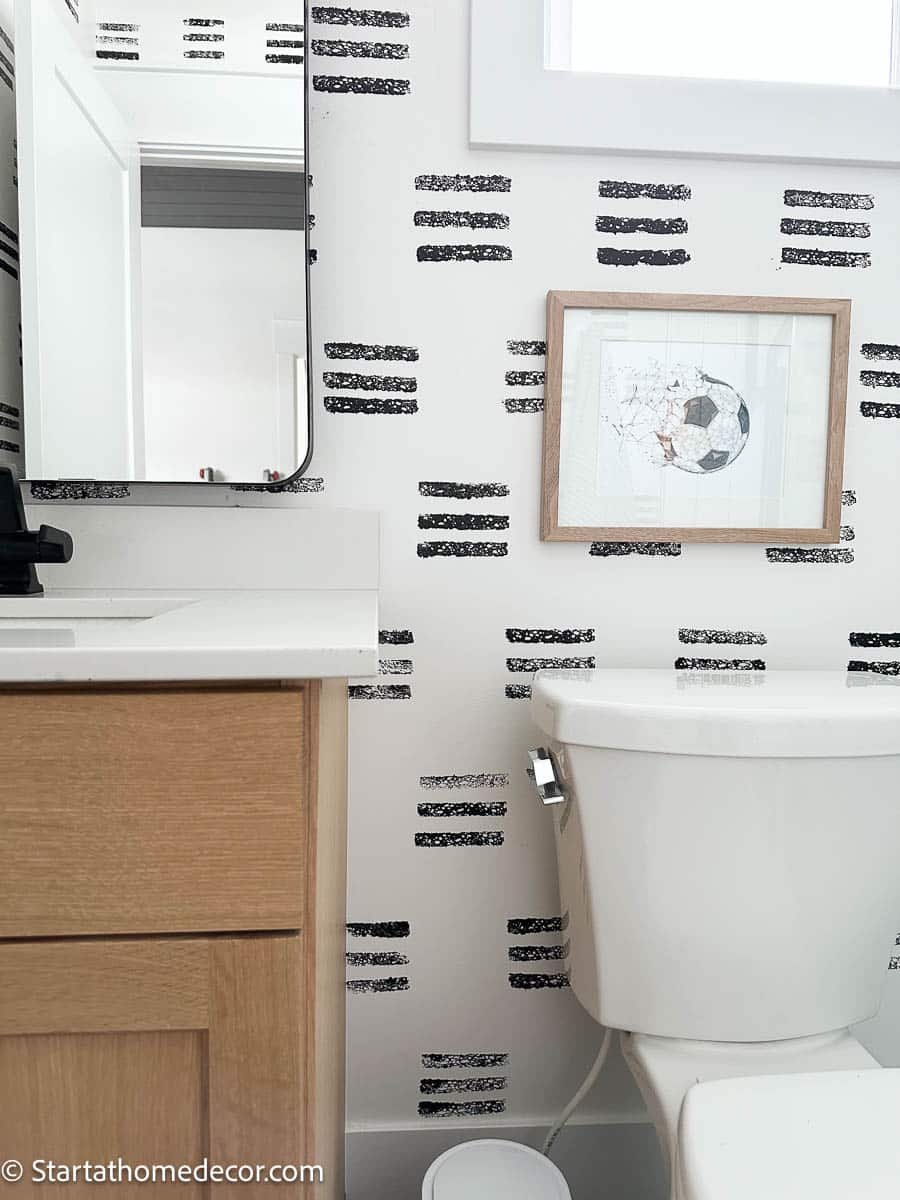
Embellishing a bathroom with hardware is one of the easiest ways to bring in more design elements. We opted for sleek black accents in hardware to convey that modern look in this black and white bathroom.

Shop Bathroom Gadgets

- Peel and stick shower hooks
- Silicone back scrubber
- Silicone body scrubber
- Motion sensor garbage can
- White bath mat
- Black Squeegee
- Motion sensor toilet bowl light
Easily change the look of an entire wall with this thrifty DIY sponge painting. Achieve a sophisticated wall accent that will change the look of your home from traditional to modern and sleek.
Get more ideas on small bathroom remodels with a big impact here.
Happy Painting!


Colette says
This is so adorable! Thanks for the inspiration!