Learn to build a freestanding wall with a vintage wallpaper accent.
A freestanding wall project is the perfect solution for creating a backdrop for just about anything! From standalone walls for your home office to a personal privacy wall, a freestanding type of wall can help in different situations. With a few supplies and basic construction skills, you can have a beautiful and functional DIY freestanding wall design in no time.
We'll discuss materials and tools needed, provide step-by-step instructions for building, and go over some design ideas to help spark your creativity. So, if you've been wanting to add an eye-catching feature to your home and don't have a lot of money or time, this guide is for you!

Why Build A Temporary Wall?
I have been wanting to build a freestanding wall as a backdrop for my furniture. Tearing my house apart every time to stage and take pictures of a piece of furniture takes a toll on our home, plus it is a lot of work. Having free standing walls is also a good idea when selling at boutiques and markets because it is a cheap option that can help spice up your space.
- Use it as a partition wall
- Use for a freestanding shower wall
- Privacy screen
- Backdrop for pictures
- Element of home decor
Different Finishes for a Freestanding Wall
When creating your wall, consider different types of walls and what kind of finishing touches you plan on using. Here are a few options to think about for your partition wall.
- A shiplap wall
- Painted wall in color of your choice
- Lattice wall design
- Pegboard panel wall
- Wallpaper wall mural, peel and stick or traditional
- Pallet wood wall
I wanted my wall to have its own character to add a touch of vintage. I found the perfect backdrop using vintage wallpaper.

How to Build a Freestanding Wall
You can build your own freestanding wall with minimal supplies. Here is what you need for a solid base. Find most of these items at a hardware store like Home Depot.
Supplies
- (2) ⅔ inch thick 4'x8' birch plywood
- 6 metal studs 9 feet long
- (1) 2'x4'
- Screws and a drill
- Primer
- 4 rolls of wallpaper
Prime Your Plywood
First, prime your entire wall. I used Kilz latex primer. Your primer will be white, but I had this tinted for a previous project.

Add Metal 2x4s
Next step, add your metal 2x4s. I am not very fond of working with metal studs but they are much lighter than wood 2x4s, making these panels easier to move around.
Place one metal stud on each of the outside edges and line it down the length of your wall. You will also place one down the center of both the sheets of plywood. To hold the studs in place screw them to the plywood. You can see the screws coming through below.

Add Support Pieces
Adding support pieces to the back of the wall is necessary so it doesn't fall over backwards. We cut wood 2x4s at precise angles and screwed them to the middle of each metal 2x4, but you can also use other options that will be more sturdy for longevity.

How to Add Wallpaper to Your Freestanding Wall
When your wall is completely built, it is time to add your wallpaper or what ever design you choose to make it more decorative.
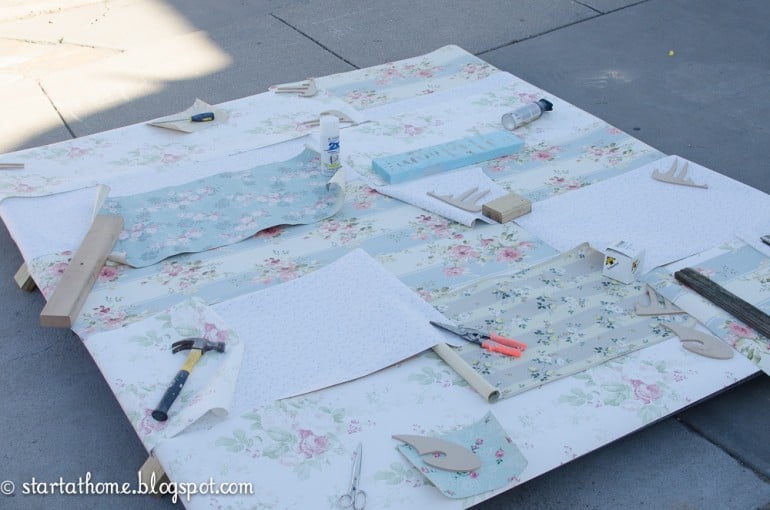
Lay Out Your Wallpaper
Begin by laying out your selection of wallpaper. I wanted my wall to look like it has several years of layered wallpaper peeling off, so I used random pieces.
Apply Wallpaper
Once you have your wallpaper laid out you can start applying it. To apply your wallpaper use the instructions that came with it. Start at the top of the wall and make sure you are overlapping the wallpaper so you can rip it off later.


Rip Wallpaper
Once you have the wallpaper on and all the air and bubbles are out, begin to rip the wallpaper in various places while it is still wet. Continue to do this across the entire wall. Once you have completed this process, let it dry over night.
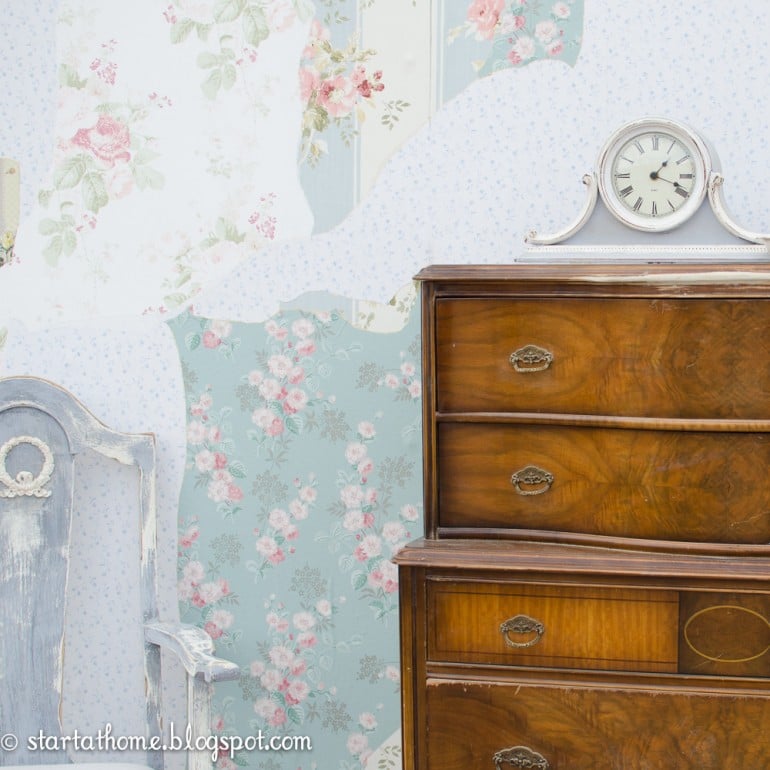
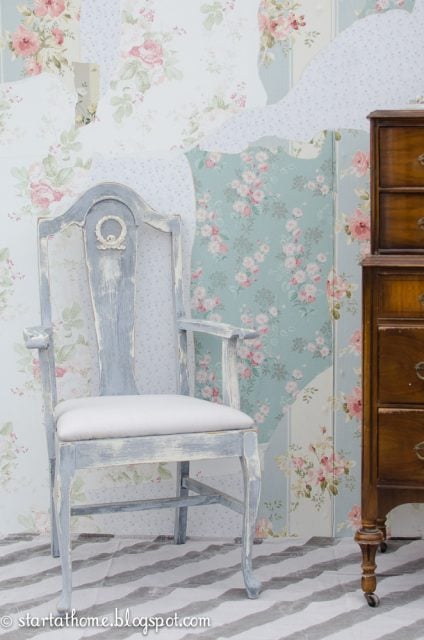
Build a Freestanding Wall DIY
And now you have a beautiful backdrop instead of traditional walls for your freestanding wall DIY. This wall is a great option for adding style and character to a room, while also serving for practical functions.
Happy DIYing!
Brooke
Kathy says
Beautiful!!
Christina says
Love this! It really looks like a wall thats been around for years and love how you chose subtle colors that don't compete with your furniture! Might borrow/steal this idea on a smaller scale to photo my art for my online store.
Linking up from the DIY My Spring hop
Cheers
Lindsay Eidahl says
Such a great idea! Love it!
Cecilia MyThriftStoreAddiction says
This is fabulous! Visiting from the Spring Blog Hop!
Cindy diy beautify says
This is so beautiful! I too struggle with not having space for staging furniture, and this is a fantastic solution!
Meegan says
Gorgeous piece! I love your talents and your blog.
Thanks for sharing.
Patti says
What a clever idea! Very shabby chic and looks great with your dresser!
Sadie Seasongoods says
Ok, this is seriously fantastic- I've been thinking of making different backdrops for my photos, too, but never ONCE thought of using vintage wallpaper- what a "DUH!" moment for me. 🙂 LOVE. IT. Happy #DIYMySpring!
julie nichols says
Beautiful idea! Love it! Visiting from the blog hop.
Holly says
HI Brooke - I'm totally crushing on this wallpaper! Visiting as a fellow contributor to #DIYMySpring. Hope your week is full of sunshine! Hugs, Holly
Maria Gonzalez says
Thank you for sharing this! It turned out beautiful!
Claire says
I want one of these walls ! Great for photo backdrops. Thanks for sharing
Michele says
What a fun project!! I would love to do this in my shop space....!! 😉
Angie @ Knick of Time says
I've been meaning to build a free standing wall too - I love how yours turned out! I don't have a great space in my house to photograph larger things,and I get so tired of rearranging everything to do it. Yours has inspired me to get it done!
Mary-the boondocks blog says
What a lovely project. It turned out so vintagey and just perfect for the purpose you intended. And of course it is just right for the blog hop. Happy Spring from a fellow blog hopper.
Jen @ Girl in the Garage says
Brooke, this is gorgeous! I really need some kind of portable backdrop like this for my projects.
Rebecca Holt says
Hello! I love this and have a quick question- how did you "screw the 2x4's" into the back brackets? I am looking to make something like this and love how easy this version is! Thanks!
Ginger says
Do you think your wall will hold up if used for paper flower backdrop? Adding material and paper flowers? Is this pretty sturdy? Very nice idea.