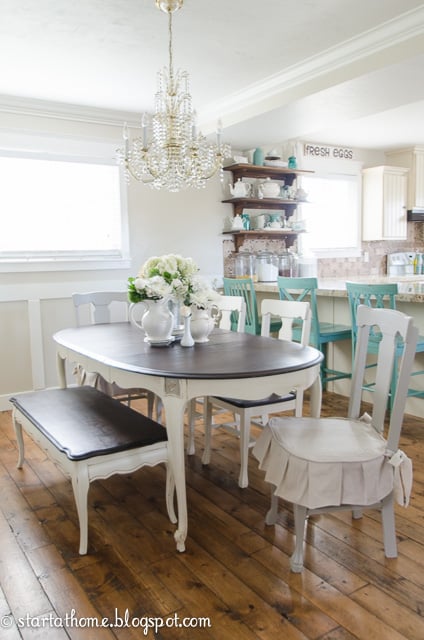
Refinish a tabletop with an electric sander or ... buying something new. I can't even begin to tell you how many times I've heard this argument!
While buying new furniture may seem easier, refinishing is incredibly cost effective, and honestly you'll probably spend the same amount of time hunting down that new piece to get that right decor look compared to how long it takes to actually refinish.
Unfortunately, I also feel that unless you want to spend a few thousand dollars or more on a very nice set, most of what is more budget friendly is just cheap, faux wood that won't last.
And... if you have kids, man, you need something sturdy that will survive their harassment! Still not convinced? Well... see that table down below? Yeah, my kitchen table did NOT look that attractive when I got it.
And I'm here to tell you, it is so easy and I did it for so much cheaper than buying something brand new!! I've even included a video on how to do it... so follow along and take a peek at the instructions listed on the bottom for those needing both ways.

What you will need Refinish a Tabletop with an Electric sander
- Orbital Sander - My favorite one
- 80 and 220 grit sanding discs and sandpaper (if you don't have a sander, borrow one!)
- Stain
- Rag (a few at least)
- Sponge Brush
- Waterbased Polyurathane
7 Easy Steps to Refinish a Tabletop with an Electric sander
Step 1: Make Sure You Are Refinishing Something That is Solid Wood.
This makes the perfect candidate for a refinishing project. For more help on how to find a piece, you can get more info here by signing up for the furniture e-course.
Step 2: Use an Electric Sander
Use an orbital sander to sand down the table top. I start with 80 grit sandpaper. Sand with the grain of the wood, not against it. If you sand against the grain you are more likely to scratch the wood.
With the 80 grit sandpaper, my goal is to get all of the old stain off. But, be careful not to sand one place too heavily as it can cause a dip in your surface. Use long, even strokes to avoid that.
Step 3: When to Use Sandpaper
Once you have sanded everywhere you can with the sander, it's time to pull out the sandpaper to get in the small cracks. In order to get an even stain, you want to make sure all the old top coat and stain are off.
Next, sand everything down with 220 grit sandpaper. This will remove any scratches that were created from sanding with an 80 grit sand paper. It will also make the table top nice and smooth.
Step 4: Wipe off Dust from the Tabletop
Now that everything is sanded down, wipe all the saw dust off and it is time for stain!
Step 5: Stain the Sanded Tabletop
To stain I used Minwax's penetrating stain in dark walnut. This stain is going to sink down into the wood to really show off the grain.
I like to apply my stain with a sponge brush and wipe the excess off with an old rag. When applying your stain you want to paint with the grain of the wood. Allow 24 hours for the stain to dry. Sometimes stain can cause your wood grain to raise.
Step 6: Prep for Top Coat
I sand everything down one last time with 220 grit sandpaper to ensure everything is smooth. Staining a table top can cause the grain to raise slightly.
Once it is sanded down use a rag and make sure ALL the dust is off. This is very important as our next step is the top coat and we don’t want dust under our top coat.
Step 7: Top Coat the Tabletop
I like my top coat in a spray can because it is easier, and although it can be more pricey, I get a nice even finish that makes it worth it. I am using a water based poly urethane to spray this table. When spraying a top coat make sure you are using long even coats with the grain of the wood. I usually give my tables at least 4 coats.

There you have how to refinish a tabletop with an electric sander
Happy Refinishing!
Brooke

Danielle says
Do you have a tutorial for how you finished the rest of the table?