A guide to learning different methods for achieving distressed furniture.
Do you want to learn how to create a unique piece of furniture that makes a statement? A distressed finish is the perfect way to do this. Distressing involves a few simple techniques to give furniture an aged or weathered look.
Discover different ways to distress furniture using simple methods or everyday household items to give your furniture a unique look. With a few simple steps, you can transform any piece of furniture into a beautiful, character-filled showpiece to display in your home.

How to Distress Furniture Without Sanding
Believe it or not, there are other methods to creating a distressed piece of furniture that do not include sanding. Did you all just jump for joy? Take a look below at a few different techniques.
Vaseline Method
What You Will Need:
- Vaseline
- Finger, Q-tip or paint brush
- Damp cloth or rag
How to Use the Vaseline Method
The vaseline method is one of the easiest ways to create a distressed look. Prepare your wood furniture for paint by sanding, removing the existing finish if needed and taking off hardware.

Apply a thin layer of Vaseline to any areas where wood naturally ages over time. This would be edges, corners, or places that might see more use. You can use your finger or even a brush to apply.
Then, apply your first coat of paint to your furniture piece. The paint will not adhere as well in the areas where there is Vaseline. Let the paint somewhat dry, but make sure it isn't wet. Then take a damp rag to gently wipe away areas with Vaseline and the paint will wipe away easily leaving an exposed edge.
After the distressing process, I used a glaze on top of the painted finish to seal everything in.
Oil Wax Method
What You Will Need:
- Oil wax
- Chip brush
- Cheese cloth

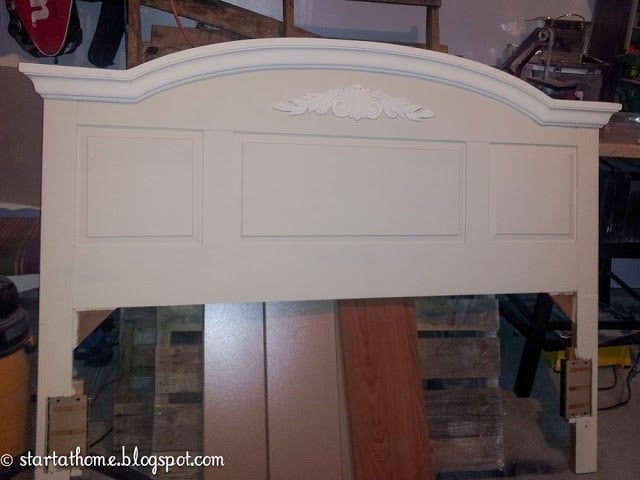
One of my favorite things about using oil wax to antique furniture is that it gives a distressed look while sealing at the same time! It's super to easy to use and timing is not an issue when using it. Oil wax is a great way to achieve a smooth, hard finish that offers lots of protection for your furniture including water-mark resistance. For my latest project on turning a footboard into a bench, I used oil wax to seal everything.

Make sure you have done the prep work on your piece, applied your coats of paint and let it dry.
Paint the Wax on the Furniture
First step, pour a little bit of the liquid oil wax into a cup. I am using a relatively dark wax to see the finish with the green furniture paint.
Start painting the oil wax onto the surface area using a chip brush. Make sure to get all of the crevices and cracks. It will look dirty at first, but won't stay like this.
Wipe Off Wax and Let it Dry
When you are done applying the wax, grab a cheese cloth and wipe off all the wax. Touch up areas with another layer of wax if you need more or less. Let the wax dry overnight, or for approximately 12 hours to seal the milk paint.
If you want your piece to look more distressed, simply leave more of the wax on when wiping. Likewise, if you remove too much then you can add more.
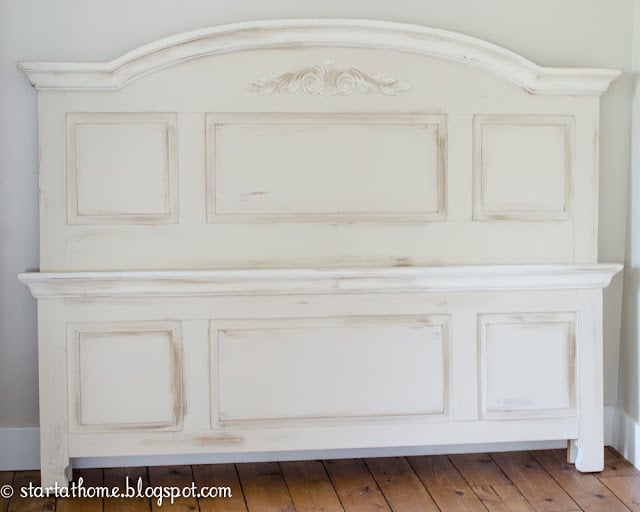
This method creates a beautiful farmhouse style piece for my entry! Video tutorial is included below.
Layered Paint Method
What You Will Need:
- Amy Howard's One Step Paint (I used Linen)
- Milk paint (I used Toscana)
- Antiquing glaze
- Light antique wax
- Dark antique wax
- Paint brush
- Sea sponge

One of the best parts about this aged look is that it looks authentic without using a sander to distress furniture!

Apply Chalk Paint
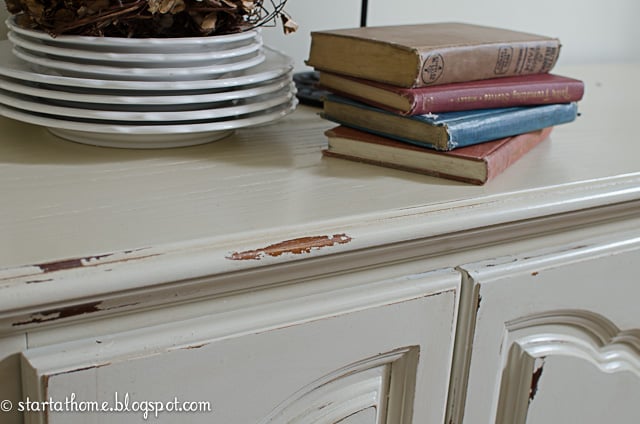
Make sure to prep your piece first. Then, paint your entire piece with the one step chalk paint. This dresser used to be a dark pink. It took a second coat of paint for me to cover all the pink, which is amazing considering it is a white paint.

For each coat I used a pint of paint so 2 pints total.

Apply Milk Paint
The chalk paint will take approximately 30 minutes to an hour to dry. Once the chalk paint is dry it is time to mix up the milk paint. Use equal parts of water and milk paint powder. To get all the powder to blend together, it's a good idea to use a whisk and mix it for at least 2 minutes for the best paint texture.

I applied 2 coats of milk paint to get good coverage. Your milk paint will appear darker on the surface of the piece. But don't worry, when it dries it will look much better.

Use Antiquing Glaze
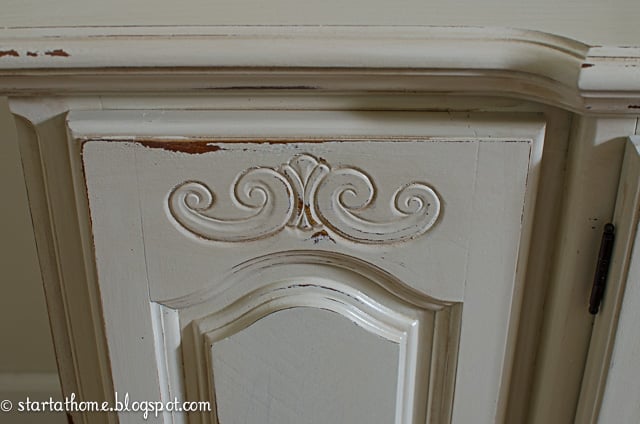
Now it is time to distress! For best results, put a small amount of antiquing glaze onto your sea sponge and lightly rub where you want to distress. Think of places a piece would naturally show distress, like the corners or anywhere a piece will be touched a lot.

As you lightly rub your piece of furniture, the antiquing glaze will pull the milk paint off showing the chalk paint underneath, creating these beautiful distressed areas.

If you take too much milk paint off in an area, wait for the antiquing glaze to dry and then you can paint with the milk paint again. After the antiquing glaze is dry, use a 220 fine grit sand paper to lightly go over everything to smooth it all out. You are not sanding to distress, but only sanding so it is smooth to the touch.

Add Light Antiquing Wax
Now it is time to add light antiquing wax. This wax is seals the piece. Do NOT do this until you are happy with your piece. Milk paint will not paint over wax.

Load your brush up with wax and then press it into the paint. As you add your wax it will slightly darken your piece and really bring out all the details. After you have waxed your entire piece let it dry for about an hour and then buff it to a shine.

Final Step - Dark Antiquing Wax
Last but not least, add dark wax as the last step. I like to add my wax to the corners, or anywhere a piece would naturally distress. Dark wax can go on a little heavy so use it sparingly. Use a chip brush and lightly load up the bristles and then rub it over the corners. If you get too much in a specific spot you can put a little bit of light wax on a rag and rub it off. Once it is dry buff it to a shine and your piece is done!


How to Distress Furniture With Sandpaper
Out of all the different distressing techniques, distressing with a sander is generally considered to be the easiest.
What You Will Need:
- Fine grit sandpaper around 220
- Cloth
- Final top coat
Paint Your Piece
Take your chose piece and make sure it is completely painted. I used chalk paint for this piece because sanding is a big perk with this type of paint. Sanding down latex paint can sometimes cause paint to ball up. But chalk paint sands off with the consistency of chalk, creating a nice and smooth surface.
Sand Your Piece
Take your piece of sandpaper or sand block and start sanding away. It's a great idea to start in small sections. When sanding to antique, think where you would get more wear naturally. Start lightly and then if needed, you can sand heavier for more visible wood.


Apply Dark Wax or a Glaze
Clean off your piece with a rag and make sure all dust particles are gone. You can then add a finishing coat. I like to use a glaze over the top because the glaze will soak into the wood where you have distressed it and make it darker.
With this piece I used a dark wax over the areas I sanded. The wax will help to protect the paint. You can also paint soft wax on everywhere and let it dry. After it has dried, buff it with a rag. Wipe it down with Pledge for added protection and shine.
Interested in more antique wood? Check out these posts.
Looking to create your own vintage-style furniture without spending a fortune? Try out one of these methods to help distress furniture. The process is easy and can be customized for your style.
Happy DIYing!
Brooke


Alysha says
Hi, Brooke. That's brilliant! It's good to know that there's an alternative to distressing a furniture aside from using a sander. Hmm, it seems like this process is easier... Is it? 🙂