
Easy tips to complete a modern look DIY bathroom on a budget.
Are you tired of looking at the same outdated bathroom every day? Do you dream of a luxurious and modern space, but are overwhelmed by the cost and time of a professional remodel? Well, you're not alone. Bathroom remodeling is the most common home renovation project. However, it's also considered the most expensive and time-consuming.
You can achieve a stunning bathroom makeover on your own. In this article, I'll provide you with the tools and tips I used to complete our bathrooms into stylish and functional spaces. Let's get started!
DIY Bathroom Remodel
When building our new home, we planned to do several areas ourselves to save on labor costs and other things. Though we could have used a general contractor, I knew I could save more money doing most of the finish work myself.
A DIY bathroom remodel or completion on a budget can be done in any bathroom, no matter the size. Check out my tips below for a timeless bathroom that will last for years to come.
Pick Timeless Hard Surfaces
The first thing to remember is to pick neutral and hard finishes that are also timeless. Hard finishes are much harder and more costly to change out, especially a bathroom floor. I did opt to have someone else do the new tile for this space, because it is larger and saved me time.
Floor Tile
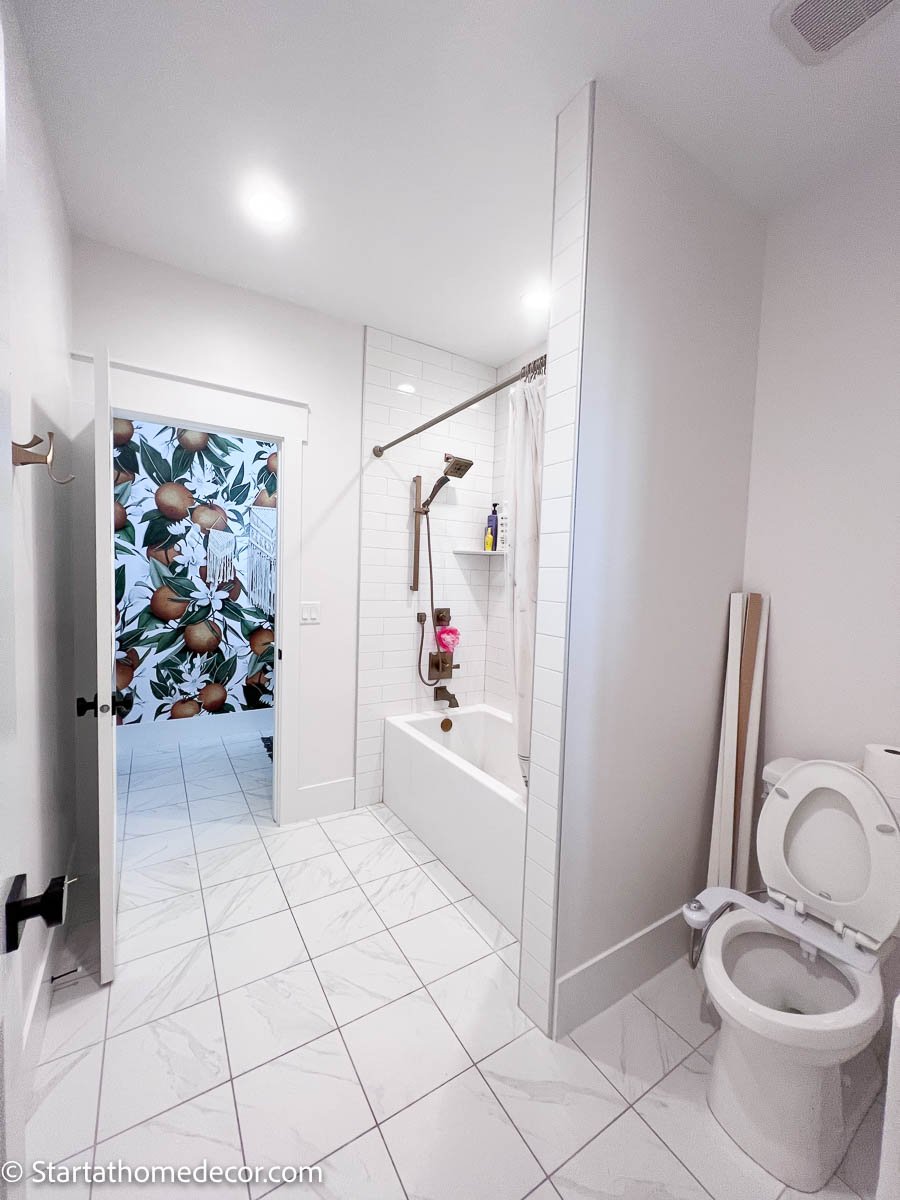
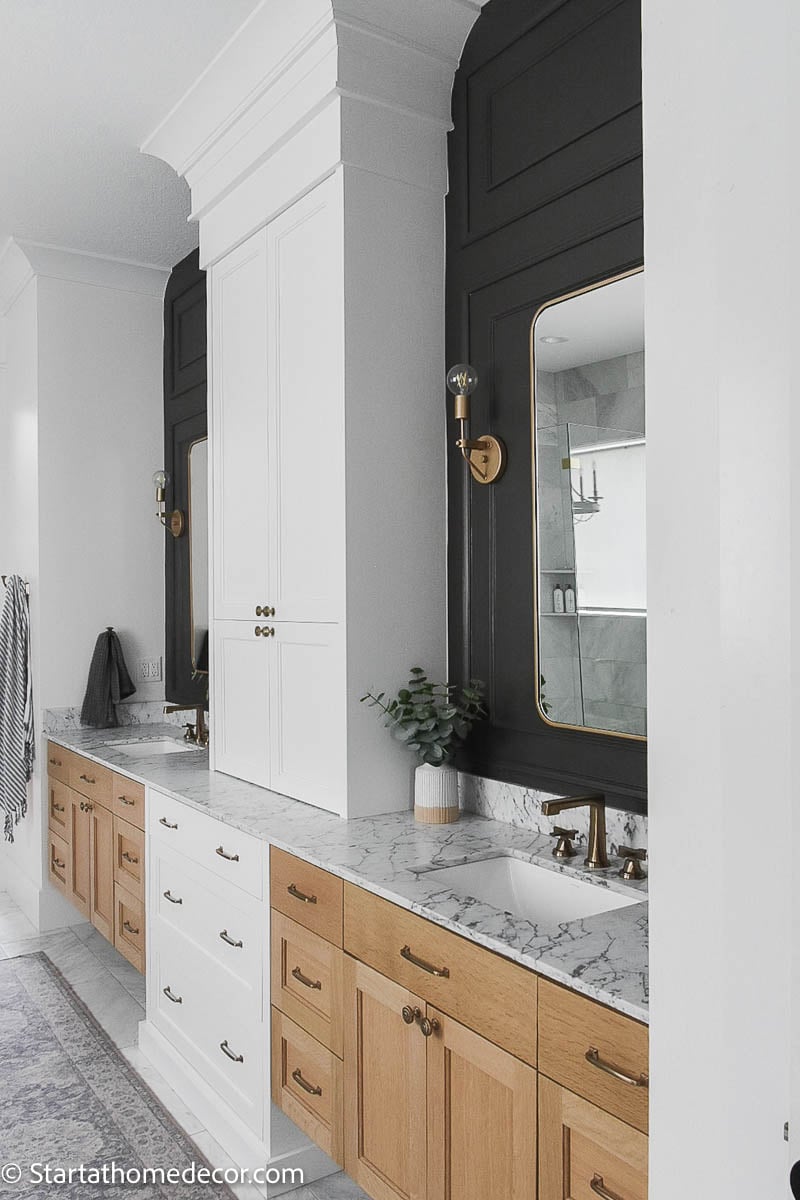
My daughter's bathroom tile on the floor is a ceramic tile that looks like marble. Ceramic tiles are the most durable for a bathroom floor and the average cost is very affordable. The ceramic tile is white with subtle gray and brown throughout. This makes it easy to change out decor and even adjusting the wall color.
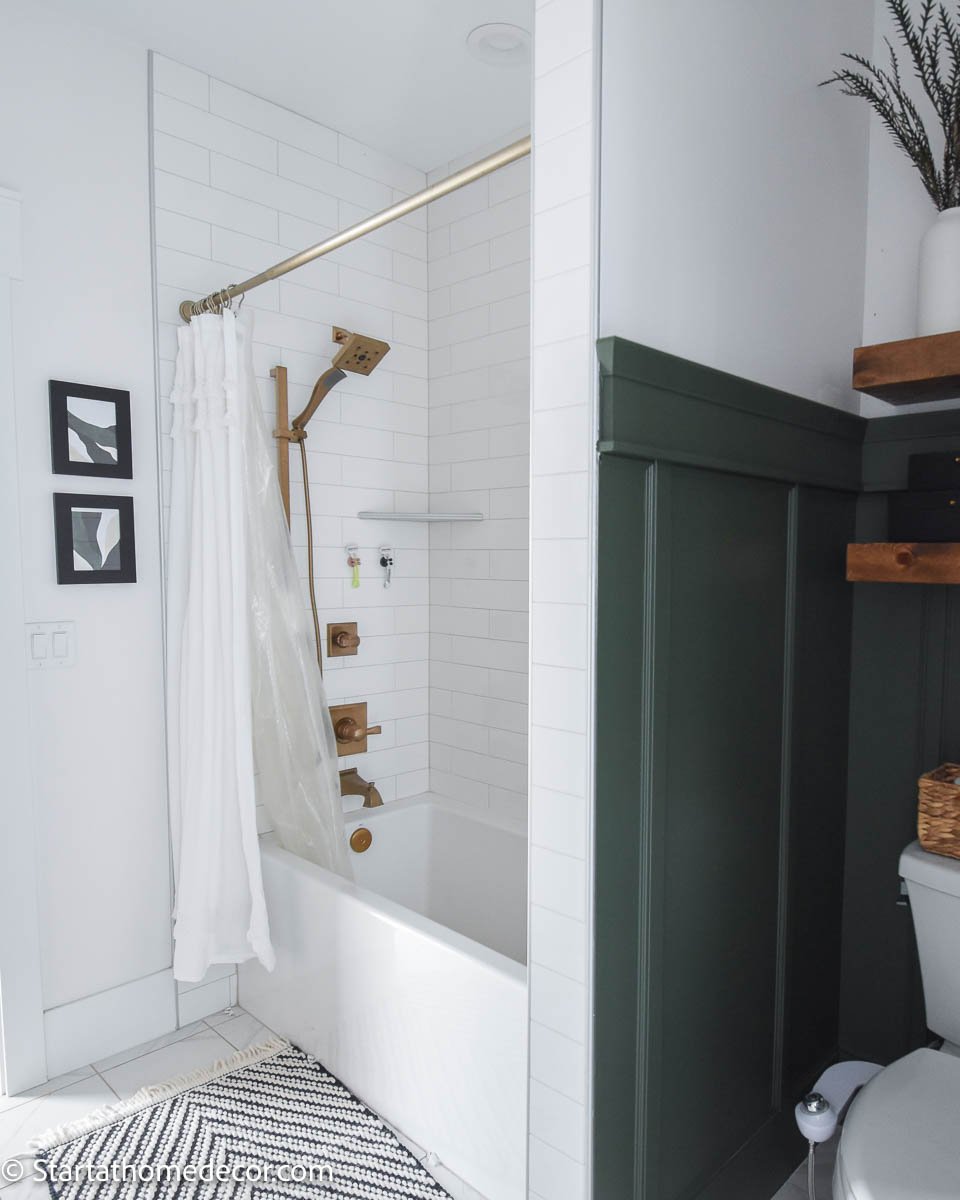
Shower Walls and Surrounding Area
For the shower wall tile it's a good idea to go with another neutral like standard white subway tiles. To add a fun design element I found new subway tile that is longer than average. This worked perfectly with the new bath and tub surround.
To add some elegance to the space I added a gold shower head and fixtures.
Find Inspiration for Bathroom DIY
A great way to start a DIY bathroom renovation, or any renovation for that matter, is to first find inspiration. For this bathroom, we used my daughters adjoining bathroom vanity rooms as the inspiration.
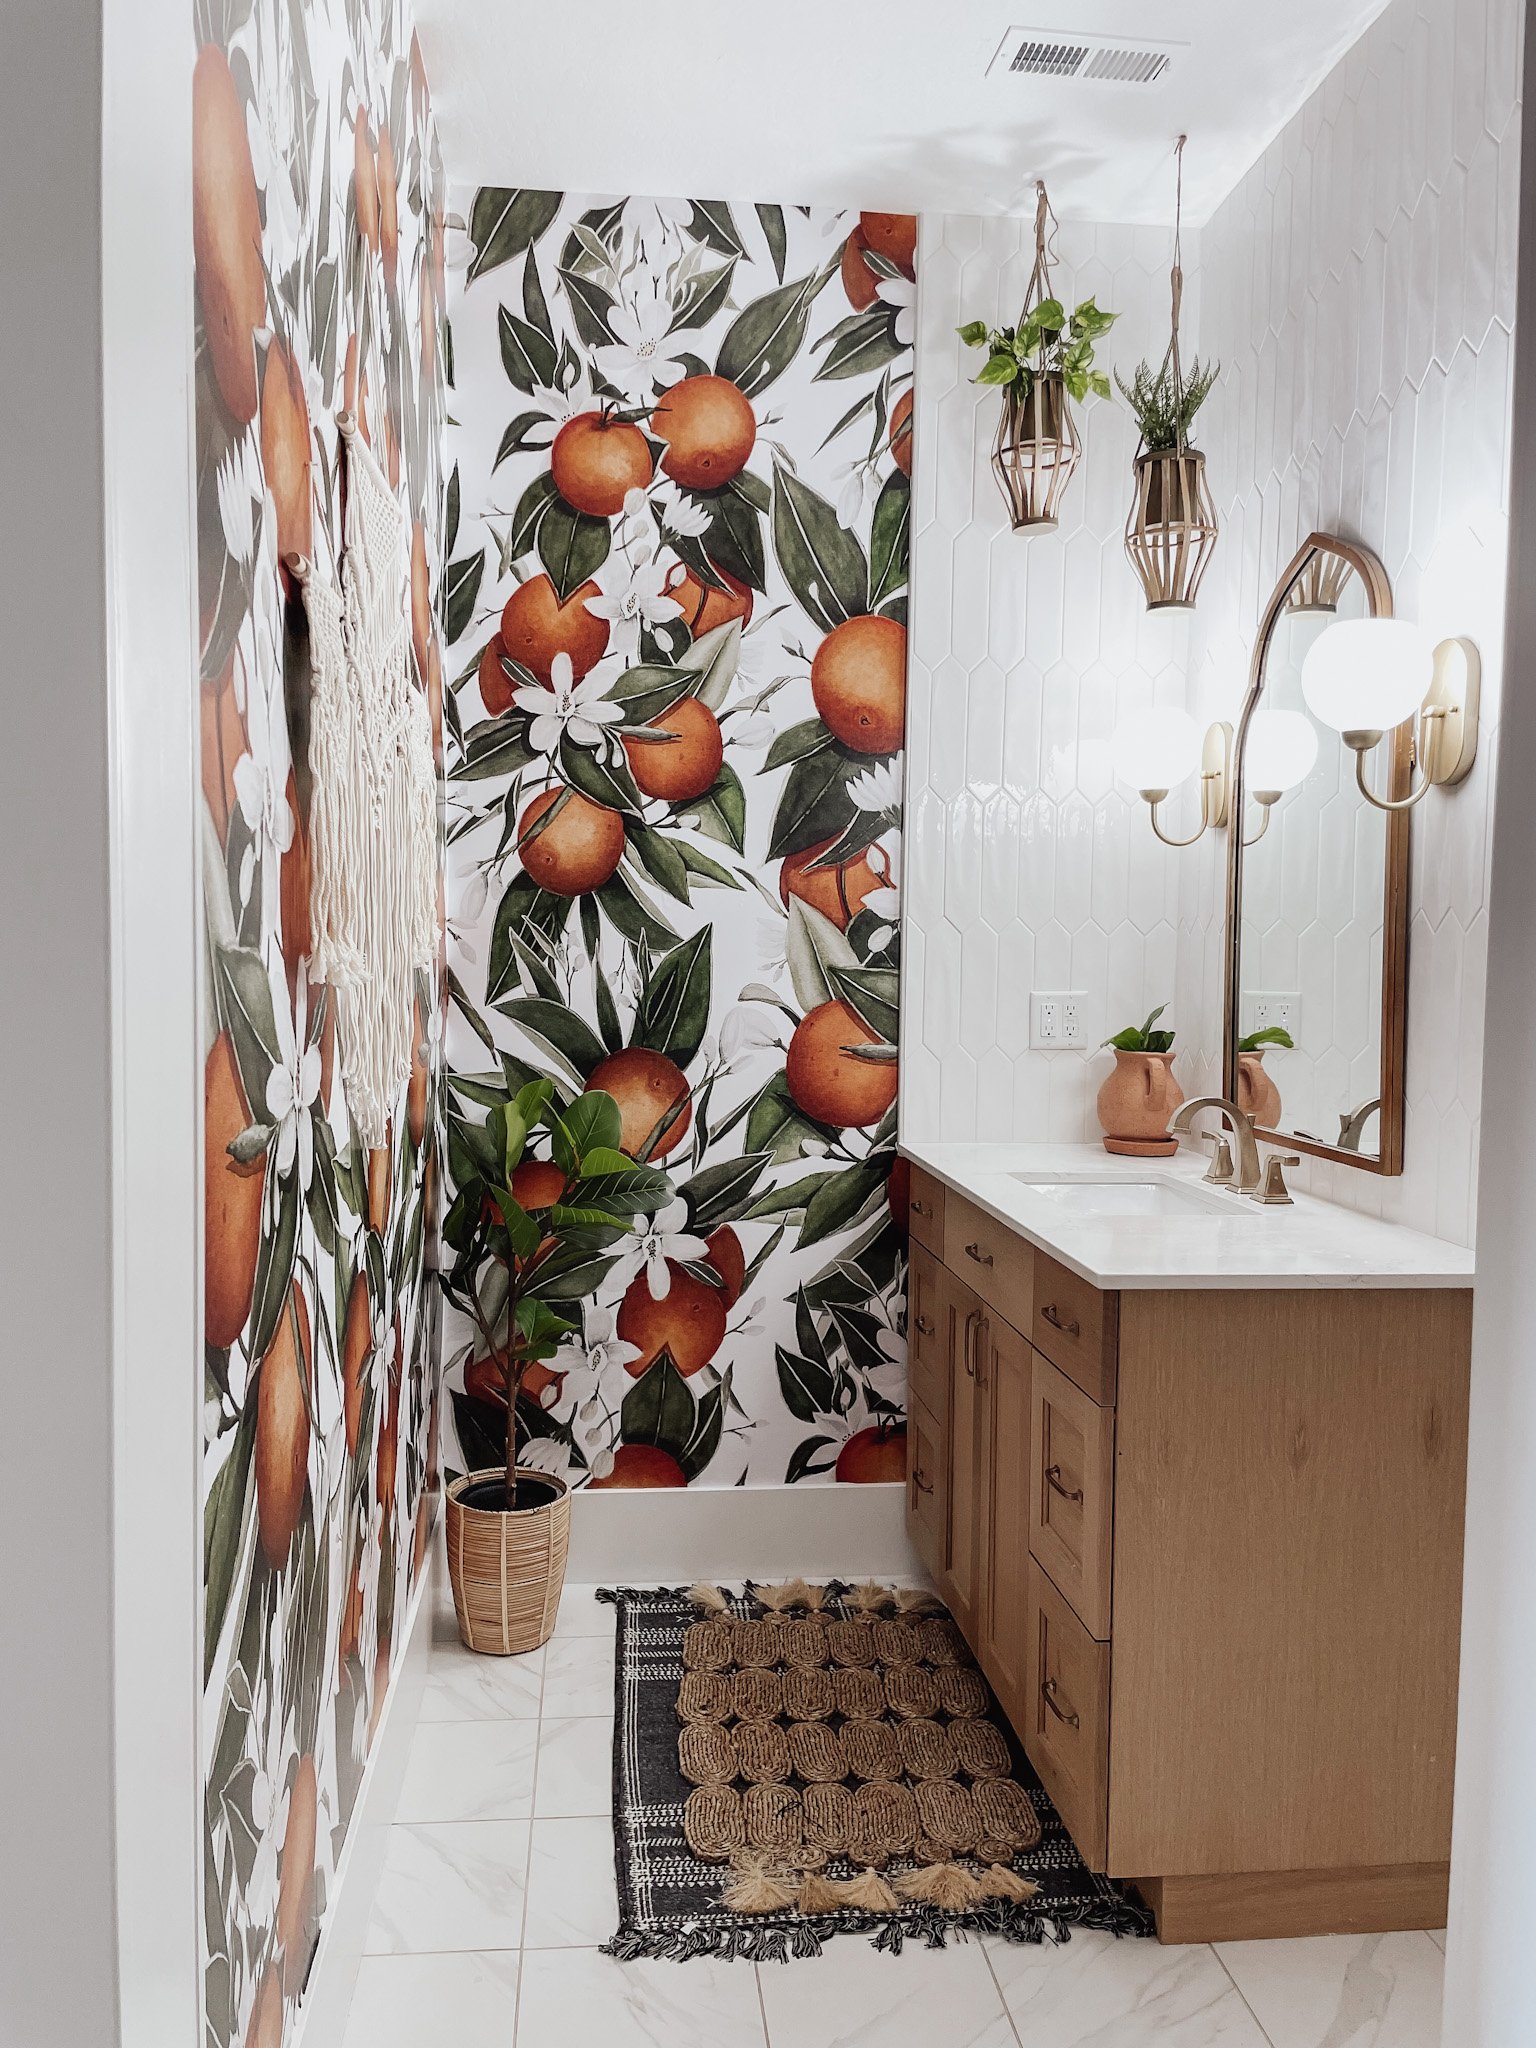
My oldest daughter's vanity area is a Boho style with citrus peel and stick wallpaper (all details here) with gorgeous new fixtures that have a mid-century vibe.
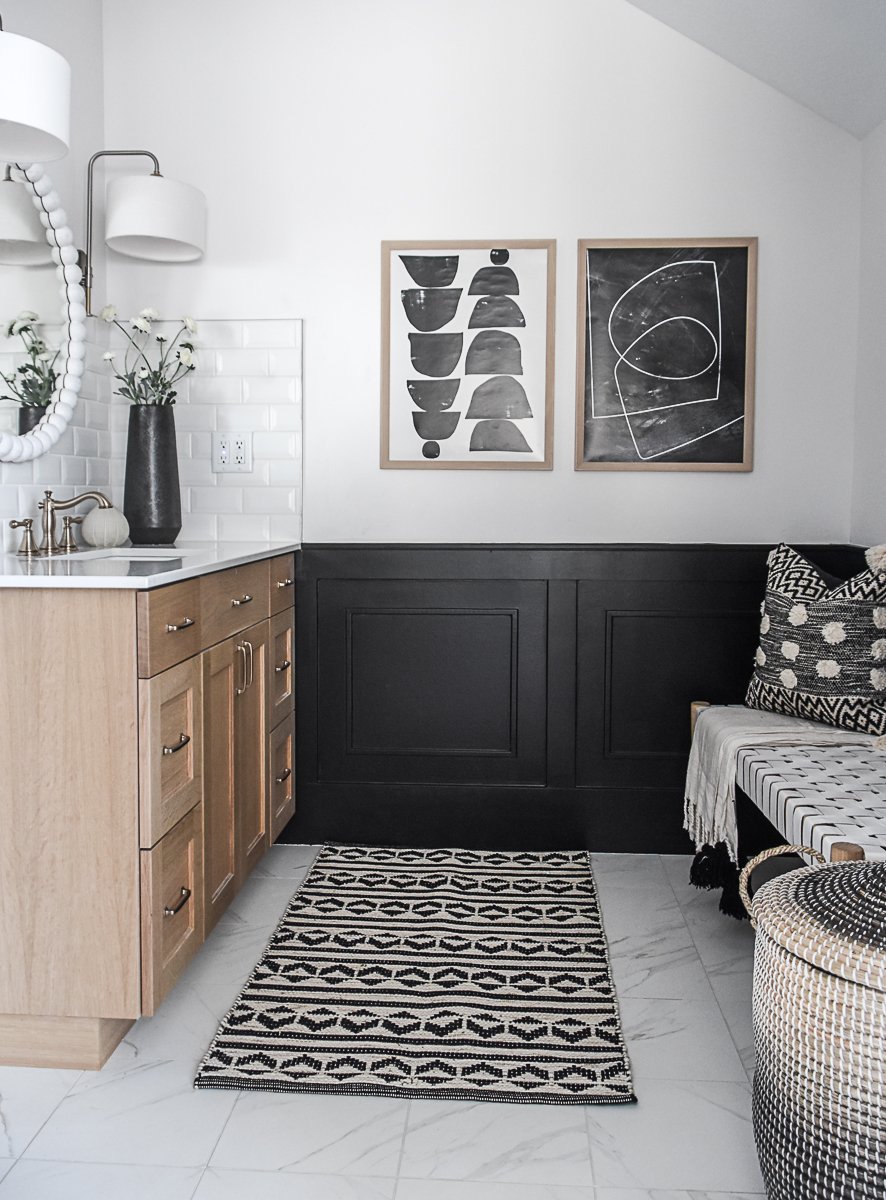
My other daughter's vanity area is a strong black and white theme (details here) with a beveled backsplash and black wainscoting. I did each DIY project myself.
The goal is to merge these two spaces together for easy flow.
Use Supplies You Have First
When you have your desired design, the first step is to go through all my existing material to use what I have. This is a great option to save a lot of money. Here is my complete list, most items I already had from other projects.
- Molding for batts - I had some left over molding in the garage I ripped down
- Top board - I had left over header from our home build
- Small molding - Home Depot
- Miter shears - great deal on Amazon
- 2x2 - Home Depot
- 2 ½ inch screws
- 8'x10' common board - floating shelves
- Providential Minwax stain
- Wood glue
- Brad nails 1 ½" long
- Brad nail gun
- Pin nailer
- Pins - 1" long
- Caulk
- Spackle
- Blue tape
- Painter's paper
- Painter plastic
- Graco paint sprayer
- Paint - Backwoods by Benjamin Moore
- Drill
- Chop saw
You can watch this DIY bathroom remodel here.
DIY Wainscoting
A great way to merge these two spaces together is by adding wainscoting on the bathroom walls. Whether your bathroom is a small space or a large one, wainscoting accents are always a great choice for finishing touches.
I started with the back wall between the doors. To determine the spacing of my batts I measured the entire wall and then divided it until I got an even number.
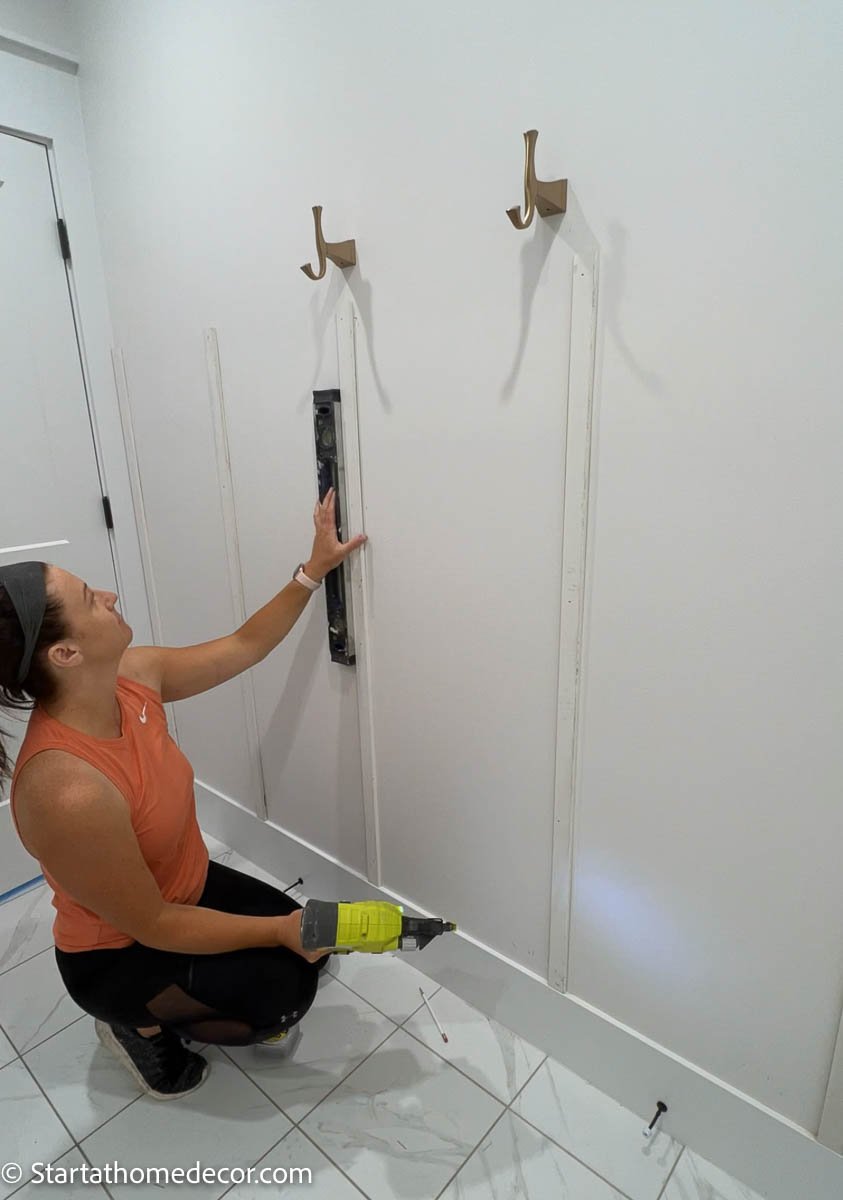
Measurements: My wall is 97" long so I have 5 batts that are spaced 17 ¾" apart with 1 ½" batts in-between. I will use this same spacing around the toilet so it flows.
The first step is to add your batts. I start by placing them on top of my baseboard and then spacing them accordingly down the wall.
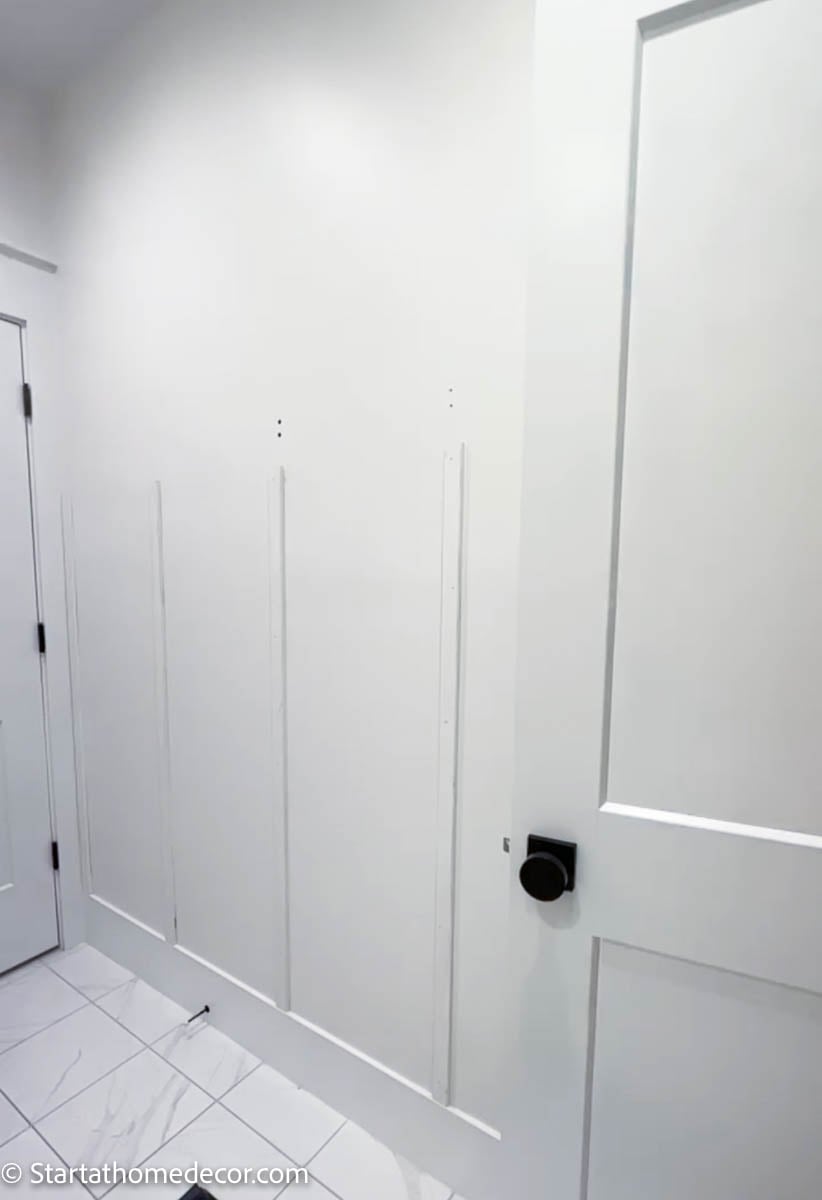
To attach the batts, I used 1 ½" inch brad nails and my brad nailer. You can use glue as well. However, nails provide a fairly secure hold to the wall.
Textured Wall Tip
My walls are smooth, so I just place my moldings straight on the wall. If you do not have smooth walls I would recommend buying 8'x4' boards of ¼" thick hard board to place on the back of the wall.
To do this, first carefully pull off your baseboards. Rip the hardboard down to the height of your wainscoting and then nail and glue it to the wall.
Next step, add your base molding back on. If you have to use more than one sheet of hard board, you will have seam where they come together. Make sure to plan your spacing correctly so the batts cover that up.
Adding the Top Board
Once the batts are on, add the top board. I used door header for my top board. It is all one piece of molding so it is easy to install.

A cheaper option would be to install a straight top piece. Make sure your top board is at least 6" wide for the best look. I find the wider the better it looks.
You can stop at this point for board and batten wainscoting. It will still make a huge difference in your interior design and it is a great option for a tight budget.
Add Small Decorative Molding
I wanted my wainscoting to be a little more ornate in this space to add a little bit of elegance. I ran over to Home Depot and picked up this small molding to run on the inside of the batts. Doing this added a little extra money to the total cost but the outcome was worth it.

Miter shears are the best option to cut the small molding. This made the process so much faster. The miter shears make a cleaner cut then the power tools miter saw.
I cut the molding at 45 degree angles and ran it on the inside of the rectangles. I used my pin nailer to attach the molding to the wall. If you don't have a pin nailer a brad nailer will work. Just make sure to shoot the nail in the thicker spots so you don't split the wood.
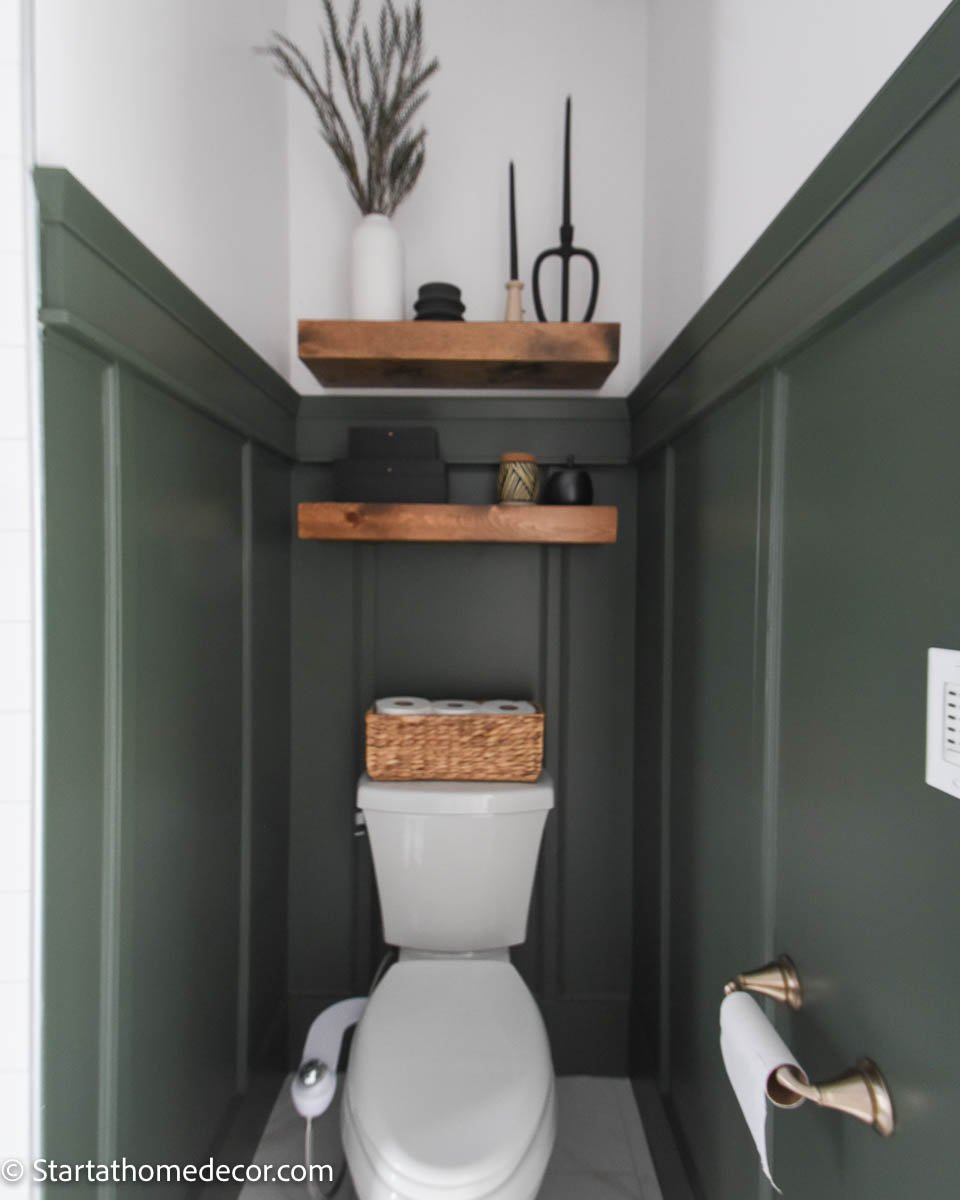
Add Floating Shelves to DIY Bathroom Remodel
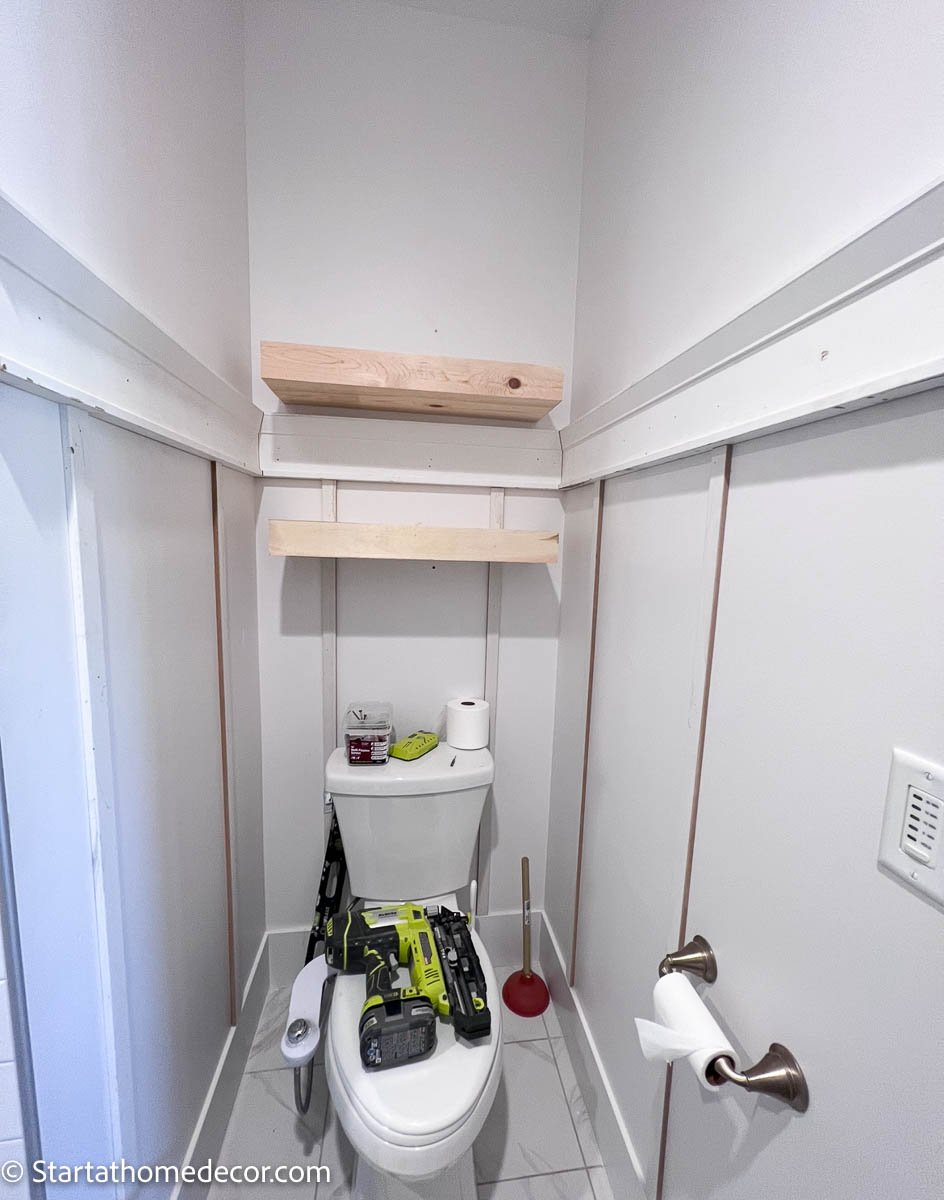
Before I started on the the wainscoting around the the toilet I built floating shelves. This is an affordable way to add style and storage on your wall space. I wanted the floating shelves installed first so I could run my molding up to the shelves for a cleaner look. I used 2x2s to create the support for the shelves.
The supports measure 23 ½" long by 6" wide.

First, find the studs on the wall. The supports for these shelves need to be really strong. I used 2- 2 ½" screws into each shelf to attach the support to the wall as well as glue.
Make the Shelves
I want the shelves to look like a big chunk of wood. To get this look I cut ALL the edges at a 45 degree angle. My shelves measure 26" long x 7 ½" wide.
I then used brad nails and wood glue to glue everything together. To stain the shelves I used Providential by Minwax.

I sealed them with a clear lacquer. I have found this to be the cheapest way to add floating shelves.
When the shelves are in place, I finished adding the wainscoting around the toilet.
Caulk and Wood Fill
The DIY bathroom remodel is well on its way to becoming a whole new bathroom space. With the wainscoting up, it is time to caulk and add wood filler. Do not skip this part. This is what takes a good finish to an amazing finish.
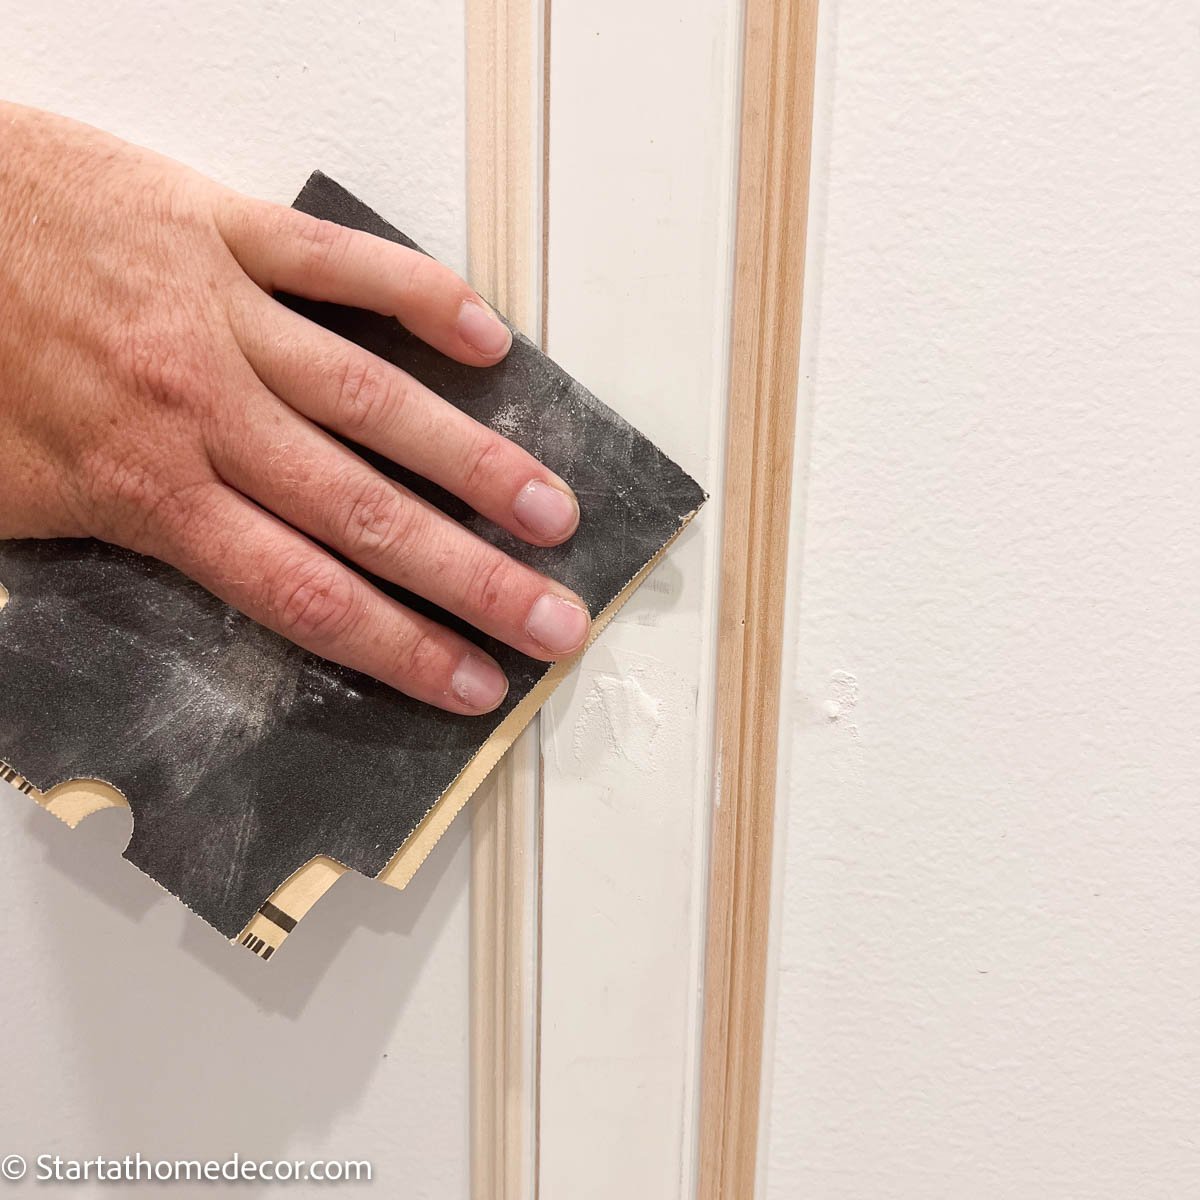
Wood Filler
I used Crawford's spackle and a putty knife to fill the nail holes. Once it is dry, sand all of the extra spackle off.
Caulking
While the wood fill dries, caulk the seams. To do this, run a small bead of caulk along the crack. Then, use your finger and a damp cloth to smooth the caulk out and remove any extra.
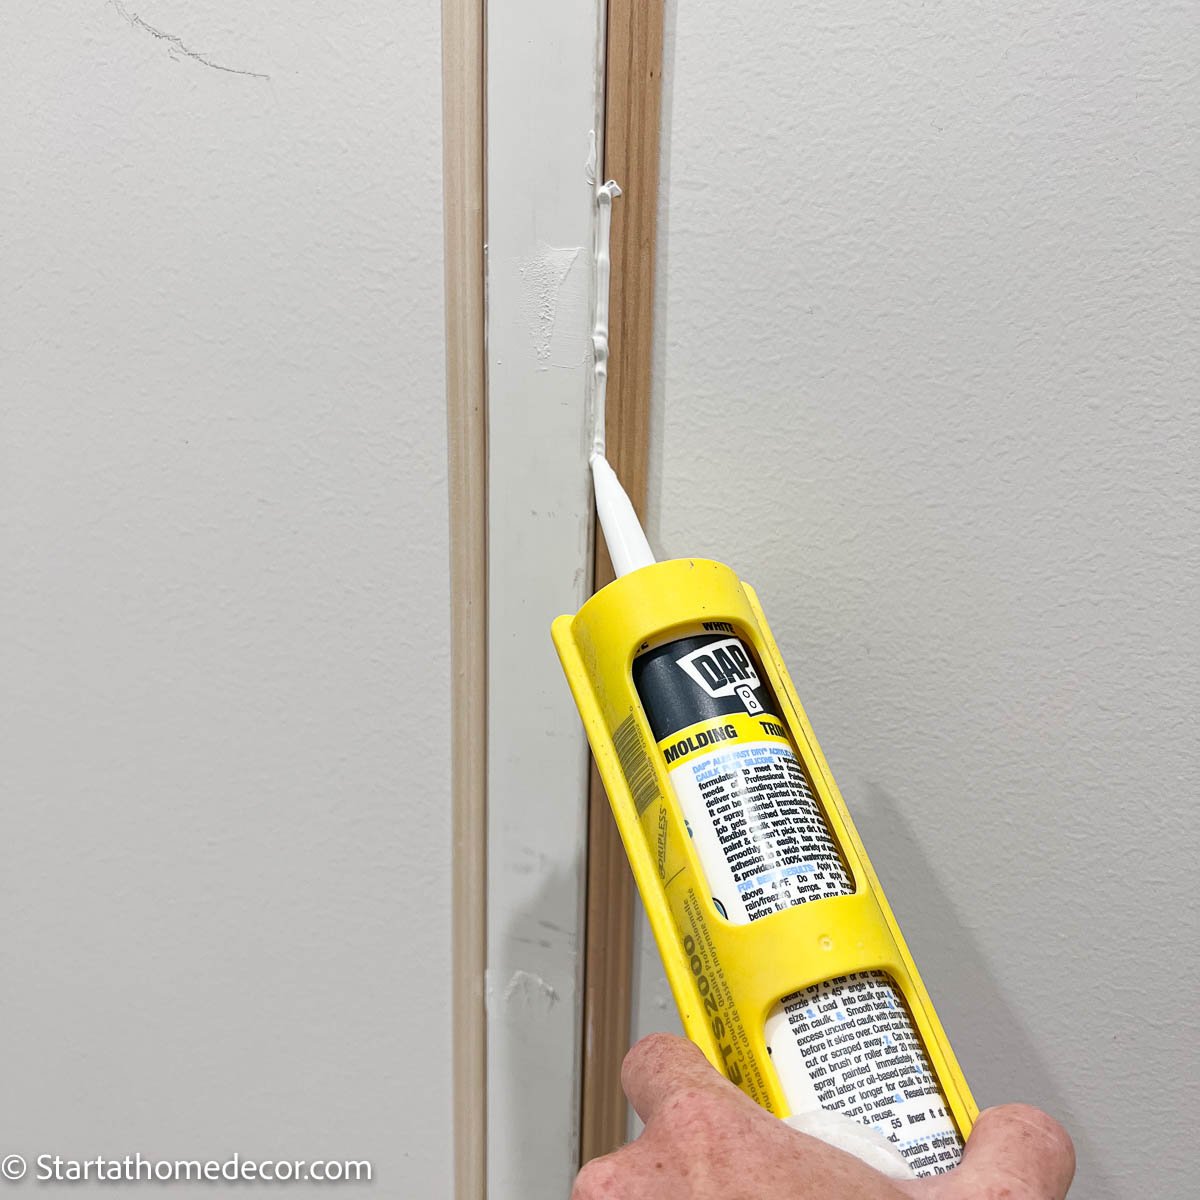
Tip: cut your caulk tube at a 45 degree angle. Apply a bead of caulk at the edges, then use a damp rag to smooth the caulk out and remove the excess.

Paint Your Space
One of the biggest impacts you can make with DIY bathroom makeovers is with paint. To prep for paint, the first thing I do is vacuum the floors and moldings to remove any dust. I then ran painter's tape all along the floor.
Next, roll paper out for the floor and tape it to the tape already applied. I know this sounds like overkill. But when you are spraying the air can lift the paper up. I have found you get a tighter seal to stick tape on tape.
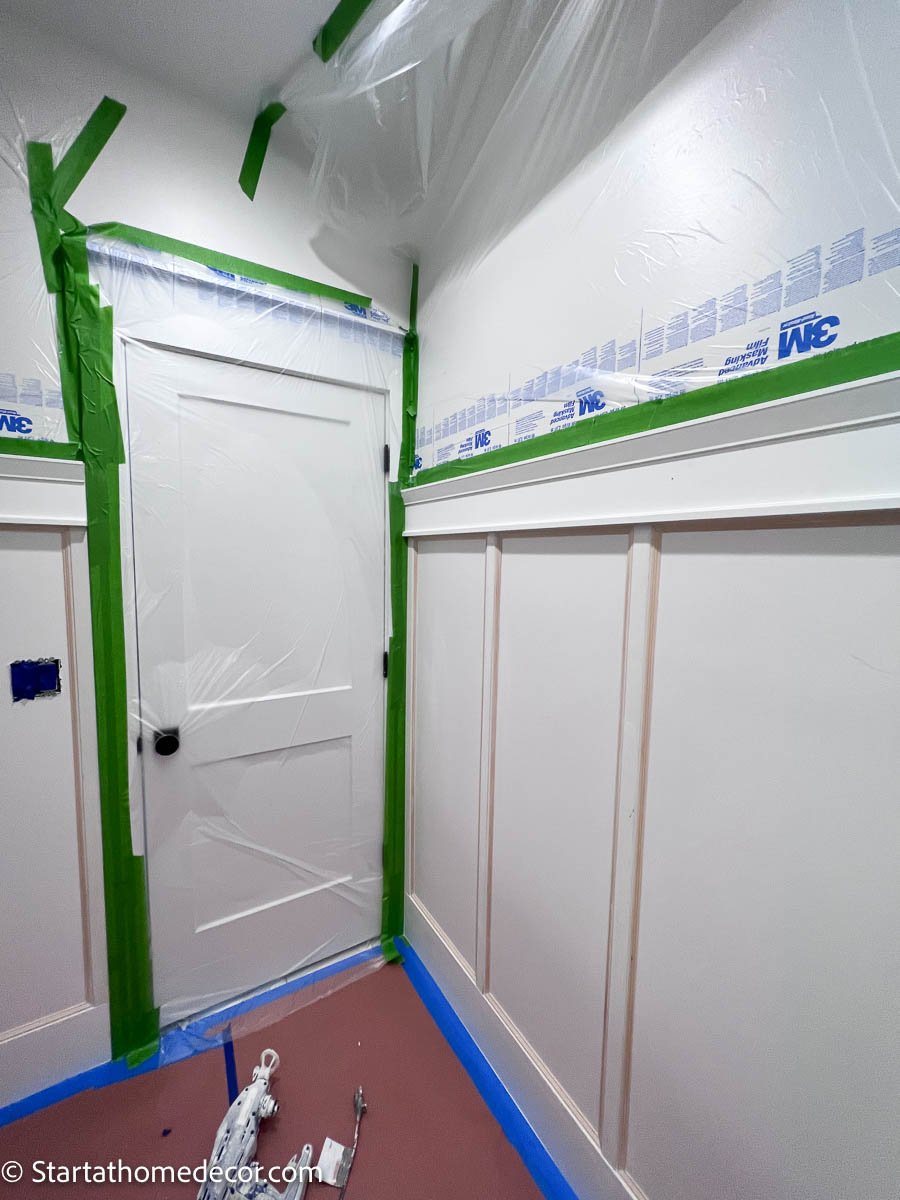
I also ran tape along the top of the molding and then added plastic all the way to the ceiling. If there is one thing I have learned it is that anything that is not covered will have paint on it. So make sure everything is covered including doors, toilet, shower etc.
To paint, I am using my Graco paint sprayer. This paint sprayer is my favorite. It puts out enough paint to get a good smooth finish. Keep in mind it does put out a lot of paint, so move quickly and evenly.
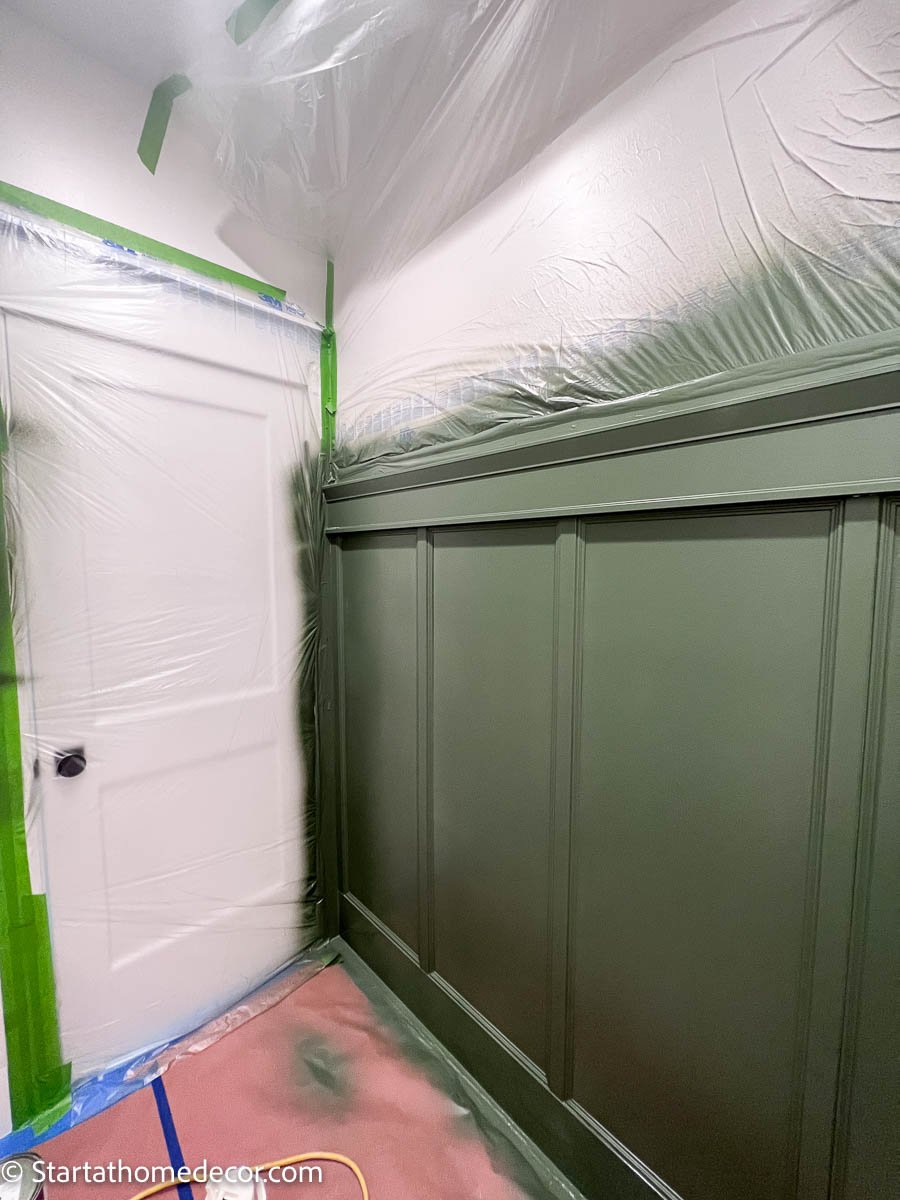
I applied two coats of Backwoods by Benjamin Moore. A fresh coat of paint makes a huge difference giving a space a fresh look.
Tip: If this is your first time spraying, do a test run on a scrap piece of wood.
Bathroom Décor
To help merge these two spaces, I also used decor to pull in the color scheme and tie everything together.
- Canvas - I pulled black in with this canvas print
- Boxes - These black boxes over the toilet are perfect for storage space, especially feminine supplies.
- Toilet paper basket - This is a great way to store toilet paper and add texture
- Vases - I used different size and shape vases
- Candlesticks - these are a go to when I need to fill a tall area
- Shower curtains - I stayed with a white shower curtain as to not make the space too dark
- Picture frames - A creative idea is to buy cheap $5 frame and printable to create inexpensive art

This DIY bathroom remodel turned out so great!
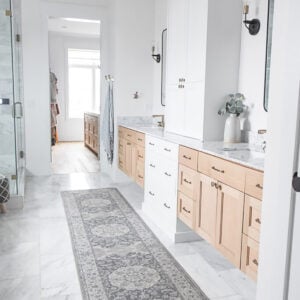
Check out my Master bathroom renovation on a budget here.
A bathroom makeover doesn't have to be hard and super costly. Choose finishes that can go with multiple spaces and add simple accents that make a big impact.
Happy DIYing!
Brooke
Access Doors and Panels says
Thank you for sharing this budget-friendly home renovation DIY. I am amazed by your ideas. Looking forward to more of your posts!