
Learn how to safely demo a bathroom before you begin your home remodel.
Thinking about remodeling your bathroom but don't know how to get started? Breathing new life into an old bathroom may seem like a daunting task, but it doesn't have to be. With a few easy steps, you can learn to do a DIY bathroom demolition all on your own. Let me teach you all the know-how for a successful and safe home renovation project.

How to Demo a Bathroom: FAQ
The first step in a bathroom remodel is demolition work. There is nothing more appealing than ripping an existing bathroom to shreds. But really, who out there doesn't love demo day where you can use a pry bar to destroy stuff? If you ever need a little therapeutic exercise, I highly recommend it.
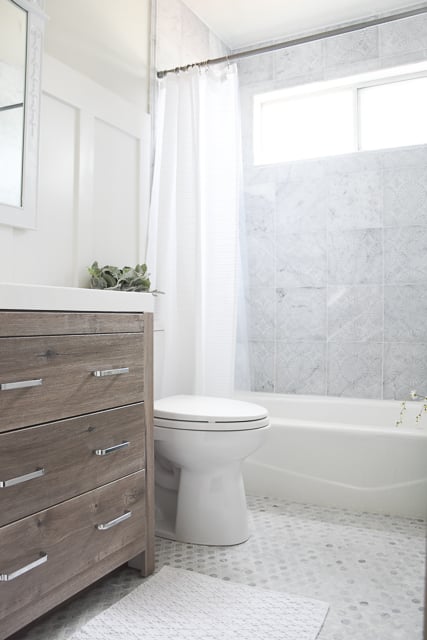
Luckily, the upstairs small bathroom in our farmhouse style home was due for an overhaul with all of its dated fixtures. This DIY bath remodel took about 6 weeks to complete from demo to finish. Let's take a look at some of the most frequently asked questions when it comes to a bathroom demolition project.

Bathroom Demolition FAQ
How Much Does It Cost To Demo a Bathroom?
Bathroom demolition costs can fluctuate significantly, influenced by various factors. For those opting to hire a professional, the range typically falls between $500 and $3,000. This variation is shaped by factors such as bathroom size, location, and the extent of demolition needed.
Alternatively, choosing to handle the demolition yourself, as I did with my husband, can drastically reduce costs. Since we already owned the necessary tools, our expenses were minimal, practically negligible.
What Do I Need for a DIY Demolition Project?
- Razor blade or utility knife - to run along the silicone lines
- Drill
- Hammer or sledge hammer
- Crowbar - or anything flat you can get under the tile
- Broom for clean up
- Bucket to catch water and for clean up
- Towel to clean up water
- Shop vac
- Safety glasses for eye protection
- Knee pads
- Mr. Muscles for some heavy lifting - my husband makes the process go much faster!

How Long Does it Take to Demo a Bathroom?
Bathroom demolition duration can vary depending on factors like the bathroom size, complexity of the project, and the efficiency of the individuals involved. In our case, it took approximately 5 hours to complete the demolition process for this particular bathroom.
It is wise to plan at least a full day for a small bathroom, especially with clean up and tile removal. Always allow for more time than you originally plan. And remember, everything goes faster when you have more than one person helping.

How to Demo a Bathroom Step-by Step
Beginning with a good foundation is key to any remodel. You might think that you can just lay floor tile or shower tile right on top of the subfloor or drywall. Not so! If you want something that will last and be good quality, take the time to do it right and give yourself a good foundation to begin your DIY bathroom renovation.
Also, be sure to take proper safety precautions and wear protective eye gear and gloves as needed.
1. Clear Out the Bathroom
First thing, begin by clearing all of your items out of the bathroom. Take everything out of the bathroom that you can. This includes removing any items off of the walls like towel racks and hooks. And don't forget to clean out your medicine cabinet or open shelving before removing.
2. Shut Off Water
It's important to shut off your water supply. Turn off your valves under the sink and disconnect them from the water faucet so you don't have excess liquid dumping from your water lines.
3. Remove Vanity and Toilet
The next step is to remove the old bathroom vanity. It's a good idea to have a second person for this job if your vanity is quite large or heavy.
Then it is time to get rid of the toilet. Be sure to remove all of the water from the toilet tank. You can do this by scooping out water with a cup or something similar, then use a towel to soak up the rest. You will also need to take out the bolts on either side of the toilet base. Pull up to remove it. Toilets are super heavy so you may need help in carrying it out of the bathroom, especially if you plan to reuse it.
4. Take Out Baseboards and Flooring
To pave the way for new flooring, remove all of the baseboards. This will make it easier to remove the outdated tile, linoleum or whichever type of flooring is in your bathroom. Tile demolition can be a lengthy process depending on how well the previous tile was installed.
We had to spend a long time removing the flooring because it was attached to the subfloor. We also discovered a second subfloor underneath that had to be taken out as well because of water damage. You never know what you will find underneath.

A note about water damage:
Always be prepared for the unexpected when doing a demo project! I have yet to pull apart a bathroom that doesn't have some sort of water damage. If you find this in your bathroom, don't be too alarmed. First, you need to check a few things:
- Is the area still wet? If so, then water is still leaking from somewhere. Find the leak and stop it.
- If the area is not wet - how strong is the plywood? If your plywood is at all squishy, replace it.
- Is the area hard? If so, spray it with bleach and let it dry all the way out for a few days. Once it is dry you can continue with your bathroom updates.
5. Remove Shower Fixtures
Take out your shower fixtures, including shower head and shower walls. This includes removing the shower surround or tile on bathroom walls. Be careful as you do this. Shower surrounds are heavy and can fall and damage your bathtub. We are keeping our bathtub so we took extra care with this step.
If you are planning on reusing any fixtures, be careful to remove them and place them where you can keep track of all the parts.
We ended up also removing the old sheet rock because of the water damage and because it still had liquid nails attached to it.

6. Clean Up
The last thing to do when you demo a bathroom is clean up. Of course, it is wise to remove debris as you go if it is in your way or the area is complete. But you'll definitely want to do a final clean up.
Sweep big chunks of material using a broom and dust pan. A great way to remove the fine dust and smaller particles is by using a shop vac. It helps to clean as you go so your work area is more functional and you don't end up tracking stuff around your house.
Getting Ready for Tile Floor: Foundation
After you have done all of your hard work and demolition, now is a good opportunity for prep work foundation.
When you are installing new tile, whether that is wall tile or floor tile, it is important you have a flat and level surface or you can run into problems with installation. So to be safe, we installed new mold and mildew resistant sheetrock on the walls.

On the floor we installed ¼" thick cement board. Cement backboard creates a very smooth surface and is great stability for tile. Do not lay tile directly onto subfloor. You will want your floor as level as possible to make it easier for tile installation. Also, don't forget to cut out areas for your plumbing fixtures.


Bathroom Demo
And there you have all you need to demo a bathroom and prepare for the overall appearance of your new space. Remodeling an entire bathroom is easiest when you begin with a good foundation. And a good bathroom demo is a huge part of that success.
You can see how the bathroom was finished here.
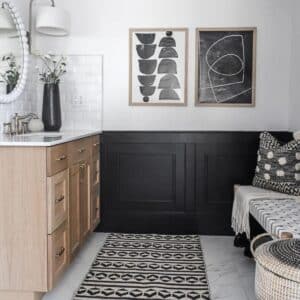
Take a look at more bathroom renovation inspiration here with our half bathroom makeover.

Or this gorgeous farmhouse master bathroom remodel here.

Check out some of my favorite bathroom gadgets below

Happy Demo-ing!
Brooke

Choice Furniture Superstore says
This is great. Thanks for sharing this amazing post.
Vritika| Villas in OMR says
Wonderful transformation and I love it!